Contamination Control in Cell Therapy Manufacturing: A 2025 Strategic Guide for Risk Reduction and Quality Assurance
This article provides a comprehensive guide for researchers, scientists, and drug development professionals on establishing a robust contamination control strategy (CCS) for cell therapy manufacturing.
Contamination Control in Cell Therapy Manufacturing: A 2025 Strategic Guide for Risk Reduction and Quality Assurance
Abstract
This article provides a comprehensive guide for researchers, scientists, and drug development professionals on establishing a robust contamination control strategy (CCS) for cell therapy manufacturing. Covering foundational principles to advanced applications, it details the primary contamination risks from human operators, raw materials, and processes. It explores methodological solutions including closed systems, single-use technologies, and automated decontamination. The content also addresses troubleshooting common pitfalls, optimizing processes for scalability, and validation strategies aligned with the latest 2025 regulatory expectations from Annex 1 and Ph. Eur. updates. The goal is to equip professionals with the knowledge to ensure product safety, minimize manufacturing failures, and accelerate the delivery of transformative therapies to patients.
Understanding Contamination Vectors: A Risk-Based Foundation for Cell Therapy
In the field of cell therapy, contamination control is not merely a regulatory requirement—it is a fundamental determinant of patient safety and product efficacy. This is especially critical given that cell therapies are often administered to severely ill patients as a last resort. Autologous therapies (derived from a patient's own cells) and allogeneic therapies (derived from a donor's cells) present unique contamination challenges throughout their complex manufacturing processes. A single contamination event can lead to catastrophic consequences, including product loss, delayed treatment for patients with rapidly progressing diseases, and serious health risks. This technical support center provides a comprehensive guide to identifying, troubleshooting, and preventing contamination in cell therapy manufacturing.
FAQs: Understanding Contamination Risks
1. What are the most common types of contamination in cell therapy manufacturing?
Cell therapy products are susceptible to a wide range of biological and chemical contaminants. The most common biological contaminants include:
- Bacteria and Fungi: These can be introduced through operators, non-sterile materials, or during open process steps. Bacterial contamination often causes sudden pH drops and culture turbidity, while fungal contamination (yeast and molds) may not alter pH initially but will become turbid in advanced stages [1].
- Mycoplasma: This is a particularly serious concern as these microorganisms are difficult to detect without specialized methods like PCR and can persist in cultures without causing obvious cloudiness [2] [1].
- Viruses: Viral contamination can originate from the donor cells (patient or donor) or be introduced during processing. Due to their small size, they are hard to remove and detect, requiring techniques like PCR or electron microscopy [3] [1].
- Cross-Contamination: This involves the introduction of other, faster-growing cell lines, which can overgrow and completely alter the intended therapy product [2] [1].
Chemical contaminants can include impurities in media, sera, water, endotoxins, plasticizers, and detergents [1].
2. Why is contamination considered more critical in cell therapies than in traditional biopharmaceuticals?
Cell therapies face unique, heightened risks for several reasons:
- The Starting Material Cannot Be Sterilized: Unlike traditional drugs, human source cells cannot be filtered or sterilized without killing the product, so any intrinsic contamination in the starting material will be carried forward [3].
- Limited Product Shelf-Life: Autologous therapies, in particular, have an extremely short ex vivo lifespan—sometimes only a few hours. This leaves no time for lengthy sterility tests or re-manufacturing if contamination occurs [4] [5].
- "Living Drug" Characteristics: As living products, cell therapies cannot undergo the same terminal sterilization processes (like gamma irradiation) as traditional injectables.
- High Stakes for Patients: For many patients, such as those receiving CAR-T therapies, the cell product is a last-resort treatment. A lost batch due to contamination can have dire consequences [5].
3. How do contamination risks differ between autologous and allogeneic therapies?
While both therapy types face serious risks, their profiles differ, as summarized in the table below.
| Risk Factor | Autologous Therapies | Allogeneic Therapies |
|---|---|---|
| Source of Cells | Patient (may be immunocompromised) | Healthy Donor |
| Scale | One batch per patient | One batch for many patients |
| Primary Contamination Concern | Process-related introduction of contaminants [5]. | Donor-derived viruses or contaminants that can be amplified and spread to multiple patients [5]. |
| Key Challenge | Time-critical manufacturing; no time for re-do [4]. | Large-scale production and storage can allow adventitious agent growth over time [5]. |
4. What advanced assays are used to detect contamination in human cell sources?
A battery of tests is required to ensure safety [3]:
- Rapid, Broad-Spectrum Detection: Next-generation sequencing (NGS) and degenerate PCR can screen for known and unknown viral contaminants.
- Targeted Detection: PCR assays are highly sensitive for specific pathogens like mycoplasma and viruses, with results in 1-3 days.
- Sterility Tests: These culture-based assays detect bacteria and fungi, though they can take 5-10 days.
- In-vitro Cell-Based Assays: Used to detect the presence of replication-competent viruses, which is critical for therapies transduced with viral vectors.
Troubleshooting Guides
Guide 1: Identifying Biological Contamination
Visual inspection and microscopy are the first lines of defense. The following table outlines common contaminants and their characteristics.
| Contaminant Type | Visual & Microscopic Signs | Culture Medium Indicators |
|---|---|---|
| Bacteria | Tiny, shimmering granules between cells under low power; defined shapes (rods, spheres) under high power [1]. | Rapid turbidity (cloudiness); sudden, sharp drop in pH [1]. |
| Yeast | Individual ovoid or spherical particles that may bud off smaller particles [1]. | Turbidity; pH usually remains stable initially, then increases with heavy contamination [1]. |
| Mold | Thin, wispy filaments (hyphae) or denser clumps of spores [1]. | Turbidity; pH is stable initially, then increases rapidly [1]. |
| Mycoplasma | No visible change; requires specialized testing [1]. | No obvious change; may slow cell growth and cause morphological abnormalities [1]. |
Guide 2: Decontaminating an Irreplaceable Culture
If a critical, irreplaceable culture becomes contaminated, you may attempt decontamination. Note: This is a last resort and carries a risk of failure or inducing cellular stress.
Protocol for Antibiotic/Antimycotic Decontamination [1]:
- Identify and Isolate: Confirm the contaminant type and immediately isolate the culture from all other cell lines.
- Clean the Environment: Thoroughly clean incubators and laminar flow hoods with a validated disinfectant.
- Determine Toxicity:
- Dissociate, count, and dilute the contaminated cells in antibiotic-free medium.
- Dispense the cell suspension into a multi-well plate.
- Add your chosen antibiotic/antimycotic to the wells across a range of concentrations.
- Observe cells daily for toxicity signs (sloughing, vacuoles, decreased confluency, rounding).
- Treat the Culture: Culture the cells for 2-3 passages using the antibiotic at a concentration one- to two-fold lower than the determined toxic level.
- Verify Eradication: Culture the cells for one passage in antibiotic-free media, then reassess. If clean, continue culture in antibiotic-free medium for 4-6 more passages to confirm the contamination is gone.
Workflow for Contamination Response:
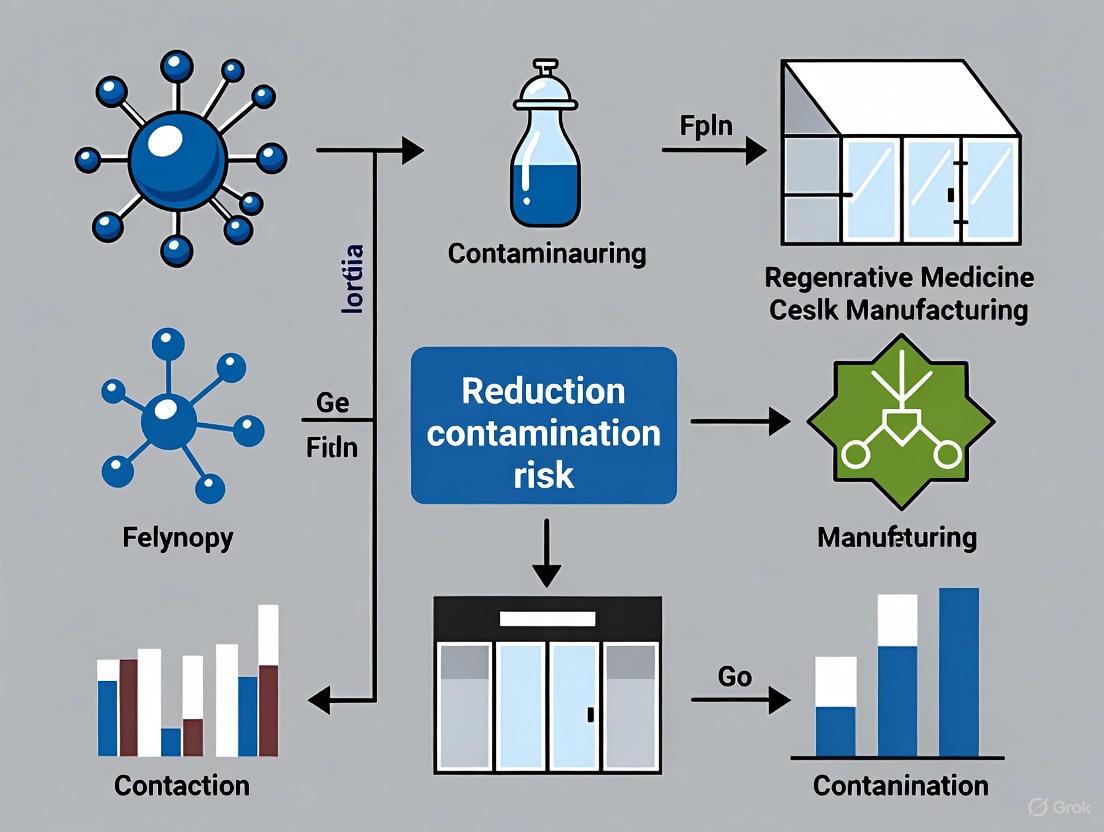
Contamination Control and Prevention Strategy
A proactive, comprehensive strategy is essential. The core pillars of this strategy are visualized below.
Comprehensive Contamination Control Strategy:
Key Elements of the Strategy:
Prevention through Engineering Controls: The most effective way to prevent contamination is to use closed systems and isolators that physically separate the process from operators and the environment [5]. Employing sterile connectors that have been validated with bacterial challenge tests can eliminate risks during fluid transfers [6]. Automated decontamination using methods like Vaporized Hydrogen Peroxide (VHP) is more robust and reliable than manual cleaning, providing consistent, repeatable results [5].
Rigorous Process Monitoring: Implement a risk-based environmental monitoring program for air and surfaces in the cleanroom [5]. For the product itself, employ a panel of rapid, sensitive assays (like PCR and NGS) to detect contaminants as early as possible in the process [3].
Rapid Response to Exceptions: Manufacturing execution systems (MES) with "review by exception" functionality can automatically flag process deviations, allowing operators to quickly identify and resolve issues that could impact product quality [7]. Any contamination event must be followed by a thorough root cause analysis and corrective and preventive actions (CAPA) [5].
The Scientist's Toolkit: Essential Reagents & Materials
The following table details key reagents and materials used for contamination control and testing in cell therapy research and manufacturing.
| Research Reagent / Material | Primary Function |
|---|---|
| Polymerase Chain Reaction (PCR) Assays | Highly sensitive and specific detection of target contaminants like mycoplasma and viruses [3]. |
| Next-Generation Sequencing (NGS) | Broad, untargeted detection of known and unknown viral contaminants in source cells [3]. |
| Sterility Testing Kits | Culture-based detection of bacteria and fungi; required for product release [3]. |
| Validated Disinfectants (e.g., VHP) | For automated decontamination of rooms and isolators; effective against a broad spectrum of microbes and spores [5]. |
| Aseptic Connectors | To make sterile connections between fluid pathways in a closed system, preventing introduction of contaminants [6]. |
| Zeba Spin Desalting Columns | Rapidly desalt or perform buffer exchange on protein solutions, removing small-molecule contaminants [8]. |
In cell therapy manufacturing, where living cells constitute the final product and cannot be sterilized, maintaining an aseptic environment is paramount. Among various contamination risks, the operator has been identified as the most significant source of bacterial and viral contamination in the manufacturing process [9]. The manual, high-touch nature of cell processing, which still heavily relies on skilled operators, creates a constant challenge for contamination control [10] [11]. This technical guide addresses the specific contamination risks introduced by personnel and provides evidence-based troubleshooting protocols to mitigate these risks effectively.
Quantitative Evidence: Understanding Operator-Related Contamination Risks
Recent survey data from cell processing facilities provides compelling evidence of operator-related contamination concerns:
Table 1: Operator Concerns and Experiences with Cell Contamination [10]
| Survey Aspect | Response Percentage | Key Findings |
|---|---|---|
| Operators expressing contamination concerns | 72% | Indicates high perceived risk among personnel |
| Operators with direct contamination experience | 18% | Actual contamination incidence is lower than perceived risk |
| Attributed to raw materials (cells/tissues) | 9.6% | Primary source of intrinsic contamination |
| Attributed to materials (reagents, supplies) | 8.8% | Extrinsic contamination source |
| Attributed to personnel | 4% | Direct operator-related contamination |
Table 2: Contamination Causes from Experienced Batches (29,858 Batches Analyzed) [12]
| Contamination Source | Incidence Rate | Context and Contributing Factors |
|---|---|---|
| Overall contamination rate | 0.06% (18 cases) | Very low probability with proper procedures |
| Intrinsic contamination | Majority of cases | Originating from collected blood (raw materials) |
| Early phase contamination | 5 cases | During cell isolation and primary culture |
| Middle phase contamination | 13 cases | During passage culture and bag culture processing |
Contamination Mechanisms: How Operators Introduce Contaminants
Primary Contamination Pathways
Operator-induced contamination occurs through several mechanisms:
- Direct Physical Contact: Concerns regarding contamination from physical contact during operations were reported by 47% of operators, including activities such as opening flask lids, handling centrifuge tubes, and manipulating tissues in Petri dishes [10].
- Open System Operations: 50% of operators identified open handling as a significant risk, particularly when working outside safety cabinets or performing temporary open operations where airflow disturbances can introduce external contaminants [10].
- Inadequate Cleaning Procedures: 40% of operators expressed concerns about insufficient cleaning and disinfection protocols, especially on uneven surfaces difficult to wipe clean and potential contamination from wipe remnants [10].
Psychological Factors and Human Error
The psychological burden on operators significantly impacts contamination risk:
- High Stress Levels: The responsibility for product sterility and quality creates considerable psychological stress, which can lead to reduced work efficiency and increased errors [10].
- Complacency and Oversight: 17% of responses indicated that operational laxity and complacency ("this is sufficient" mentality) contribute to contamination risks, along with insufficient experience or training [10].
Frequently Asked Questions: Operator-Specific Contamination Concerns
Q: What specific operator behaviors present the highest contamination risk during cell processing? A: The highest-risk behaviors include: (1) direct physical contact during aseptic operations (reported by 47% of operators) [10], (2) improper open system handling that disrupts airflow (50% concern rate) [10], and (3) insufficient disinfection of materials and equipment before introduction to the cleanroom environment (40% concern rate) [10].
Q: How can facilities monitor and control operator flora without creating a blame culture? A: Implement nonjudgmental monitoring systems to detect normal bacterial flora on personnel, reinforcing that such flora is natural but its transfer to sterile products must be controlled. This approach helps normalize flora monitoring while emphasizing control rather than fault-finding [9].
Q: What illness policies should be implemented for cleanroom personnel? A: Restrict access to cleanroom areas if staff or their close contacts have active viral infections. This policy helps prevent viral contamination of cell products, which is particularly challenging to detect and control [9].
Q: How significant is the disconnect between perceived and actual contamination risk among operators? A: Survey data shows a substantial disconnect: 72% of operators expressed concern about contamination, but only 18% had actually experienced it, and comprehensive batch analysis revealed an actual contamination rate of just 0.06% [10] [12]. This indicates that perceived risk exceeds actual incidence, contributing to operator stress.
Q: What technological solutions can reduce operator-dependent contamination? A: Closed processing systems significantly minimize operator-product interaction and contamination risk. These systems are preferred over open biosafety cabinets as they provide greater separation between operators and products [9]. Automated technologies for fluid handling, centrifugation, and formulation also reduce direct human interaction [13].
Experimental Protocols for Contamination Control
Protocol: Operator Flora Monitoring and Control
Purpose: To establish baseline operator flora and implement control measures without creating a punitive environment.
Materials:
- Tryptic Soy Agar plates
- Sterile swabs
- Incubator (30-35°C)
- Laboratory information management system (for anonymous tracking)
Procedure:
- Collect weekly samples from operators' gloves, gowns, and masks using sterile swabs
- Streak samples onto Tryptic Soy Agar plates
- Incubate plates at 30-35°C for 48-72 hours
- Enumerate and identify predominant microorganisms
- Record data anonymously to track facility trends rather than individual performance
- Use results to tailor disinfection protocols and training programs
Expected Outcomes: Establishment of facility-specific flora baselines, identification of potential contamination trends, and development of targeted control measures [9].
Protocol: Changeover Procedure Validation Between Batches
Purpose: To prevent cross-contamination during sequential processing of multiple patient cells in a single biosafety cabinet.
Materials:
- Certified disinfectants (e.g., sporicidal agents)
- Sterile wipes
- Contact plates
- Particle counter
Procedure:
- After completing each batch operation, thoroughly clean all surfaces with certified disinfectants
- Wipe BSC surfaces using a systematic S-pattern from top to bottom and back to front
- Allow sufficient contact time for disinfectant effectiveness
- Validate cleaning efficacy using contact plates on critical surfaces
- Monitor particle counts to ensure environmental control
- Document all changeover activities for each batch
- Implement a "single batch at a time" policy per operator to prevent parallel processing errors [12]
Expected Outcomes: Effective prevention of cross-contamination between batches, as demonstrated by the very low (0.06%) contamination rate across nearly 30,000 batches [12].
Visualization: Operator-Induced Contamination Pathways
Diagram: Operator-induced contamination pathways and mitigation strategies. Percentages indicate operator concern levels for each pathway [10] [9].
The Scientist's Toolkit: Essential Reagents and Materials
Table 3: Research Reagent Solutions for Operator Contamination Control
| Reagent/Material | Function | Application Protocol |
|---|---|---|
| Certified Disinfectants | Surface decontamination | Apply with sterile wipes using S-pattern; ensure proper contact time |
| Sterile Gloves and Gowns | Operator barrier protection | Change between critical operations; proper donning technique required |
| Contact Plates | Environmental monitoring | Press onto surfaces after disinfection; incubate 48-72 hours at 30-35°C |
| Particle Counters | Air quality verification | Monitor during operations; establish baseline for cleanroom classification |
| Closed System Bioreactors | Operator-product separation | Implement for critical process steps to minimize open handling |
| Biological Safety Cabinets | Primary engineering control | Certify every 6 months; proper airflow maintenance critical |
Effectively managing operator-related contamination risks requires a multifaceted approach that addresses both technical and human factors. The data demonstrates that while operators represent the most significant contamination risk [9], proper training, psychological support, and appropriate technological controls can reduce actual contamination rates to extremely low levels (0.06%) [12]. Successful contamination control strategies must balance rigorous technical protocols with support for operator well-being, recognizing that reducing psychological stress is directly linked to improved aseptic performance [10]. By implementing the troubleshooting guides, FAQs, and experimental protocols outlined in this document, cell therapy facilities can significantly enhance their contamination control posture while supporting operator effectiveness and job satisfaction.
Raw Material and Supply Chain Vulnerabilities
Within cell therapy manufacturing, raw material and supply chain vulnerabilities present significant risks to product quality and patient safety. These vulnerabilities can directly introduce contamination or cause process failures, compromising the entire therapeutic batch. This technical support center provides targeted guidance to help researchers and scientists identify, troubleshoot, and mitigate these critical risks within their experimental and development workflows.
Frequently Asked Questions (FAQs)
Q1: Why do raw materials pose a unique contamination risk in cell therapy manufacturing? Raw materials, especially those of biological origin (e.g., serum, cytokines, growth factors), are not sterile and can introduce microbial contaminants (e.g., mycoplasma, endotoxins) or adventitious viruses into the manufacturing process. Unlike traditional pharmaceuticals, cell therapies use living cells that cannot undergo terminal sterilization, making the control of starting materials paramount [14] [15].
Q2: What are the most common supply chain-related causes of cell therapy batch failure? Common causes include:
- Variability in raw material quality between different suppliers or lots [16].
- Logistical delays in shipping critical materials, exceeding the limited viability of living cells [17] [15].
- Insufficient or outdated documentation from suppliers, failing to meet regulatory requirements for traceability [14].
- Unreliable availability of GMP-grade materials, forcing the use of lower-grade alternatives that carry higher contamination risks [16].
Q3: How can we objectively assess the supply risk for a specific raw material? A straightforward tool involves assessing risk based on two primary factors: Supply Options and GMP Grade Availability. The matrix below outlines this objective assessment [16].
Table: Raw Material Supply Risk Assessment Matrix
| Multiple Suppliers Available | Single Source or Limited Suppliers | |
|---|---|---|
| GMP Grade Available | Low Risk | Medium Risk |
| Research Grade Only | Medium Risk | High Risk |
Q4: What are the critical quality control steps for raw material receipt?
- Visual Inspection: Check the external packaging for damage or contamination.
- Temperature Monitoring: Verify that temperature loggers confirm maintenance of the required cold chain.
- Certificate of Analysis (CoA) Review: Ensure the material comes with a valid CoA and that its specifications (e.g., sterility, endotoxin, potency) meet your predefined critical quality attributes (CQAs).
- Quarantine: Hold the material in a designated quarantine area until QC release is confirmed.
Troubleshooting Guide
Table: Common Raw Material and Supply Chain Issues and Solutions
| Problem | Potential Root Cause | Mitigation Strategy |
|---|---|---|
| High variability in cell growth and potency | Uncontrolled variability between lots of critical growth factors or serum [15]. | Implement a raw material qualification program. Use functional assays to test new lots against a gold standard before introducing them into manufacturing. Establish a policy of purchasing large lots of critical materials for long-term use. |
| Microbial contamination detected mid-process | Contaminated reagent (e.g., enzymes, media supplements) introduced during manufacturing [14]. | Strengthen supplier qualification. Audit suppliers and insist on detailed TSE/BSE (Transmissible Spongiform Encephalopathy/Bovine Spongiform Encephalopathy) statements and Certificates of Analysis. Move towards using fully defined, xeno-free culture media components. |
| Cell therapy batch failure due to apoptosis | Logistical delay during transport, causing critical raw materials to expire or cells to perish [17]. | Develop a dual-sourcing strategy for critical single-use materials. Map your supply chain thoroughly and build contingency plans with pre-qualified alternative suppliers for high-risk items. |
| Inconsistent cell isolation efficiency | Uncontrolled performance of isolation kits (e.g., antibodies for MACS) across different lots [15]. | Enhance raw material characterization. Define critical material attributes (CMAs) for reagents and perform incoming testing. Work closely with the supplier to understand and control the sources of variability. |
The Scientist's Toolkit: Research Reagent Solutions
Table: Essential Materials and Their Functions in Cell Therapy Manufacturing
| Research Reagent / Material | Primary Function | Key Considerations for Contamination Risk Mitigation |
|---|---|---|
| Cell Culture Media | Provides essential nutrients for cell growth and expansion. | Use serum-free, xeno-free formulations to eliminate risk from animal-derived components. Pre-qualify each lot for performance and sterility [15]. |
| Growth Factors & Cytokines | Directs cell differentiation, expansion, and enhances therapeutic potency. | Source GMP-grade, recombinant human proteins to minimize viral and prion risk. Define CMAs like purity and biological activity [15]. |
| Magnetic Cell Separation Beads | Isulates target cell populations (e.g., T-cells for CAR-T) from a heterogeneous mixture. | Validate separation efficiency and purity for each new lot. Ensure the beads are endotoxin-free and supplied with full traceability [15]. |
| Viral Vectors | Delivers genetic material to engineer cells (e.g., for CARs or TCRs). | One of the highest-risk materials. Requires rigorous testing for replication-competent viruses and full traceability of all plasmid and cell bank starting materials [15]. |
| Cryopreservation Media | Preserves cell viability during frozen storage and transport. | Use defined, animal component-free cryoprotectants like DMSO. Ensure sterility and control the freezing rate to prevent ice crystal formation that can compromise cells [15]. |
Experimental Protocols for Risk Mitigation
Protocol 1: Raw Material Qualification and Supplier Validation
Objective: To establish a standardized methodology for qualifying a new raw material or supplier, ensuring consistency and reducing contamination risk.
Methodology:
- Documentation Review: Audit the supplier's Quality Management System and require full traceability for all animal-derived components.
- Functional Testing: Perform a side-by-side comparison of the new material lot against your current, qualified "gold standard" lot using a relevant functional assay (e.g., a cell proliferation assay for growth factors).
- Quality Testing: Conduct or review testing for sterility, mycoplasma, and endotoxin levels as appropriate for the material.
- Small-Scale Process Integration: Introduce the qualified material into a small-scale model of your manufacturing process and assess its impact on all Critical Quality Attributes (CQAs) of the final product.
Protocol 2: Supply Chain Mapping and Vulnerability Assessment
Objective: To visually identify and assess single points of failure and vulnerabilities within the supply chain for a critical raw material.
Methodology:
- Component Identification: List all components required to produce and deliver the raw material, including source materials, manufacturing locations, and transportation routes.
- Relationship Mapping: Document the relationships and dependencies between all entities and steps using a flow diagram (see Diagram 2 below).
- Risk Flagging: Identify and flag elements with single-source dependencies, geopolitical instabilities, complex logistics, or custom-made components.
- Mitigation Plan Development: For each high-risk element identified, develop a specific mitigation plan (e.g., identify an alternate supplier, increase safety stock, change the material specification).
Process Visualization with DOT Scripts
Troubleshooting Guide: Common Aseptic Processing Issues
This guide addresses frequent challenges in cell therapy manufacturing related to open systems and aseptic connections, providing root cause analysis and corrective actions.
Table 1: Troubleshooting Common Aseptic Connection and Open System Issues
| Problem | Potential Root Cause | Corrective & Preventive Actions |
|---|---|---|
| Sterile Connector Failure | Membrane not properly removed during engagement; incorrect connector pairing [18]. | Implement hands-on training with connector simulators; adopt genderless connector designs to minimize pairing errors [19] [18]. |
| Tube Weld Failure | Tubing material or size mismatch; overheated or underheated blade [18]. | Ensure tubing is identical material and size; establish and adhere to regular welder calibration and maintenance schedules [18]. |
| Microbial Contamination | Extensive open manipulations in Biosafety Cabinet (BSC); improper gowning technique; lengthy process duration [20] [5]. | Transition to closed systems where possible; enforce rigorous gowning qualifications and annual requalification; automate decontamination [20] [5] [9]. |
| High Operator-Induced Risk | Complex, lengthy, or high-proximity aseptic manipulations [21]. | Use the Aseptic Risk Evaluation Model (AREM) to score and risk-rank all manipulations; prioritize automation for high-risk steps [21]. |
| Inconsistent Manual Processes | Lack of standardized, step-by-step instructions; insufficient staff training [22]. | Develop detailed, written procedures for all open manipulations; invest in routine aseptic technique training in operators' native languages [9] [22]. |
Risk Assessment Methodology: The Aseptic Risk Evaluation Model (AREM)
For a systematic evaluation of aseptic manipulation risks, employ the Aseptic Risk Evaluation Model (AREM). This risk-based approach uses three key factors to determine the relative risk of loss of sterility for each manipulation [21]:
- Complexity: The number of steps and the level of technical skill and coordination required.
- Duration: The total time the product is exposed to the environment during the manipulation.
- Proximity: How close the manipulation occurs to the sterile product or open container.
Scores for each factor are combined using the AREM matrices to yield an overall risk score (Low, Medium, or High), which dictates the level of control and monitoring required [21]. The workflow for this process is outlined below.
Frequently Asked Questions (FAQs)
Q1: What is the single greatest source of contamination in aseptic processing? Operators are the leading source of bacterial and viral contamination. This risk is managed through comprehensive gowning procedures, rigorous aseptic technique training, and policies that restrict cleanroom access for ill staff [9].
Q2: Are Biosafety Cabinets (BSCs) considered closed systems? No, BSCs are open systems. Although they provide a controlled ISO 5/Grade A environment, there is no physical barrier between the operator and the process, leaving potential for contaminated air to enter [5] [22]. Truly closed systems, like isolators, provide a higher level of containment [9].
Q3: How can I justify not performing a full process duration Aseptic Process Simulation (APS)? A risk assessment may justify a shorter simulation time. If the assessment determines that a shortened time is representative of the actual duration in terms of interventions, personnel fatigue, and shift changes, it can be deemed acceptable. All critical aseptic manipulations must still be challenged [20] [22].
Q4: What is the key advantage of single-use sterile connectors over tube welders? Sterile connectors can join tubing of different materials and sizes, offering greater flexibility. Tube welders require the tubing to be the same size and material (thermoplastic) to create a leak-free weld [18].
Q5: What is more reliable, manual or automated disinfection? Automated decontamination (e.g., with Hydrogen Peroxide Vapor) is more robust and reliable. It provides consistency, repeatability, reduced process time, and is more easily validated than manual methods, which introduce human variability [5].
The Scientist's Toolkit: Essential Reagents & Materials
Table 2: Key Solutions for Sterile Fluid Transfer and Contamination Control
| Tool / Material | Function | Key Application Note |
|---|---|---|
| Single-Use Sterile Connectors | Enables sterile, closed-system connections between tubing or devices [19] [18]. | Ideal for pre-planned, infrequent connections. Reduces need for complex tube welding [18]. |
| Tube Welder | Creates a sterile connection by cutting and fusing two thermoplastic tubing ends [18]. | Requires identical tubing material and size. High capital and maintenance cost [18]. |
| Multiple-Use Aseptic Connector | A novel device allowing for multiple sterile disconnections and reconnections [18]. | Fills a technology gap for processes requiring frequent small-volume transfers [18]. |
| Growth Promotion Testing Media | A sterile culture medium like Tryptic Soy Broth (TSB) used in Aseptic Process Simulations (APS) [22]. | Used to validate closed systems and qualify aseptic operator technique by challenging the process for microbial growth [23] [22]. |
| Validated Disinfectants | Chemicals (e.g., alcohols, sporicidal agents) for manual decontamination of surfaces and equipment [5]. | Efficacy must be validated for specific facility microbes. Automated methods (e.g., VHP) are more consistent [5]. |
| Hydrogen Peroxide Vapor | An automated decontamination method for rooms and isolators [5]. | Highly effective, excellent material compatibility, and provides quick cycle times with active aeration [5]. |
In the field of cell therapy manufacturing, a Contamination Control Strategy (CCS) is a proactive, scientifically designed framework to ensure product quality and patient safety. By 2025, a holistic CCS is no longer a mere recommendation but a firm regulatory expectation, essential for compliance with evolving standards like EU Annex 1 and various Pharmacopoeia chapters [24]. This guide provides troubleshooting and FAQs to help you build a robust CCS tailored to the unique challenges of cell therapy research and development.
Frequently Asked Questions (FAQs)
FAQ 1: What are the most critical elements of a CCS for a research-scale cell therapy lab? A foundational CCS should prioritize closed processing systems (e.g., isolators, sterile connectors) to minimize open manipulations, strict personnel training and monitoring programs as operators are a primary contamination source, and the use of sterile, single-use materials with validated Certificates of Analysis from trusted suppliers [9] [5].
FAQ 2: Our autologous therapy starting material comes directly from patients. How does this affect our CCS? Patient-derived (autologous) starting materials present a high and variable risk, as techniques like apheresis can introduce skin microorganisms. Your CCS must account for this inherent variability in donor material purity and implement rigorous in-process bioburden monitoring and testing to ensure consistent batch success [24].
FAQ 3: Why is a "one-size-fits-all" approach to CCS ineffective for cell therapies? Unlike traditional biologics, many cell therapy products cannot undergo terminal sterilization or post-production viral filtration. Their large, complex, and unstable nature makes them prone to aggregation and sharing biophysical properties with contaminants, complicating standard impurity clearance and detection methods [24] [5]. Your CCS must be product and process-specific.
FAQ 4: How do updated regulatory guidelines like the Ph. Eur. impact our testing strategies? Recent updates, such as those in the European Pharmacopoeia (Ph. Eur.), emphasize a risk-based approach and scientific justification over rigid numerical limits. This flexibility allows manufacturers to adopt more advanced or product-specific methods, like droplet digital PCR (ddPCR), and potentially omit certain tests (e.g., replication-competent virus testing on final lots) if justified by data from earlier process stages [24].
FAQ 5: What is the role of automated decontamination, and how does it compare to manual methods? Automated decontamination (e.g., Hydrogen Peroxide Vapor) offers greater consistency, repeatability, and easier validation by removing the variability of human operators. While manual cleaning will always be necessary, automated systems reduce downtime, health risks, and are highly recommended for isolators and between campaign changes, especially when handling viral vectors [5].
Troubleshooting Common CCS Challenges
Here are solutions to frequent contamination control issues in cell therapy manufacturing.
| Challenge | Root Cause | Solution & Preventive Action |
|---|---|---|
| High bioburden in final product | Open processing in biosafety cabinets; inadequate in-process controls [5]. | Transition to closed systems (isolators, tube welding) [24] [9]. Implement rigorous environmental monitoring and in-process bioburden checks. |
| Consistent operator-introduced contamination | Insufficient aseptic technique; lack of ongoing training and monitoring [9]. | Invest in routine, hands-on aseptic training. Normalize non-punitive personnel flora monitoring. Enforce illness-based cleanroom access restrictions [9]. |
| Contamination from raw materials | Unvalidated suppliers; materials not certified as sterile and endotoxin-free [9]. | Source materials from trusted suppliers with GMP-grade product lines. Require and review Certificates of Analysis (CoA) for sterility, endotoxin, and mycoplasma [9]. |
| Difficulty validating manual cleaning | High human variability in mopping, spraying, and wiping techniques [5]. | Where possible, adopt automated decontamination (e.g., Vaporized Hydrogen Peroxide) for validation consistency. For manual steps, validate disinfectant contact times and coverage [5]. |
| Low product yield & batch failure | Variability in (donor) starting material purity; complex and unstable products [24]. | Enhance raw material qualification. Use advanced analytical methods (e.g., flow cytometry) to monitor cell viability and count throughout the process [24]. |
Experimental Protocols for CCS Implementation
Protocol 1: Implementing a Risk-Based Environmental Monitoring Program
This protocol establishes a data-driven EM program to identify contamination risks before they impact the manufacturing process.
- Risk Assessment: Map the process flow and identify critical intervention points and locations with the highest risk of contamination (e.g., material transfer points, vial fills).
- Site Selection: Choose sampling sites for viable (air and surface) and non-viable particulate monitoring based on the risk assessment. Focus on areas closest to the open product.
- Sampling Schedule: Define frequency (e.g., per batch, daily) and timing (during key operations) for sampling.
- Culture Conditions: Use appropriate culture media (e.g., Tryptic Soy Agar for bacteria, Sabouraud Dextrose Agar for fungi). Incubate at two temperatures (e.g., 20-25°C and 30-35°C) for at least 7 days [5].
- Data Trending: Log all data and analyze trends over time. Investigate any excursions or upward trends in counts for root cause and implement corrective and preventive actions (CAPA).
Protocol 2: Validation of Sterile Connections
Validating aseptic connection techniques is critical for maintaining a closed system.
- Technique Selection: Choose between tube welding or pre-sterilized single-use connectors based on process needs. Welding may introduce particles, while plastic connectors require extractables & leachables (E&L) studies [24].
- Visual Inspection: Every connection must be visually inspected for integrity (e.g., complete seals, no cracks).
- Integrity Testing: For critical connections, perform integrity tests, such as pressure hold or bubble point tests, to ensure a sterile barrier is maintained.
- Microbiological Challenge: During method validation, challenge the connection system with a high concentration of a non-pathogenic indicator microorganism (e.g., Bacillus atrophaeus spores) to demonstrate it prevents microbial ingress.
Essential Research Reagent Solutions
Equip your lab with these key materials to support your CCS.
| Item | Function in CCS |
|---|---|
| Sterile, Single-Use Systems (e.g., bioreactor bags, tubing sets) | Eliminates cross-contamination between batches and reduces cleaning validation burden [9]. |
| Closed System Bioreactors (e.g., G-Rex) | Enables cell expansion in a functionally closed environment, significantly reducing risk during culture [25]. |
| Isolators or RABS (Restricted Access Barrier Systems) | Provides a physical barrier between the operator and the process, allowing operation in lower-grade cleanrooms [24] [9]. |
| Recombinant Factor C Assay | A highly sensitive, non-animal based method for detecting bacterial endotoxins, a critical quality release test [24]. |
| Rapid Microbial Detection Systems (e.g., SCANRDI) | Offers an ultra-rapid alternative to traditional compendial methods for detecting microbial contaminants in final products, crucial for short-shelf-life therapies [11]. |
| Validated Disinfectants | A roster of EPA-registered and efficacy-validated sporicidal and bactericidal agents for manual and automated decontamination of surfaces [5]. |
Workflow: Building a Holistic Contamination Control Strategy
The following diagram illustrates the interconnected components of a holistic CCS, showing how different elements support the overall goal of patient safety.
Implementing Proactive Defenses: Closed Systems, Automation, and Sterile Materials
Prioritizing Closed Systems over Open Processing
In cell therapy manufacturing, the shift from open to closed processing systems represents a critical evolution in contamination control strategy. Open systems, while simple and low-cost, expose therapeutic products to environmental contaminants and require extensive human intervention, leading to increased risks of microbial contamination, batch-to-batch variability, and manufacturing failures [26]. In contrast, closed systems utilize sterile barriers, connectors, and single-use technologies (SUTs) to minimize product exposure to the environment, significantly reducing contamination risks while improving process consistency and scalability [26] [27]. This technical support center provides practical guidance for researchers and manufacturing professionals implementing closed systems to enhance product quality, patient safety, and regulatory compliance.
Frequently Asked Questions (FAQs)
1. What are the primary contamination risks in open cell processing systems?
Open systems pose multiple contamination risks: (1) Microbial contamination from airborne particles and microorganisms in the environment; (2) Operational contamination from increased human interaction during processing; (3) Cross-contamination between different products or batches; and (4) Particulate contamination from the surrounding environment [26] [28]. These risks can compromise product sterility, lead to batch rejections, and potentially cause serious patient infections, particularly in immunocompromised individuals [28].
2. How do closed systems fundamentally reduce contamination risk?
Closed systems physically isolate the cell therapy product from the manufacturing environment through sterile barriers, connectors, and single-use technologies [26]. This isolation minimizes exposure to airborne contaminants and reduces direct operator-product interaction, which is a leading source of bacterial and viral contamination [9]. By maintaining this sterile barrier throughout processing, closed systems prevent the introduction of microorganisms that could compromise product quality and patient safety [27].
3. What are the regulatory implications of implementing closed systems?
Recent regulatory guidelines, including the revised EU GMP Annex 1, explicitly encourage the use of closed systems and risk-based environmental classification [24] [28]. Implementing closed processing may allow manufacturing in Grade C facilities instead of more stringent and expensive Grade A or B cleanrooms [26]. Regulatory agencies now expect a comprehensive Contamination Control Strategy (CCS) that integrates closed systems as a fundamental element across the product lifecycle [24] [28].
4. Can closed systems be integrated with existing equipment and workflows?
Yes, closed systems offer flexible implementation approaches. Modular closed systems allow integration of specialized instruments for individual unit operations, providing versatility in application without restricting manufacturers to a single supplier [26]. Proper integration typically uses sterile connectors, tube welding, or pre-assembled single-use kits that maintain the closed environment while connecting various processing components [24].
5. How does automation enhance the benefits of closed systems?
Automation complements closed systems by reducing human intervention, minimizing errors, and improving process robustness and reproducibility [26]. The European Medicines Agency notes that "The use of automated equipment may ease compliance with certain GMP requirements" while enhancing product quality [26]. Automated closed systems also enable real-time analytics and characterization testing during processing, allowing corrective adjustments before product failure occurs [26].
Troubleshooting Guide: Common Closed System Challenges
| Challenge | Possible Causes | Resolution Steps |
|---|---|---|
| Connector Integrity Issues | Improper welding technique; Defective sterile connectors; Incorrect connection sequence | Visually inspect all welds and connections; Validate connection procedures; Implement particle monitoring where tube welding is used [24] |
| Single-Use Component Failures | Material defects; Improper handling; Compatibility issues with process parameters | Establish rigorous incoming quality checks; Train staff on proper handling techniques; Conduct extractables and leachables studies [24] |
| Software Integration Problems | Interface incompatibility; Lack of 21 CFR Part 11 compliance; Data integrity issues | Select systems with proven compliance (e.g., Gibco CTS Cellmation Software); Perform thorough validation testing; Ensure audit trail functionality [26] |
| Process Transfer Difficulties | Scale-up complexities; Equipment capability mismatches; Parameter translation errors | Implement phased process transfer approach; Utilize scalable single-use technologies; Validate at target production scale [27] |
| Environmental Monitoring Gaps | Inadequate sampling plans; Insensitive detection methods; Improper data interpretation | Develop risk-based monitoring strategy; Incorporate rapid microbial methods; Establish data trending protocols and action limits [9] [24] |
Quantitative Comparison: Closed System Technologies
Table 1: Performance Metrics of Common Cell Processing Systems [26]
| System Type | Core Technology | Cell Recovery | Input Volume | Processing Time |
|---|---|---|---|---|
| Modular Systems | Counterflow centrifugation | 95% | 30 mL–20 L | 45 min |
| Modular Systems | Electric centrifugation motor and pneumatic piston drive | 70% | 30 mL–3 L | 90 min |
| Modular Systems | Spinning membrane filtration | 70% | 30 mL–22 L | 60 min |
| Integrated Systems | Acoustic cell processing | 89% | 1–2 L | 40 min |
| Integrated Systems | Magnetic separation | 85% | 1–2 L | N/A |
Table 2: Contamination Risk Reduction Through Environmental Control Strategies [24]
| Control Strategy | Relative Bioburden Risk | Cleanroom Grade Requirement | Operator-Product Interaction |
|---|---|---|---|
| Open Systems (BSCs) | Baseline | Grade A/B | High |
| Closed Systems (Isolators) | >95% reduction | Grade C/D | Minimal |
| Full Automation with Closed Systems | >99% reduction | Controlled non-classified possible | None during processing |
Experimental Workflow: Implementing Closed System Processing
The following diagram illustrates the conceptual transition from open to closed processing, highlighting key decision points and contamination control measures:
Diagram 1: Closed System Implementation Workflow
The Scientist's Toolkit: Essential Research Reagent Solutions
Table 3: Key Components for Closed System Cell Processing
| Component | Function | Application Notes |
|---|---|---|
| Single-Use Bioreactors | Cell expansion in a controlled, closed environment | Maintain optimal conditions for cell growth; Available in various scales; Pre-sterilized and ready-to-use [26] [27] |
| Sterile Connectors & Tube Sealers | Maintain closed fluid pathways during processing | Enable aseptic connections between components; Require proper technique validation; Visual inspection critical [24] |
| Cell Culture Bags | Closed expansion and storage of cell products | Materials support optimal gas exchange; Enable visual monitoring; Designed for durability and leak-resistance [27] |
| Automated Cell Processing Systems | Integrated or modular systems for specific unit operations | Reduce manual processing steps; Improve consistency; Enable data tracking and documentation [26] |
| Closed System Transfer | Aseptic transfer of materials and intermediates | Maintain sterility during material movement; Reduce contamination risk during sampling or additions [27] |
The Synergy of Single-Use Technologies (SUT) and Closed Systems
Technical Support Center
Troubleshooting Guides
Guide 1: Addressing Single-Use System (SUS) Leaks and Integrity Failures
Problem: Leaks detected in single-use bags, tubing assemblies, or connectors.
| Potential Cause | Investigation Steps | Corrective & Preventive Actions |
|---|---|---|
| Material Incompatibility | Review process fluid composition (pH, solvents) and contact time against supplier's chemical compatibility tables [29]. | Perform pre-use compatibility tests under actual process conditions; select alternative polymer films (e.g., switch from PA to EVA for specific solvents) [29]. |
| Physical Damage during Handling | Inspect SUS for visible punctures, creases, or seal defects. Review shipping and handling records against ISTA-2A/ASTM D7386 standards [29]. | Implement validated handling procedures; use protective secondary packaging; conduct gross leak tests post-irradiation [29]. |
| Exceeding Mechanical Limits | Analyze process parameters against SUS specifications for tensile strength (ASTM D882), tear strength (ASTM D1004), and dynamic mechanical properties (ASTM D5026) [29]. | Redesign process to avoid pressure spikes or sharp bends; select components with higher mechanical strength ratings [29]. |
Guide 2: Managing Contamination Events in Closed Systems
Problem: Microbial contamination detected in a supposedly closed process.
| Potential Cause | Investigation Steps | Corrective & Preventive Actions |
|---|---|---|
| Failure in Aseptic Connection | Audit aseptic connection procedures; review environmental monitoring data at connection points [30] [9]. | Retrain staff on aseptic connector use; implement closed-system devices (e.g., sterile welders); use isolators for high-risk connections [30] [9]. |
| Intrinsic Contamination from Raw Materials | Test incoming raw materials (cells, media, reagents) for bioburden and endotoxins [9] [31]. | Enhance supplier qualification; require Certificates of Analysis for sterility and endotoxins; implement incoming material testing protocols [29] [9]. |
| System Compromise during Material Transfer | Perform a Closure Analysis Risk Assessment (CLARA) to identify contamination ingress points during material transfers [32]. | Use active HEPA purging pass-throughs for material transfer; decouple unit operations from the environment; validate transfer processes [32] [33]. |
Guide 3: Qualification and Validation Failures for SUT
Problem: SUS fails to meet qualification specifications or validation requirements.
| Potential Cause | Investigation Steps | Corrective & Preventive Actions |
|---|---|---|
| Inadequate Extractables/Leachables Data | Gap analysis between supplier's extractables study (USP <661>) and your process conditions (time, temperature, solvents) [29]. | Request application-specific extractables data from supplier; conduct leachables studies on final drug product if needed [29]. |
| Irradiation Impact on Polymer | Confirm gamma irradiation dose (ISO11137) and verify shelf life has not expired [29]. | Establish internal controls for irradiation dose verification and shelf-life management [29]. |
| Supplier Quality Inconsistency | Conduct technical due diligence audit of supplier's manufacturing process and quality controls [29]. | Qualify alternative suppliers; align release and acceptance criteria with supplier; require detailed validation guides [29]. |
Frequently Asked Questions (FAQs)
Q1: What is the fundamental difference between an "open," "closed," and "functionally closed" system? An open system directly exposes the product to the immediate environment (e.g., a petri dish in a biosafety cabinet). A closed system is physically sealed from the external environment throughout processing. A functionally closed system uses pre-sterilized, single-use components that are connected aseptically, creating a closed processing pathway that is not opened during normal operations [30] [34].
Q2: We use pre-sterilized, single-use bioreactor bags. Why is chemical compatibility testing still necessary? Although the bags are sterile, process fluids (media, buffers, product) can interact with the polymer materials. Incompatibility can lead to polymer swelling, leaching of additives, or loss of tensile strength, potentially causing leaks or affecting cell growth [29]. Supplier data provides a general guide, but qualification under your specific process conditions is essential.
Q3: Our operators report high stress levels about causing contamination. What strategies can reduce this risk? This is a common concern, with surveys showing 72% of operators worry about contamination [10]. Mitigation strategies include:
- Implementing closed systems to minimize direct operator-product interaction [9].
- Investing in routine, non-punitive aseptic technique training [9] [10].
- Using isolators and automated closed systems to reduce the cognitive burden on staff [34] [35].
Q4: How do single-use technologies within a closed system help with regulatory compliance? They simplify compliance by reducing the need for cleaning validation, decreasing cleaning-related deviations, and providing extensive documentation (e.g., Certificates of Analysis, sterilization records) [30] [29]. The combination demonstrates a robust, risk-based contamination control strategy, which regulators increasingly expect [30] [9].
Q5: What is a Closure Analysis Risk Assessment (CLARA), and when should it be performed? CLARA is a systematic risk assessment tool that breaks down each unit operation to identify potential sources of environmental contamination. It should be performed during process design and when implementing new equipment or systems to ensure they are appropriately closed and to define the necessary environmental controls [32].
Table 1: Documented Contamination Rates and Operator Concerns in Cell Processing
| Metric | Value | Context / Source |
|---|---|---|
| Overall Contamination Incidence | 0.06% (18 cases in 29,858 batches) | Analysis of autologous immune cell production; mostly attributed to intrinsic contamination from source material [31]. |
| Operators Concerned About Contamination | 72% | Online survey across 47 cell processing facilities; indicates high perceived risk [10]. |
| Operators with Direct Contamination Experience | 18% | Survey result; shows perceived risk is higher than actual incidence [10]. |
| Polymer | Incompatible With (General Guideline) | Common SUS Components |
|---|---|---|
| Polyvinyl Chloride (PVC) | Ketones, esters, aromatic and chlorinated hydrocarbons | Tubing, fluid containers |
| Polypropylene (PP) | Strong oxidizing agents, chlorinated solvents | Connectors, fittings, bottles |
| Polyethylene (PE) | Strong oxidizing acids, surfactants | Bags, containers |
| Silicone | Strong acids/bases, some solvents | Tubing, seals, gaskets |
| Ethylene Vinyl Acetate (EVA) | Aliphatic and aromatic hydrocarbons, oils | Bags, fluid containers |
Experimental Protocols
Protocol 1: Chemical Compatibility Testing for Single-Use Components
Objective: To validate that a single-use component (e.g., bag, tubing) is chemically compatible with a specific process fluid under process conditions.
Materials:
- Test specimen of the SUS component
- Process fluid or a simulant matching critical properties (pH, polarity)
- Control fluid (e.g., WFI)
- Inert container (e.g., glass beaker)
- Analytical scales, tensile tester, and GC/MS for extractables analysis
Methodology:
- Pre-conditioning: Weigh and measure the physical dimensions of the test specimen. Perform baseline mechanical testing (e.g., seal strength per ASTM F2097) if required.
- Exposure: Fill the SUS with the process fluid. For a control, fill an identical SUS with the control fluid. Seal as per the manufacturing process.
- Incubation: Incubate the units at the maximum process temperature for the maximum contact time.
- Post-examination:
- Visual Inspection: Check for discoloration, swelling, haze, or deformation.
- Weight/Dimension Change: Measure changes in weight and dimensions.
- Mechanical Testing: Re-test mechanical properties like tensile strength (ASTM D882) and seal strength.
- Extractables Analysis: Analyze the process fluid for leachables using GC/MS if product quality is a concern.
- Acceptance Criteria: The component should show no significant physical degradation, excessive swelling (>5% is often a red flag), or release of leachables that impact product quality.
Protocol 2: Performing a Closure Analysis Risk Assessment (CLARA)
Objective: To systematically identify and mitigate potential contamination ingress points in a bioprocess [32].
Materials:
- Process Flow Diagrams (PFDs)
- Piping and Instrumentation Diagrams (P&IDs)
- Equipment manuals and functional specifications
- Multidisciplinary team (engineers, operators, quality assurance)
Methodology:
- Scheduling and Preparation: Schedule a dedicated session. Assemble all relevant documents.
- Node Definition: Break down the entire process into discrete unit operations or "nodes" (e.g., "Media Addition," "Cell Harvest").
- Risk Identification per Node: For each node, the team brainstorms and documents:
- Potential Contamination Ingress Points: (e.g., open manipulations, connector seams, sensor ports).
- Potential Root Causes: (e.g., operator error, seal failure).
- Risk Analysis & Evaluation: Assess the severity, probability, and detectability for each identified risk. Use a risk matrix to prioritize high-risk items.
- Risk Mitigation: For high-priority risks, define mitigation strategies. These can be:
- Mechanical: Redesigning equipment for better closure.
- Operational: Implementing new procedures (e.g., specific wiping techniques).
- Architectural: Changing the facility design (e.g., installing pass-throughs [33]).
- Documentation and Review: Document the entire assessment in a CLARA report. Review and update the CLARA when processes or equipment change.
System Workflow and Relationships
SUT and Closed System Implementation Workflow
The Scientist's Toolkit: Essential Research Reagents & Materials
Table 3: Key Solutions and Materials for SUT and Closed System Research
| Item | Function & Application | Key Considerations |
|---|---|---|
| G-Rex Bioreactors (SUT) | Scalable cell expansion vessel for T-cells or NK cells in a closed system [30] [25]. | Reduces contamination risk by minimizing media exchange events; enables high-yield production [25]. |
| CliniMACS System (Closed) | Automated, closed-system cell separation and processing device [30]. | Often used in clinical-scale manufacturing; critical for specific cell selection steps. |
| WAVE Bioreactor (SUT) | Single-use, rocking-motion bioreactor for scalable cell culture [30]. | Provides efficient mixing and gas transfer in a closed, single-use bag. |
| Isolators | Rigid enclosures that provide a physical barrier between operator and process [30] [9]. | Enable processing in lower-grade cleanrooms; critical for handling GMOs; reduce operator shedding risk [9]. |
| Sterile Connectors & Tubing (SUT) | Pre-sterilized components for building fluid pathways in closed systems [30] [29]. | Material compatibility (e.g., Silicone, EVA) with process fluids is essential; integrity is critical [29]. |
| Active HEPA Pass-Throughs | Enclosed chamber with HEPA filtration for transferring materials into cleanrooms [33]. | More space-efficient than airlocks; prevents contamination during material transfer [33]. |
| Extractables Test Kits | Standardized solvents and protocols for characterizing SUS extractables profiles [29]. | Needed to supplement supplier data and confirm compatibility with specific process fluids. |
Sourcing Sterile, Endotoxin-Free Raw Materials with Validated CoAs
In cell therapy manufacturing, controlling contamination is not just a best practice—it is a critical determinant of product safety and efficacy. The foundation of this control lies in the rigorous sourcing of raw materials. Sterile, endotoxin-free raw materials, backed by validated Certificates of Analysis (CoAs), are essential for mitigating risks that can compromise entire production batches [24] [9]. This guide provides actionable troubleshooting and protocols to ensure your material sourcing strategy effectively reduces contamination risk.
Frequently Asked Questions (FAQs)
Q1: What constitutes a "validated" Certificate of Analysis (CoA)? A validated CoA is not just a supplier-provided document; it is one whose reliability has been confirmed by your organization. This involves initial validation of the supplier's testing methods and results, and periodic re-validation to ensure ongoing accuracy. The FDA has issued warning letters to firms that relied on supplier CoAs without establishing this reliability [36].
Q2: Our lab uses aseptic technique, but we still experience bacterial contamination. Could raw materials be the source? Yes. Even with excellent technique, contamination can originate from raw materials. The sterility assurance level (SAL) of products can vary by manufacturer. An SAL of 10⁻³, for example, indicates a probability of one non-sterile unit in 1,000. For extremely sensitive cells and assays, additional filtration of media prior to use may be necessary [37].
Q3: What are the key tests to look for on a CoA for cell culture media? A comprehensive CoA should provide results for:
- Sterility: Confirming the absence of viable microorganisms.
- Mycoplasma: Using methods like PCR or DNA staining.
- Endotoxin: Typically via the Limulus Amebocyte Lysate (LAL) assay or recombinant Factor C (rFC) methods.
- Bioburden: Quantifying the number of viable microorganisms present before sterilization [37] [38].
Q4: Should we perform our own identity testing on incoming raw materials? Absolutely. Regulatory authorities mandate at least one specific identity test for each lot of incoming components [36]. Relying solely on a CoA without verification is considered a current good manufacturing practice (CGMP) violation.
Q5: How can we justify accepting a CoA from a supplier instead of conducting full in-house testing? Justification is built through a robust vendor qualification program. This involves auditing the supplier, understanding their quality management system (e.g., if they adhere to ISO 13485), and establishing through data that their testing is consistently reliable [36] [9].
Troubleshooting Common Sourcing Issues
| Problem | Possible Root Cause | Recommended Corrective Action |
|---|---|---|
| Recurrent microbial contamination in processes | Compromised sterility of raw materials; inadequate supplier controls. | Filter-sterilize the material upon receipt as an interim measure; initiate supplier audit to review their sterilization and packaging validations [37]. |
| Consistently high endotoxin levels in final product | Raw materials with high endotoxin load; ineffective supplier testing. | Switch to suppliers that provide endotoxin-free certification on their CoAs; implement in-house endotoxin testing using LAL or rFC assays upon receipt [9] [39]. |
| Failed identity test on incoming material | Supplier error; material mislabeling; supply chain mix-up. | Quarantine the entire lot and immediately contact the supplier. This event should trigger a re-evaluation of the supplier within your qualification program [36]. |
| Supplier CoA lacks critical quality data | Supplier's quality system does not align with GMP standards. | Source materials from suppliers with GMP-grade product lines and a history of providing detailed, compliant CoAs. This is a fundamental selection criterion [9]. |
| Cell growth or viability issues suspected from new material lot | Undetected cytotoxic contaminants or formulation change. | Perform a side-by-side comparison with a previous, acceptable lot using a sensitive cell line. Check for leachates from single-use materials and request full disclosure of components from the supplier [24]. |
Experimental Protocols for In-House Verification
Protocol for Sterility Testing of Incoming Materials
This method outlines a culture-based approach to confirm the absence of microbial contamination.
- Principle: Samples are inoculated into nutrient-rich media and incubated to promote the growth of any viable microorganisms.
- Materials:
- Tryptic Soy Broth (TSB) or Thioglycollate Medium
- Sterile pipettes and tubes
- Class II Biological Safety Cabinet
- Incubators set at 20-25°C and 30-35°C
- Procedure:
- Aseptically transfer a defined volume (e.g., 1-10 mL) of the liquid raw material into containers of sterile TSB.
- Incubate the inoculated media for 14 days at both 20-25°C and 30-35°C [37].
- Observe the tubes daily for visual signs of growth, such as turbidity.
- Interpretation: Clear, non-turbid broth after the incubation period indicates the test material meets sterility requirements. Any turbidity indicates a failed test and the material lot should be rejected.
Protocol for Mycoplasma Testing by PCR
PCR provides a rapid and sensitive method for detecting mycoplasma contamination.
- Principle: DNA is extracted from the test material and amplified using primers specific to highly conserved mycoplasma genes.
- Materials:
- Commercial Mycoplasma PCR Kit
- DNA extraction kit
- Thermal Cycler
- Microcentrifuge and pipettes
- Procedure:
- Concentrate potential contaminants from the material, if necessary, by centrifugation.
- Extract DNA following the kit's manufacturer instructions.
- Prepare the PCR master mix and add the template DNA.
- Run the PCR using the cycling conditions defined in the kit protocol.
- Analyze the PCR products by gel electrophoresis.
- Interpretation: The presence of a band at the expected size for the mycoplasma target, compared to positive and negative controls, indicates mycoplasma contamination [38].
Protocol for Endotoxin Testing Using LAL Assay
The LAL assay is a standard for detecting and quantifying bacterial endotoxins.
- Principle: Limulus Amebocyte Lysate (LAL) enzymes clot in the presence of endotoxin.
- Materials:
- LAL reagent
- Endotoxin standard
- Depyrogenated glassware and tips
- Water bath or microplate reader (depending on test format: gel-clot, turbidimetric, or chromogenic)
- Procedure (Gel-Clot Method):
- Prepare a dilution series of the test sample and endotoxin standards.
- Combine equal volumes of LAL reagent and each sample/standard in a depyrogenated tube.
- Incubate the mixture at 37°C ± 1°C for 60 minutes.
- Invert the tube 180° and check for the formation of a firm gel clot.
- Interpretation: The highest dilution that produces a positive gel clot is used to calculate the endotoxin concentration in the sample, which must be below the specified limit for the material's application [39].
The table below compares common in-house verification tests for raw materials.
| Test Type | Target Contaminant | Key Methodologies | Typical Detection Time |
|---|---|---|---|
| Sterility Testing | Viable bacteria, fungi | Culture in liquid media (e.g., TSB) [37] | 14 days [37] |
| Mycoplasma Testing | Mycoplasma species | PCR, Fluorescence staining (e.g., Hoechst), Culture [37] [38] | Several hours (PCR) to weeks (Culture) |
| Endotoxin Testing | Bacterial endotoxins | LAL Gel-Clot, Turbidimetric, Chromogenic; recombinant Factor C (rFC) [39] | ~1 hour |
| Identity Testing | Material authenticity | Chemical analysis, FTIR, HPLC, or functional assay | Varies by method |
The Scientist's Toolkit: Essential Research Reagent Solutions
| Item | Function in Contamination Control |
|---|---|
| Limulus Amebocyte Lysate (LAL) | The standard reagent for detecting and quantifying bacterial endotoxins [39]. |
| Recombinant Factor C (rFC) Assay Kits | An animal-free, sustainable alternative to LAL for endotoxin testing, gaining regulatory acceptance [24] [39]. |
| Mycoplasma Detection Kits (PCR-based) | Provide sensitive and rapid detection of mycoplasma contamination in reagents and cell cultures [37] [38]. |
| Sterile, Single-Use Connectors & Assemblies | Pre-sterilized, endotoxin-free components for creating closed systems, minimizing exposure to contaminants during processing [24] [9]. |
| Filter Sterilization Units | For implementing an additional sterility assurance step for liquid media and reagents upon receipt or before use [37]. |
Workflow Diagrams for Material Qualification and Verification
Supplier Qualification Workflow
Incoming Material Verification
Advanced Environmental Monitoring and Risk-Based Sampling
Technical Support Center
Troubleshooting Guides
Guide 1: Addressing High Microbial Counts on Surfaces
- Problem: Consistently high microbial counts recovered from surfaces, particularly in Grade B environments.
- Investigation Steps:
- Identify the Species: Perform microbial identification to species level. One study found Bacillus to be the predominant genus on cleanroom surfaces. Identification is crucial for tracing the contamination source [40].
- Check Disinfection Procedures: Review the application and contact time of sporicidal agents. Research indicates that resistance to disinfectants like hydrogen peroxide can vary, with transfer windows showing notably higher resistance [40].
- Audit Personnel Practices: Focus on hand hygiene and aseptic technique. Significant microbial differences have been found between hands and other Grade B surfaces, highlighting the "human aspect" as a critical control point [40] [11].
- Solution: Based on the investigation:
- If Bacillus or other spore-forming bacteria are dominant, enhance the frequency or concentration of sporicidal disinfectants [40].
- If contamination is linked to personnel, implement enhanced hand hygiene training and more frequent glove changes [40].
- Re-qualify the cleaning and disinfection process for efficacy.
Guide 2: Responding to a Viable Air Particle Alarm
- Problem: An alarm is triggered due to viable airborne particles exceeding alert or action limits during a manufacturing operation.
- Investigation Steps:
- Immediate Action: Halt open manipulations within the biosafety cabinet and safely seal any open product containers [41].
- Assess Personnel Activity: Determine if the excursion coincided with sudden or high-movement activities by staff within the room, as this can shed particles [11].
- Check Facility Integrity: Inspect for potential breaches, such as gaps around doors, damaged HEPA filters, or issues with room pressurization. Facilities are designed with specific air change per hour rates (e.g., 15-72 ACH) and pressure differentials to prevent contamination; a failure can lead to excursions [41].
- Review Recent Maintenance: Check logs for any recent maintenance work in or near the cleanroom that could have disturbed particulate levels [41].
- Solution:
- Perform a root cause analysis based on the findings.
- Increase the frequency of non-viable and viable particle monitoring until the environment is stable.
- If a facility issue is identified, contact facilities management and recertify the cleanroom.
Guide 3: Handling Ineffective Traditional Microbial Identification
- Problem: Slow or inconclusive identification of microbial contaminants using traditional phenotypic methods.
- Investigation Steps:
- Evaluate Regulatory Alignment: Note that regulatory agencies prioritize genotypic identification methods as more reliable for species-level identification, which is often a minimum requirement [42].
- Consider Method Limitations: Traditional methods may require pure culture isolation, which is time-consuming and may not identify all species in a mixed sample [40].
- Solution:
- Implement rapid genotypic identification systems, such as the Applied Biosystems MicroSEQ Rapid Microbial Identification System, which uses PCR and DNA sequencing for highly accurate results [42].
- Adopt metagenomic sequencing for precise tracing. This culture-independent method allows for the simultaneous identification of all microorganisms on a sample plate without the need for pure culture isolation, providing a comprehensive overview for root cause analysis [40].
Frequently Asked Questions (FAQs)
FAQ 1: What are the key components of an effective Environmental Monitoring (EM) program for a cell therapy clean room?
A comprehensive EM program includes viable (living microorganisms) and non-viable (non-living particles) air particle monitoring, surface monitoring (e.g., RODAC plates), personnel monitoring, and temperature and humidity controls [41]. The program should be based on a risk assessment that considers factors like facility layout, equipment placement, and personnel flow [41].
FAQ 2: How can a risk-based approach be applied to environmental monitoring sampling?
A risk-based strategy involves tailoring the type, frequency, and location of samples to the risk posed to the product. This includes:
- Sampling Location: Placing samples in high-risk areas such as biosafety cabinets (Grade A), worktables, floors near critical operations, and locations with high personnel traffic [40] [41].
- Sampling Frequency: Monitoring more frequently during dynamic operations (when personnel are present) than during static conditions [41].
- Personnel Focus: Including hand swabs and fingertip sampling as personnel are a primary contamination vector [40].
FAQ 3: What is the role of metagenomic sequencing in environmental monitoring?
Metagenomic sequencing moves beyond traditional culture methods by allowing for the simultaneous identification of all microorganisms in a sample without the need for prior isolation [40]. This provides a powerful tool for:
- Accurate Tracing: Precisely identifying the species of all contaminants for root cause analysis.
- Resistance Gene Profiling: Understanding the genetic basis of microbial resistance to disinfectants, which can inform the selection of more effective cleaning agents [40].
- Microbial Community Analysis: Gaining insights into the overall diversity and function of the microbial population in the cleanroom [40].
FAQ 4: What are the common pitfalls in contamination control for cell therapy facilities?
Common challenges include:
- The "Human Factor": The manual, labor-intensive nature of cell therapy production increases contamination risk from personnel [11].
- Right First Time Criticality: Unlike some pharmaceuticals, most cell therapy products cannot be sterilized or reworked, making contamination prevention paramount [11].
- Starting Material Variability: In autologous therapies, the patient's starting material can have variable and unknown microbial bioburden, adding complexity [43].
Table 1: Microbial Distribution and Resistance Findings in a Cell Therapy Clean Room (CTCR)
| Sampling Category | Predominant Genus Identified | Notable Resistance Finding | Proposed Control Measure |
|---|---|---|---|
| Surface Subgroups | Bacillus [40] | Significant variation in resistance patterns between different equipment types [40] | Tailored disinfection protocols for different surface types [40] |
| Transfer Windows | Not Specified | Notably higher resistance to hydrogen peroxide [40] | Review and potentially rotate disinfectants used on transfer windows [40] |
| Personnel (Hands) | Not Specified | Significant microbial differences compared to other Grade B surfaces [40] | Enhance hand hygiene protocols and training [40] [11] |
Table 2: Key Components of a cGMP Cleanroom Environmental Monitoring Program [41]
| Monitoring Type | Method Example | Typical Frequency | Purpose |
|---|---|---|---|
| Non-Viable Particles | Particle Counter | Weekly (Static & Dynamic) | Verifies control over non-living particles and air change effectiveness [41] |
| Viable Air Particles | Air Sampler (e.g., 1000L onto RODAC plate) | Weekly (Static & Dynamic) | Quantifies and identifies living microorganisms in the air [41] |
| Surface Monitoring | RODAC Contact Plates | Weekly | Verifies microbial levels on equipment, tables, and floors [41] |
| Personnel Monitoring | Finger Tips, Garments | Each manufacturing session | Monitors the microbial load introduced by operators [40] [41] |
Experimental Protocols
Protocol 1: Surface Sampling using the Swab Method
Purpose: To collect microorganisms from surfaces for subsequent culture and/or metagenomic analysis [40].
Materials:
- Sterile swabs
- Sterile elution fluid (e.g., phosphate-buffered saline or composite neutralizing fluid)
- Template (5 cm x 5 cm for surfaces ≥100 cm²)
- Sterile tubes
Methodology:
- For surfaces ≥100 cm²: Place a sterile template on the surface. Moisten a sterile swab with elution fluid [40].
- Swab the area within the template thoroughly, moving vertically and horizontally at least five times each while rotating the swab [40].
- For surfaces <100 cm² or irregular shapes: Swab the entire surface with a moistened swab without a template [40].
- Aseptically break off the swab tip into a tube containing 10 mL of elution fluid.
- Seal the tube and vortex vigorously for at least 30 seconds to elute microorganisms [40].
- Inoculate culture medium immediately or process for DNA extraction.
Protocol 2: Viable Air Sampling using an Active Air Sampler
Purpose: To quantitatively assess the number of viable microorganisms in the cleanroom air [41].
Materials:
- Airborne microorganism sampler (e.g., SAS Super 100)
- RODAC plates with tryptic soy agar
Methodology:
- Place a RODAC plate into the sampler.
- Set the sampler to aspirate a defined volume of air (e.g., 1000 liters) at designated sampling points throughout the facility [40] [41].
- The sampler directs a laminar flow of air onto the agar surface, impinging any viable particles.
- Remove the plate, seal, and incubate at 30-35°C for 5-7 days [40] [41].
- Quantify the colony-forming units (CFUs) and identify the microorganisms.
Workflow and Relationship Diagrams
The Scientist's Toolkit
Table 3: Essential Research Reagent Solutions for Environmental Monitoring
| Item | Function |
|---|---|
| RODAC Plates | Replicate Organism Detection and Counting (RODAC) plates with tryptic soy agar are used for surface and viable air monitoring to culture and quantify bacteria and fungi [41]. |
| Composite Neutralizing Elution Fluid | Used to neutralize residual disinfectants on swabs after surface sampling, ensuring that any microorganisms present are not killed before culture, thus providing accurate results [40]. |
| MicroSEQ Rapid Microbial ID System | A genotypic identification system that combines PCR and DNA sequencing for highly accurate, rapid microbial identification from environmental isolates, supporting root cause analysis [42]. |
| Metagenomic Sequencing Kits | Kits for microbiome DNA extraction and library preparation enable culture-independent analysis of entire microbial communities from an environmental sample, providing a comprehensive contamination profile [40]. |
Frequently Asked Questions (FAQs)
FAQ 1: What are the primary contamination risks in cell therapy manufacturing? Contamination can be introduced through several sources, with the human operator being a primary risk, shedding hair and skin cells, and carrying microorganisms. Other significant risks include the air in the environment, contaminated equipment surfaces, water used in cleanrooms, and the materials used in the process, such as cells, media, and supplements. The risk is magnified during any transfer of materials in or out of an otherwise closed system [5].
FAQ 2: Why is manual decontamination considered high-risk for cell therapies? Manual processes, such as spraying, mopping, and wiping with disinfectants, are inherently operator-dependent. This introduces variability, as each person may perform the cleaning differently, leading to inconsistent coverage and effectiveness. Validating these protocols is difficult due to this human element, making manual methods less reliable and robust for ensuring sterility [5].
FAQ 3: What are the key advantages of automated decontamination systems? Automated decontamination provides consistency and repeatability, as the same conditions are replicated exactly in every cycle. This makes the process easier to validate. It also reduces disinfection time and production downtime, requires less operator resource, and lowers health risks to personnel by minimizing exposure to disinfectants [5].
FAQ 4: How does facility design and isolator technology reduce contamination risk? Isolators are fully sealed containment devices that physically separate the operator from the manufacturing environment, maintaining an ISO Class 5 aseptic workspace even within a non-classified hospital room. This is a significant advantage over open biosafety cabinets. Using closed systems like isolators or Restricted Access Barrier Systems (RABS) allows for production in lower-grade cleanrooms (e.g., Grade C) while maintaining high sterility assurance, reducing both cost and contamination risk [24] [44].
FAQ 5: What is a Contamination Control Strategy (CCS) and why is it critical? A Contamination Control Strategy (CCS) is a holistic and proactive approach to identifying, evaluating, and controlling potential risks to product quality and patient safety. It is now a regulatory expectation. A comprehensive CCS encompasses facility design, raw material handling, personnel behavior, process validation, and ongoing environmental monitoring, and is integrated throughout the entire product lifecycle [24].
Troubleshooting Guides
Issue 1: Recurring Low-Level Bioburden in Environmental Monitoring
Problem: Environmental monitoring samples consistently show low-level microbial contamination, though not yet at an action level.
| Possible Cause | Investigation Steps | Corrective and Preventive Actions |
|---|---|---|
| Ineffective manual disinfection | - Review and validate disinfectant contact times and coverage.- Audit operator gowning and aseptic technique. | - Transition to automated decontamination (e.g., Vaporized Hydrogen Peroxide) for rooms or isolators between campaigns [5].- Implement repeated training and competency assessments for staff. |
| Compromised cleanroom integrity | - Check HEPA filter certifications and integrity.- Perform room pressure differential mapping. | - Engage facilities team to rectify filter or pressure issues.- Increase the frequency of environmental monitoring in affected areas. |
Issue 2: Contamination of a Critical Cell Therapy Batch
Problem: A batch of cell therapy, particularly an autologous product, is found to be contaminated, risking patient treatment.
| Possible Cause | Investigation Steps | Corrective and Preventive Actions |
|---|---|---|
| Breach in aseptic connection | - Review batch records and video footage (if available) of the manufacturing process.- Test the integrity of sterile connectors and tubing welds. | - Implement closed-system processing with sterile, pre-assembled tube kits and welded connections [24] [45].- Utilize isolator technology with integrated rapid transfer ports to minimize open manipulations [44]. |
| Human error during open process steps | - Interview operators to identify any deviations from SOPs. | - Invest in automated, closed, and modular manufacturing solutions that reduce manual handling [46] [45].- For POC manufacturing, deploy isolator-based systems to perform the entire workflow in a sealed environment [44]. |
Quantitative Data Comparison: Decontamination Methods
Table 1: Comparison of Manual vs. Automated Decontamination Key Characteristics
| Characteristic | Manual Decontamination | Automated Decontamination |
|---|---|---|
| Consistency & Repeatability | Low (Operator-dependent) [5] | High (Pre-programmed cycles) [5] |
| Validation Ease | Difficult due to human variability [5] | Easier to validate due to reproducible conditions [5] |
| Capital Investment | Low [5] | High [5] |
| Operational Costs & Downtime | Higher labor costs and longer downtime [5] | Reduced labor and shorter cycle times [5] |
| Operator Safety | Higher risk of exposure to disinfectants [5] | Lower risk by minimizing exposure [5] |
| Efficacy against Spores | Dependent on disinfectant choice and application | Highly effective with methods like VHP [5] |
Table 2: Efficacy Comparison of Decontamination Methods for Laparoscopes (Relevant to Equipment Cleaning) [47]
| Decontamination Method | Qualified Rate vs. Manual Cleaning (Risk Ratio) | Detection Method Used |
|---|---|---|
| Alkaline Multi-Enzyme + Ultrasonic Cleaning | RR = 1.07 (95% CI: 1.02–1.13) | Visual Inspection |
| Alkaline Multi-Enzyme + Ultrasonic Cleaning | RR = 1.12 (95% CI: 1.02–1.23) | Occult Blood Test |
| Automatic Reprocessing Machines | RR = 1.08 (95% CI: 1.01–1.16) | Visual Inspection |
Table 3: Comparison of Leading Automated Decontamination Technologies [5]
| Method | Key Advantages | Key Disadvantages |
|---|---|---|
| UV Irradiation | Fast; no need to seal enclosure | Prone to shadowing; may not kill spores; efficacy decreases with distance. |
| Chlorine Dioxide | Highly effective microbial kill; can be fast | Highly corrosive; high consumables cost; high toxicity requires building evacuation. |
| Aerosolized Hydrogen Peroxide | Good material compatibility | Liquid droplets prone to gravity; relies on line-of-sight; longer cycle times. |
| Vaporized Hydrogen Peroxide (VHP) | Excellent distribution and material compatibility; quick cycles with active aeration; safe with low-level sensors [5] | - |
Experimental Protocols for Decontamination Validation
Protocol 1: Validating a Manual Disinfection Regimen
Objective: To demonstrate that a manual wiping procedure with a specified disinfectant effectively reduces microbial bioburden on a defined surface.
- Surface Inoculation: Inoculate a defined area (e.g., 10cm x 10cm) of a representative surface (e.g., stainless steel) with a known titer (e.g., 10^6 CFU) of a challenge organism (e.g., Escherichia coli or Bacillus subtilis spores).
- Drying: Allow the inoculum to dry completely under controlled conditions.
- Disinfection: Have a trained operator perform the disinfection procedure exactly as per the SOP, using the specified disinfectant and contact time.
- Neutralization & Recovery: Immediately after the contact time, use a neutralization solution to stop the disinfectant's action. Recover microorganisms from the surface using contact plates or swabs.
- Incubation and Enumeration: Incubate the plates and enumerate the surviving CFUs. Calculate the log reduction compared to a non-disinfected control surface.
Protocol 2: Qualifying an Automated VHP Decontamination Cycle
Objective: To validate that a Vaporized Hydrogen Peroxide cycle provides a uniform and effective sporicidal decontamination throughout an isolator or room.
- Biological Indicator (BI) Placement: Place geobacillus stearothermophilus BIs (highly resistant spores) at predetermined locations throughout the chamber, including worst-case locations (e.g., farthest from the vapor generator, behind obstacles).
- Cycle Execution: Run the complete VHP decontamination cycle according to the established parameters.
- BI Processing: After cycle completion and aeration, recover the BIs and incubate in culture media.
- Results Interpretation: A successful validation requires no growth in all BIs after incubation, demonstrating a 6-log reduction of the highly resistant spores, proving the cycle's efficacy.
Decision Workflow for Selecting a Decontamination Strategy
The following diagram outlines a logical process for evaluating and selecting the appropriate decontamination method based on key criteria.
The Scientist's Toolkit: Essential Reagents & Materials
Table 4: Key Reagents and Materials for Effective Contamination Control
| Item | Function & Application |
|---|---|
| Sporicidal Disinfectants | Used for manual and automated decontamination to eliminate bacterial spores, the most resistant microbial form. Critical for areas requiring high sterility assurance [5]. |
| Vaporized Hydrogen Peroxide (VHP) Generators | Equipment that produces a dry VHP vapor for automated room or isolator decontamination. Provides excellent material compatibility and distribution, effectively reaching all exposed surfaces [5]. |
| Biological Indicators (BIs) | Strips or vials containing a known population of bacterial spores (e.g., Geobacillus stearothermophilus). Used to validate the efficacy of sterilants and decontamination cycles by confirming a defined log reduction [5]. |
| Sterile Single-Use Connectors & Tubing | Pre-sterilized, closed-system components that allow for the aseptic transfer of fluids and cells. They significantly reduce contamination risk compared to manual connections in open air [24] [45]. |
| Environmental Monitoring Kits | Includes contact plates, swabs, and air samplers to routinely monitor microbial and particulate levels in the manufacturing environment. Essential for trending data and early detection of contamination concerns [5]. |
Comparative Analysis of Automated Decontamination Methods (VHP, UV, Aerosols)
In the field of cell therapy manufacturing, maintaining an aseptic environment is paramount to ensuring product safety and efficacy. Automated, "no-touch" decontamination technologies provide a critical layer of contamination control beyond manual cleaning, effectively reducing the risk of microbial contamination from environmental surfaces and equipment [48] [49]. These methods are particularly valuable for sterilizing cleanrooms, biosafety cabinets, and processing equipment where manual disinfection may be inconsistent or insufficient. This technical support center focuses on three prominent automated technologies—Vaporized Hydrogen Peroxide (VHP), Ultraviolet-C (UV-C) irradiation, and Aerosolized Hydrogen Peroxide (aHP)—providing comparative analysis, troubleshooting guidance, and experimental protocols to support their implementation in reducing contamination risk.
Fundamental Principles and Mechanisms
Vaporized Hydrogen Peroxide (VHP): VHP systems convert liquid hydrogen peroxide (typically 30%-59% concentration) into a vapor state using thermal energy. The vapor distributes uniformly throughout the treated space, penetrating hard-to-reach areas. Its mechanism of action involves the generation of hydroxyl free radicals that oxidize and destroy essential cellular components of microorganisms, including lipids, proteins, and DNA [50] [51]. VHP operates in a dry, micro-condensing process, which enhances material compatibility compared to wet methods.
Hybrid Hydrogen Peroxide (HHP): A modern variation, HHP utilizes a lower concentration (7%) hydrogen peroxide solution, combining unheated vapor and micro-aerosols. Patented Pulse technology maintains optimal vapor concentrations throughout the cycle by replenishing spent hydrogen peroxide, ensuring consistent dwell time and efficacy while using less concentrated chemistry [52] [53].
Aerosolized Hydrogen Peroxide (aHP): aHP systems generate a dry mist or fog of hydrogen peroxide solution (typically 5%-12% concentration) through pressure-based atomizers, producing droplet sizes between 0.5-30 micrometers. Some systems incorporate additives like silver ions or peracetic acid to enhance efficacy, though these may raise concerns about residues and material compatibility [52] [54].
Ultraviolet-C (UV-C) Radiation: UV-C devices emit germicidal ultraviolet light in the 200-280 nm wavelength range, with 254 nm being most common. This radiation inactivates microorganisms by creating pyrimidine dimers in DNA and RNA, disrupting replication and metabolic processes. UV-C is a line-of-sight technology, meaning it only directly treats surfaces visible to the light source [55] [48] [49].
Quantitative Performance Comparison
Table 1: Comparative Efficacy of Automated Decontamination Technologies
| Technology | Log Reduction (Spores) | Pathogen Validation | Cycle Time | Material Compatibility |
|---|---|---|---|---|
| VHP | 6-log [52] | Spores, viruses, bacteria including C. diff [48] | 1.5-8 hours [50] | Good with electronics; may damage some plastics/rubbers with repeated use [52] |
| HHP | 6-log [52] [53] | Spores, non-enveloped viruses (7-10 log), SARS-CoV-2 [52] [53] | ~30 minutes for 6-log reduction [52] | Excellent; low corrosion risk due to 7% H₂O₂ concentration [52] [53] |
| aHP | 4-6-log [52] | Limited peer-reviewed sporicidal data [52] | 2-3 hours [50] | Variable; potential residue issues with additive-containing formulations [52] |
| UV-C | 1-4-log (depending on organism and exposure) [49] | Bacteria, viruses; less effective against spores [55] [49] | 5-90 minutes (varies by device and dose) [55] [49] | Excellent; no chemical residues, but may degrade some plastics with prolonged exposure [55] |
Table 2: Operational and Safety Characteristics
| Parameter | VHP | HHP | aHP | UV-C |
|---|---|---|---|---|
| H₂O₂ Concentration | 30%-59% [50] | 7% [52] [53] | 5%-12% [52] [54] | Not applicable |
| Chemical Residue | None (breaks down to water/oxygen) [48] | None [53] | Possible residues with additive-containing solutions [52] | None |
| Staff Safety Requirements | High (respiratory irritation risk) [48] | Moderate (lower concentration) [52] | Moderate | High (eye/skin damage risk from direct exposure) [55] |
| Room Re-entry Time | Several hours [48] | Short (lower ppm) [52] | Moderate | Immediate after cycle completion |
| Distribution Method | Vapor (0.1-1 μm) [54] | Vapor + micro-aerosols [52] | Aerosol/mist (0.5-30 μm) [52] | Electromagnetic radiation |
Decision Framework for Technology Selection
The following workflow diagram illustrates the logical decision process for selecting the appropriate decontamination technology based on specific application requirements:
Diagram 1: Decontamination Technology Selection Workflow
The Scientist's Toolkit: Essential Research Reagents and Materials
Table 3: Key Materials for Decontamination Validation Studies
| Item | Function | Application Notes |
|---|---|---|
| Geobacillus stearothermophilus spores | Biological Indicator for vapor methods [52] [54] | Gold standard for validating 6-log sporicidal reduction; ATCC 12980 [54] |
| Bacillus atrophaeus spores | Biological Indicator for vapor methods [54] | Alternative spore for validation; ATCC 9372 [54] |
| Hydrogen Peroxide Chemical Indicators | Visual verification of H₂O₂ distribution [54] | Color-changing cards confirm sufficient vapor exposure; qualitative assessment |
| Electrochemical H₂O₂ Sensors | Real-time concentration monitoring [54] | DrägerSensor H₂O₂ HC; verifies ppm levels during cycles and safe re-entry |
| Tryptic Soy Broth (TSB) | Culture medium for biological indicators [54] | Recovery medium for spores post-exposure; incubated at 56°C for G. stearothermophilus |
| Temperature/Humidity Probes | Environmental monitoring [54] | LABGUARD or equivalent; critical as RH and temperature affect H₂O₂ efficacy |
| ATP Bioluminescence Meters | Surface cleanliness verification [48] | Quantitative measurement of organic residue pre/post decontamination |
Frequently Asked Questions (FAQs) and Troubleshooting Guides
Technology Selection and Implementation
Q1: Which decontamination method provides the most reliable 6-log sporicidal efficacy for regulatory compliance in cell therapy manufacturing?
Vaporized Hydrogen Peroxide (VHP) and Hybrid Hydrogen Peroxide (HHP) technologies have the strongest validation records for consistent 6-log sporicidal efficacy required in regulated environments [52]. VHP has the most extensive published data supporting its use [50] [56], while HHP offers the advantage of similar efficacy with lower chemical concentration (7% vs. 35%-59% for traditional VHP), potentially enhancing material compatibility and staff safety [52] [53]. When selecting between these technologies, consider that VHP has longer regulatory track record, while HHP may offer operational advantages through faster cycle times and reduced chemical handling concerns.
Q2: Can UV-C technology be used as the sole method for terminal decontamination in cell therapy cleanrooms?
UV-C should not be used as the sole decontamination method in critical areas. While effective for surface disinfection against vegetative bacteria and viruses, UV-C has limitations against bacterial spores and achieves variable log reductions (typically 1-4 log) depending on organism type, organic load, and exposure parameters [49]. Additionally, its line-of-sight nature means shadowed areas receive inadequate treatment [48]. For comprehensive contamination control, UV-C is best deployed as an adjunct to chemical methods like VHP/HHP or to maintain disinfection between comprehensive decontamination cycles.
Q3: What are the primary factors causing inconsistent decontamination results with hydrogen peroxide systems?
Inconsistent results typically stem from four main factors:
- Improper environmental conditions: Hydrogen peroxide efficacy is highly dependent on relative humidity (optimal 45%-50% initial RH) and temperature [54].
- Inadequate concentration or distribution: Ensure proper system calibration and that the space is adequately sealed to maintain effective H₂O₂ concentrations.
- Insufficient contact time: Biological indicators may not be fully inactivated if the contact phase is truncated prematurely.
- Organic load interference: High levels of organic soil can protect microorganisms from decontamination agents [49].
Operational Challenges and Solutions
Q4: How can we safely implement hydrogen peroxide decontamination with sensitive laboratory electronics present?
Both VHP and HHP technologies are classified as dry processes and are generally compatible with electronics when used as directed [53] [51]. However, precautions should include:
- Verifying material compatibility with specific equipment manufacturers
- Ensuring proper aeration cycles are complete before reactivating equipment
- Considering HHP with its lower concentration (7%) for enhanced material compatibility [52] [53]
- Documenting validation runs with biological indicators placed near sensitive equipment
Q5: What validation approach should we use to demonstrate decontamination efficacy for regulatory audits?
A comprehensive validation approach should include:
- Strategic placement of biological indicators: Position G. stearothermophilus spores at challenging locations throughout the space (corners, behind equipment, inside cabinets) [54].
- Chemical indicator integration: Use color-change indicators to verify hydrogen peroxide distribution to all areas [54].
- Cycle parameter documentation: Record and archive time, temperature, humidity, and H₂O₂ concentration data for each cycle [54].
- Pre- and post-environmental monitoring: Compare surface and air samples before and after decontamination cycles.
- Multiple cycle repetition: Demonstrate consistent efficacy across at least three consecutive cycles.
Q6: Why does our hydrogen peroxide concentration fall below target levels during decontamination cycles?
This problem typically indicates one of three issues:
- Inadequate room sealing: Check door seals, cable penetrations, and ceiling tiles where vapor may escape.
- Excessive air changes: HVAC systems may need to be disabled or sealed during decontamination.
- Catalytic surfaces: Certain building materials or exposed metals can accelerate H₂O₂ breakdown. Troubleshoot by performing a leak test with smoke sticks, verifying HVAC shutdown, and using chemical indicators to identify areas of premature H₂O₂ decomposition.
Experimental Protocols for Decontamination Validation
Standard Operating Procedure for VHP/HHP System Validation
Objective: To validate the efficacy of vapor-phase hydrogen peroxide decontamination systems using biological indicators.
Materials:
- VHP or HHP generator and compatible hydrogen peroxide solution
- Geobacillus stearothermophilus biological indicators (106 spores/carrier)
- Hydrogen peroxide chemical indicators
- Temperature and humidity data loggers
- H₂O₂ concentration sensor (e.g., DrägerSensor)
- Tryptic Soy Broth (TSB) and incubation equipment
Procedure:
- Pre-conditioning Phase: Adjust room relative humidity to 45%-50% if necessary using dehumidification equipment [54].
- Biological Indicator Placement: Position biological indicators at predetermined challenging locations (minimum 20 sites for a standard room), including shadowed areas, inside equipment, and farthest from the generator [54].
- Chemical Indicator Placement: Distribute chemical indicators adjacent to biological indicators to verify H₂O₂ distribution.
- System Setup: Position the generator centrally, ensure room is properly sealed, and activate environmental monitoring equipment.
- Cycle Execution: Initiate the decontamination cycle according to manufacturer instructions, typically consisting of:
- Conditioning phase (~20 minutes)
- Generation phase (~8-15 minutes)
- Exposure phase (120+ minutes)
- Aeration phase (60-90 minutes) [54]
- Cycle Monitoring: Document H₂O₂ concentrations, temperature, and humidity throughout the cycle.
- Post-cycle Processing: After H₂O₂ concentrations fall below 1 ppm, retrieve biological indicators aseptically.
- Culture and Incubation: Transfer biological indicators to TSB and incubate at 56°C for 7 days alongside positive and negative controls [54].
- Results Interpretation: Compare test cultures with controls. No growth in test samples with growth in positive controls indicates successful decontamination.
Validation Criteria: All biological indicators must show no growth after incubation to demonstrate 6-log sporicidal reduction.
Comparative Efficacy Testing Protocol
Objective: To compare the efficacy of different decontamination technologies under standardized conditions.
Materials:
- Multiple decontamination systems (VHP, HHP, aHP, UV-C)
- Standardized biological indicators (G. stearothermophilus)
- Identical test chambers or similarly configured rooms
- Environmental monitoring equipment
- Culture media and incubation equipment
Procedure:
- Standardized Inoculation: Place identical biological indicators in standardized positions across all test environments.
- Parameter Standardization: Maintain consistent initial temperature (20-25°C) and relative humidity (45%-50%) across all tests.
- Cycle Execution: Run each decontamination system according to manufacturer instructions for recommended cycle times.
- Post-treatment Analysis: Retrieve and culture all biological indicators using identical methods.
- Quantitative Assessment: Record log reduction based on the number of inactivated biological indicators and quantitative culture results when applicable.
- Statistical Analysis: Compare results across technologies using appropriate statistical methods.
This protocol enables direct comparison of decontamination technologies and helps identify the optimal system for specific applications in cell therapy manufacturing environments.
Selecting the appropriate automated decontamination technology requires careful consideration of efficacy, material compatibility, operational efficiency, and regulatory requirements. For cell therapy manufacturing where contamination control is critical, VHP and HHP technologies offer the most reliable sporicidal efficacy, with HHP providing additional advantages in material compatibility and cycle time. UV-C serves as an effective adjunct technology but lacks the comprehensive coverage and sporicidal efficacy needed for primary terminal decontamination. A robust validation approach using biological indicators and comprehensive documentation ensures that these technologies effectively mitigate contamination risks in sensitive manufacturing environments.
Troubleshooting Contamination Events and Optimizing Operational Excellence
Frequently Asked Questions (FAQs)
Q1: Our lab uses strict aseptic technique, but we still experience recurring bacterial contamination, with media showing turbidity and pH decrease. What could be the source? [37]
This is a common issue where the source often isn't the technique itself but the shared environment. Regular maintenance and cleaning of biosafety cabinets and incubators are critical. You should: [37]
- Clean incubators with appropriate disinfectants (e.g., Lysol, 70% EtOH) at least once a month and autoclave the shelves. [37]
- Clean water trays often using autoclaved, distilled water and clean any spills immediately. [37]
- Perform daily cleaning of the biosafety cabinet space with 70% ethanol, supplemented by a monthly cleaning with a 10% bleach solution. [37]
Q2: How can we spot mycoplasma contamination, which is known to be invisible to the naked eye? [37]
Mycoplasma contamination does not cause turbidity but can alter cell behavior, morphology, and function. [57] [58] Detection requires specific testing: [57] [37]
- Fluorochrome DNA staining tests (e.g., Hoechst stain) followed by fluorescence microscopy. [37]
- PCR-based mycoplasma tests, which are highly sensitive. [37] These tests can be performed in your lab, or samples can be sent to an external testing facility.
Q3: Is it a good practice to use antibiotics in long-term cell cultures to prevent contamination? [37]
While used preventively, antibiotics can induce changes in cell gene expression and regulation, potentially compromising your experimental data. It is important to evaluate the effect of antibiotics on your specific cell culture outcome. Their use is generally discouraged for routine culture, as they can mask low-level contamination. Recommendations suggest evaluating the use of antibiotics on a case-by-case basis. [37]
Q4: What should we do if we discover a culture is contaminated? [57]
The response differs between research and GMP environments, but key steps include: [57]
- Immediate Disposal: Safely dispose of the contaminated culture according to biosafety guidelines.
- Decontaminate: Thoroughly decontaminate all affected areas, including lab surfaces, incubators, and equipment.
- Investigate: Identify the contamination type using microscopy, PCR, or other assays.
- Review Practices: Reevaluate lab practices, retrain personnel if necessary, and verify that stock cell lines and reagents are not contaminated.
Q5: We do not see obvious signs of contamination, but our culture media is depleting much faster than expected. Should we test for contamination? [37]
Yes. While evaporation could cause media volume loss, rapid nutrient depletion can be a sign of contamination. You should: [37]
- Check the CO₂ and water levels in your incubator.
- Perform quick tests for common, low-visibility contaminants:
- Mycoplasma: Use a Hoechst stain or PCR test.
- Bacteria: Look for visual turbidity and check media pH.
- Endotoxin: Use a Limulus Amoebocyte Lysate (LAL) assay.
Troubleshooting Guide: Common Contaminants and Corrective Actions
The table below summarizes the common types of cell culture contamination, their key characteristics, and recommended investigative and corrective actions. [57]
Table 1: Guide to Cell Culture Contamination Types and Initial Responses
| Contaminant Type | Key Characteristics | Detection Methods | Immediate Corrective Actions |
|---|---|---|---|
| Bacterial | Rapid pH shift (media turns yellow), cloudy/turbid media, possible cell death. [57] | Light microscopy (may see moving bacteria), visual inspection. [59] | Dispose of culture. Decontaminate workspace and incubator. Review aseptic technique and reagent sterility. [57] |
| Fungal/Yeast | Visible filaments (mold) or turbidity (yeast), slower progression than bacteria. [57] | Visual inspection, light microscopy. | Dispose of culture. Perform deep cleaning of incubator and biosafety cabinet. Check air filtration systems. [57] |
| Mycoplasma | No visible change in media; alters cell metabolism, gene expression, and growth. [57] [58] | PCR, fluorochrome DNA staining (Hoechst), ELISA. [57] [37] | Difficult to eradicate; often requires disposal. If invaluable, attempt decontamination with specialized antibiotics, but validate recovered cells thoroughly. [37] |
| Viral | No immediate visible changes; can alter cellular metabolism and pose patient safety risks. [57] | PCR, in vitro assays, transcriptomic analysis. | Quarantine and dispose of affected culture. Use virus-inactivated biological materials (e.g., serum) for prevention. [57] |
| Cross-Contamination | Unusual cell morphology or growth rate; misidentification of cell line. [57] | Cell line authentication (e.g., STR profiling). | Implement strict labelling protocols. Use dedicated reagents per cell line. Regularly authenticate cell stocks. [57] |
Experimental Protocols for Contamination Detection
Protocol 1: Detection of Mycoplasma by Fluorescent Staining
This protocol uses a DNA-binding dye to detect mycoplasma DNA, which adheres to the surface of infected cells. [37]
Key Research Reagent Solutions: [57] [37]
- Hoechst Stain: A cell-permeable fluorescent dye that binds to DNA in the minor groove.
- Fixative Solution: Typically a mixture of acetic acid and methanol (e.g., Carnoy's fixative).
- Mounting Medium: An anti-fade solution to preserve fluorescence.
Methodology:
- Seed Cells: Grow cells on sterile glass coverslips in a culture dish until sub-confluent.
- Fix Cells: Aspirate media and rinse cells gently with PBS. Add fixative solution to cover the cells and incubate for 10-15 minutes at room temperature.
- Stain: Aspirate fixative and rinse with PBS. Add Hoechst stain solution (diluted as per manufacturer's instructions) and incubate in the dark for 10-30 minutes.
- Rinse and Mount: Aspirate the stain and rinse thoroughly with PBS to remove unbound dye. Mount the coverslip on a glass slide with mounting medium.
- Visualize: Observe under a fluorescence microscope with a DAPI filter set. Uninfected cells will show only the bright, condensed DNA of the nucleus. Mycoplasma-contaminated cells will show a particulate or filamentous blue-fluorescence throughout the cytoplasm and on the cell surface.
Protocol 2: Microbial Sterility Testing
This protocol is used to detect bacterial and fungal contamination in cell culture media or samples.
Key Research Reagent Solutions: [37]
- Tryptic Soy Broth (TSB): A general-purpose growth medium for a wide range of bacteria.
- Sabouraud Dextrose Broth (SDB): A medium optimized for the growth of fungi and yeasts.
- Sterile PBS or Saline: For sample dilution.
Methodology: [37]
- Sample Collection: Aseptically collect a sample of the cell culture supernatant.
- Inoculation: Inoculate the sample into two tubes each of TSB and SDB.
- Incubation: Incubate the broths at two different temperatures: 37°C to support the growth of mesophilic bacteria, and 25°C (room temperature) to support the growth of fungi and environmental bacteria. [37]
- Observation: Observe the tubes daily for 14 days for any signs of turbidity, which indicates microbial growth. [37]
- Confirmation: If turbidity appears, sub-culture onto solid agar plates to isolate and identify the specific contaminant.
Root Cause Analysis Workflow and Detection Pathways
When a contamination event occurs, a systematic investigation is crucial. The diagram below outlines a logical workflow for performing a root cause analysis.
Figure 1: A logical workflow for conducting a root cause analysis following a contamination event.
The following diagram illustrates the primary methodological pathways for detecting the most common and elusive biological contaminants in cell culture.
Figure 2: Key experimental pathways for detecting different types of cell culture contaminants.
Optimizing Staff Training and Aseptic Technique in Native Languages
In cell therapy manufacturing, where products cannot be terminally sterilized, aseptic technique is the cornerstone of product safety and efficacy. Contamination can compromise entire production batches, leading to catastrophic therapeutic failures and potential patient harm. Research and incident analyses consistently identify the human operator as the most significant variable and potential contamination risk in aseptic processes [9]. This technical support center is designed within the broader thesis of systemic contamination risk reduction. Its core premise is that effective training—delivered in a practitioner's native language to ensure flawless comprehension—is not merely a regulatory formality but a critical engineering control in a robust contamination control strategy [60] [9].
Frequently Asked Questions (FAQs)
FAQ 1: Why is training in a staff member's native language so critical for contamination control, beyond simple comprehension? High-stakes, complex procedures require not just understanding but instinctual application. When instructions are processed in a second language, even with good proficiency, cognitive load increases. This can slow reaction times and heighten the likelihood of error during critical steps. Training in a native language ensures that sophisticated concepts and subtle procedural nuances are deeply internalized, transforming learned protocols into reflexive, correct actions under pressure [9].
FAQ 2: What are the most common, yet often overlooked, sources of contamination introduced by personnel in a cell culture lab? Beyond obvious breaches, common oversights include:
- Talking, whistling, or singing near open cultures [61].
- Inadequate gowning, where sleeves or gloves can brush against non-sterile surfaces immediately before handling sterile materials.
- Improper handling of caps; placing cap interiors face-down on a non-sterile surface is a frequent mistake [61].
- Working too quickly, creating turbulent airflow that can disrupt the sterile field [60].
- Jewelry and long nails, which can trap bacteria and compromise even proper hand hygiene [60].
FAQ 3: How often should aseptic technique be re-trained and assessed? Aseptic technique competency is not a one-time certification. Skills can degrade over time. Routine, periodic training and assessment are essential to maintain high standards [9]. Furthermore, re-training should be mandatory following any contamination event investigation that points to personnel technique as a root cause, and after any significant updates to standard operating procedures (SOPs).
FAQ 4: In a Grade A environment, what is the acceptable limit for non-viable particles ≥ 0.5 µm during operation, and why is continuous monitoring crucial? The EU GMP Annex 1 limit for non-viable particles ≥ 0.5 µm in a Grade A zone during operation is 3,520 per cubic meter [62]. Continuous monitoring is vital because it moves beyond "spot-checking" to real-time event detection. It can instantly capture and alarm on transient incidents like a momentary disruption in airflow from a rapid movement, a equipment malfunction generating particles, or a failed intervention, allowing for immediate corrective action [62].
Troubleshooting Guides
Problem 1: Recurring Microbial Contamination in Cell Cultures
This guide addresses systemic biological contamination issues.
| Observation | Possible Root Cause | Corrective & Preventive Actions |
|---|---|---|
| Widespread bacterial/fungal contamination | Inadequate hand hygiene; contaminated PPE; poor sterile field discipline [60] [61]. | Corrective: Discard contaminated culture. Review handwashing technique video with trainer. Preventive: Implement video-monitored hand hygiene audits. Enhance training on "no-touch" techniques within the biosafety cabinet [61]. |
| Contamination in specific batches linked to one operator | Insufficient comprehension of SOPs; technique error during a specific step (e.g., pipetting, flask cap handling) [9]. | Corrective: Conduct one-on-one retraining in the operator's native language, focusing on the problematic step. Preventive: Translate SOPs and use pictorial job aids. Implement a peer-review system for high-risk steps [9]. |
| Spores (e.g., Bacillus, Clostridium) detected | Contaminated lab coats from street clothes; inadequate surface disinfection of work area [60]. | Corrective: Review gowning procedure. Preventive: Enforce dedicated lab shoes and provide freshly laundered, facility-provided scrubs and coats. Validate disinfectant contact times against spore-forming bacteria [60]. |
Summary of Key Experimental Protocol for Investigation: When contamination is detected, an investigation should include a microbial identification step. Comparing the identified species to environmental monitoring data from the lot processing date can help pinpoint the source. Furthermore, media fill simulations that replicate the exact process flow using microbial growth media instead of product can be used to validate the overall aseptic process and identify weaknesses in technique [63].
Problem 2: High Non-Viable Particle Counts in Grade A Environment
This guide addresses events flagged by environmental monitoring systems for airborne particles.
| Observation | Possible Root Cause | Corrective & Preventive Actions |
|---|---|---|
| Brief, sharp spike in 0.5 µm particles | Sudden, rapid movement by operator within airflow; shedding from non-sterile clothing during gowning [62]. | Corrective: Pause critical activity. Investigate and document the event. Preventive: Train on slow, deliberate movements. Reinforce that smooth motion minimizes airflow turbulence [60] [62]. |
| Sustained elevation in particle counts | Improper gowning (e.g., exposed skin); failure of HEPA filter; compromised glove integrity [62]. | Corrective: Evacuate and recertify the biosafety cabinet or isolator. Preventive: Implement rigorous gowning qualification programs. Establish strict glove change schedules and use of powdered-free gloves [61]. |
| Spikes in 5.0 µm particles | Mechanical failure (e.g., bearing wear in equipment); friction from robotic parts [62]. | Corrective: Perform preventive maintenance on equipment inside the cleanroom. Preventive: Include particle counter data review as part of equipment validation and routine maintenance checks [62]. |
Summary of Key Experimental Protocol for Monitoring: Continuous non-viable particle monitoring is a regulatory requirement. The system should be set to sample air continuously and trigger alarms based on pre-defined limits. A common strategy is to set an "Alert" limit (e.g., 50% of the action limit) to signal potential drift and an "Action" limit (at the regulatory maximum, like 3,520 for 0.5µm) which requires immediate investigation and corrective action [62]. The system should be validated to ensure proper sample volume and air flow rate.
The following diagram illustrates the decision-making workflow for investigating and addressing a high particle count event:
Problem 3: Contamination Traced to Raw Materials or Supplies
This guide addresses contamination originating from materials introduced into the process.
| Observation | Possible Root Cause | Corrective & Preventive Actions |
|---|---|---|
| Contamination found in multiple batches using same material | Supplier quality failure; damaged packaging; in-house sterilization failure [9]. | Corrective: Quarantine and test remaining material lot. Switch to an approved backup supplier. Preventive: Audit critical suppliers. Enhance incoming inspection protocols. Validate in-house sterilization cycles [9]. |
| Endotoxin detection in final product | Contaminated water system; endotoxin in raw material not detected by QC [9]. | Corrective: Sanitize water purification system. Preventive: Use sterile, endotoxin-free single-use materials. Require suppliers to provide proof of endotoxin testing and bacterial contamination removal validation [9]. |
Quantitative Data on Aseptic Technique Efficacy
The following table summarizes key quantitative evidence that underscores the importance of rigorous aseptic technique in preventing specific types of infections.
Table: Impact of Aseptic Technique on Healthcare-Associated Infection (HCAI) Reduction
| Infection Type | Study Findings & Quantitative Reduction | Context & Source |
|---|---|---|
| Healthcare-Associated Infections (HCAIs) | 50% reduction in HCAIs in a Neonatal Intensive Care Unit (NICU) after implementing improved aseptic techniques [60]. | Study by Savithri Shettigar et al. as cited by LearnTastic [60]. |
| Surgical Site Infections (SSIs) | SSI rates reduced from 20% to 6% after reinforcing aseptic protocols [60]. | Research published in the International Journal of Academic Medicine and Pharmacy [60]. |
| General HCAI Statistics | On any given day, 1 in 31 hospital patients has an HCAI; nearly 99,000 preventable deaths occur annually in the U.S. [60]. | Data from the Centers for Disease Control and Prevention (CDC) [60]. |
The Scientist's Toolkit: Essential Research Reagent Solutions
The table below lists key materials and equipment critical for maintaining asepsis, along with their primary function in contamination control.
Table: Key Materials and Equipment for Aseptic Processing
| Item | Primary Function in Contamination Control |
|---|---|
| Laminar Flow Hood (Biosafety Cabinet) | Provides a ISO Class 5 (Grade A) work area with HEPA-filtered, unidirectional airflow to protect the product from particulate and microbial contamination [64]. |
| Isolator (Closed Barrier System) | Provides a complete physical barrier between the operator and the process, offering the highest level of sterility assurance. Often features automated bio-decontamination (e.g., with H₂O₂ vapor) [64]. |
| Restricted Access Barrier System (RABS) | A rigid-wall enclosure with glove ports that restricts access to the aseptic processing area, reducing direct operator intervention. Can be open (requires cleanroom) or closed [64]. |
| 70% Ethanol Solution | The most common disinfectant used for wiping down work surfaces and the outside of containers (e.g., media bottles, flask exteriors) before introducing them into the sterile field [61]. |
| Sterile, Disposable Pipettes | Single-use plastic or pre-sterilized glass pipettes prevent cross-contamination between reagents and cell lines. Using each pipette only once is a fundamental aseptic rule [61]. |
| Personal Protective Equipment (PPE) | Sterile gloves, gowns, masks, and hair covers act as a barrier, reducing the shedding of microbial flora and particles from personnel onto the product and environment [60] [61]. |
| Non-Viable Particle (NVP) Monitor | A continuous, real-time air sampling device that counts airborne particles of specific sizes (e.g., ≥ 0.5 µm and ≥ 5.0 µm). It is critical for detecting contamination events as they happen [62]. |
The following diagram illustrates the hierarchy of protection offered by different types of primary engineering controls, from the most basic to the most advanced:
Managing Operator Flora with Non-Punitive Monitoring Programs
FAQs on Non-Punitive Operator Flora Monitoring
Q1: What is the primary goal of a non-punitive operator flora monitoring program? The primary goal is to proactively control a major contamination source—the natural microbial flora present on personnel—within a quality framework that encourages consistent compliance and honest reporting. Such programs recognize that bacterial flora is normal but its transfer to sterile products must be strictly controlled. A non-judgmental monitoring system is fundamental for detecting contamination on personnel without assigning blame, which reinforces safe practices and enhances overall product protection [9].
Q2: How does a non-punitive program improve contamination control over traditional methods? Traditional punitive approaches may incentivize hiding errors, whereas a non-punitive culture focuses on systemic improvement and root cause analysis. This leads to more reliable data, early detection of potential issues, and a more robust contamination control strategy (CCS). Effective monitoring provides critical data to validate and refine your CCS, as required by modern regulatory guidelines like Annex 1 [65].
Q3: What specific personnel-related incidents should trigger a review of the monitoring data? The program should be reviewed and data analyzed when there is any deviation in environmental monitoring results, a sterility test failure, or observation of a breach in aseptic technique. Furthermore, policies should restrict cleanroom access if staff or their close contacts have active viral infections to prevent viral contamination [9].
Q4: What are the key parameters to monitor in such a program? Key monitoring parameters are summarized in the table below.
Table: Key Parameters for Operator Flora Monitoring
| Parameter | Purpose | Common Method(s) |
|---|---|---|
| Viable Particle Monitoring | Detects cultivable microorganisms on personnel gowning. | Contact plates (e.g., for gloves and gowns), finger dabs. |
| Non-Viable Particle Monitoring | Assesses the shedding of non-living particulates. | Particulate air sampling. |
| Gowning Technique Adherence | Ensures the aseptic gowning procedure is correctly followed. | Direct observation, audits. |
| Illness Reporting Compliance | Tracks self-reporting of health conditions that increase contamination risk. | Logbooks, confidential surveys. |
Regular personnel monitoring in the manufacturing area, such as for isolator operations in a Grade D environment, should be conducted as part of the overall CCS risk assessment [65].
Troubleshooting Guide: Operator Flora Monitoring and Control
Problem: Recurring Positive Viable Contamination from Operator Gloves
- Potential Cause 1: Inadequate Hand Hygiene Technique.
- Solution: Retrain staff on proper hand sanitization procedures, including duration, coverage, and choice of agent. Implement visual aids at sanitization stations.
- Potential Cause 2: Faulty or Damaged Gloves.
- Solution: Review glove donning technique to avoid tearing. Audit glove suppliers for consistent quality and integrity testing.
- Potential Cause 3: Ineffective Disinfectant or Contact Time.
- Solution: Validate the efficacy of the disinfectants used against common environmental isolates. Ensure the validated wet contact time is achieved during disinfection of gloves during operations [65].
Problem: Persistent Environmental Monitoring Hits Linked to a Specific Area or Posture
- Potential Cause: Uncontrolled Operator Movement and Behavior.
- Solution: Use the non-punitive monitoring data to re-train on aseptic techniques. Analyze movement patterns and revise workflows to minimize vigorous activity that increases particle shedding. Enhanced gowning for Grade D personnel, including covering hair, beards, and moustaches, and wearing general protective suits with disinfected shoes, is critical to avoid ingress of contaminants [65].
Problem: Overall High Background Level of Particulates in the Cleanroom
- Potential Cause: Operator Gowning or Introduction of Materials.
- Solution: Beyond operator flora, evaluate the entire material transfer process. The industry is trending towards using air showers or UV pass boxes instead of relying strictly on transfer disinfection to achieve a higher degree of safety [65].
Experimental Protocol: Implementing an Operator Flora Monitoring Program
Objective: To establish a baseline of operator-borne microbial load and track the effectiveness of contamination control measures over time in a cell therapy manufacturing facility.
1. Methodology: Sample Collection and Analysis
- Frequency: Conduct monitoring at a defined frequency (e.g., weekly during initial phases, moving to monthly once control is demonstrated) and always at the conclusion of a critical manufacturing activity.
- Sampling Sites: Sample key operator contact sites using contact plates containing appropriate culture media (e.g., Tryptic Soy Agar for total aerobic count).
- Fingertips (via finger dabs)
- Chest Zone*
- Forearms
- Incubation: Incubate plates for a validated duration to recover both bacteria and fungi. A common approach is a minimum of 3 days at 20-25°C immediately followed by a minimum of 2 days at 30-35°C to compromise for the growth of diverse microorganisms [65].
- Data Recording: Record the colony-forming units (CFU) per plate and identify microorganisms to the genus or species level for trending.
| Monitoring Result | Implied Risk | Example Non-Punitive Corrective Action |
|---|---|---|
| Alert Level Exceeded | Potential shift in control. | Review monitoring data; provide targeted aseptic technique refresher training. |
| Action Level Exceeded | Control potentially compromised. | Initiate a formal investigation (root cause analysis); review gowning and hygiene procedures; increase monitoring frequency. |
| Recurring Action Level Excursions | Systemic issue requiring intervention. | Revalidate the disinfectant regime; assess cleanroom garment quality; review the entire contamination control strategy. |
Workflow Diagram: Operator Flora Management
The following diagram outlines the logical workflow for establishing and maintaining an effective operator flora management program.
The Scientist's Toolkit: Essential Materials for Monitoring
*Table: Key Research Reagent Solutions for Operator Flora Monitoring*| Item | Function |
|---|---|
| Contact Plates | Contain culture media solidified for direct surface sampling (e.g., gloves, gowns). |
| Tryptic Soy Agar (TSA) | General-purpose medium for the recovery of a wide range of bacteria and fungi. |
| Sabouraud Dextrose Agar (SDA) | Selective medium optimized for isolating and cultivating fungi and molds. |
| Neutralizing Broth | Used to quench the effects of disinfectant residues in a sample, ensuring microbial recovery. |
| Rapid Microbial Methods (RMM) | Technologies (e.g., PCR-based, enzymatic) that can provide faster results than traditional growth-based methods [66]. |
| Validated Sporicidal Disinfectant | A chemical agent proven effective against bacterial spores for decontaminating surfaces [65]. |
Illness-Based Access Restrictions to Prevent Viral Contamination
Viral contamination poses a significant risk to the safety and efficacy of cell therapy products. The COVID-19 pandemic, caused by the SARS-CoV-2 virus, has highlighted the critical need for robust contamination control strategies within biomanufacturing facilities and research laboratories. This technical support guide provides troubleshooting and procedural guidance for implementing effective illness-based access restrictions to prevent the introduction and spread of viral contaminants, specifically within the context of cell therapy manufacturing research. These protocols are essential for protecting both personnel and products, ensuring the integrity of manufacturing processes, and maintaining compliance with regulatory standards in advanced therapy medicinal product (ATMP) development.
Troubleshooting Guides & FAQs
Frequently Asked Questions (FAQs)
Q1: What are the primary sources of viral contamination in cell therapy manufacturing?
Viral contamination can originate from multiple sources, requiring a multi-layered control strategy. Key sources include:
- Human-Derected Starting Materials (HCT/Ps): Donated cells or tissues from infected donors pose a high risk if not properly screened [67].
- Biological Raw Materials: Reagents of human or animal origin (e.g., serum, growth factors) can introduce viruses [67].
- Manufacturing Personnel: Infected operators can transmit viruses, especially through respiratory droplets or contact with contaminated surfaces, particularly in open or less-closed manufacturing systems [67].
- Clinical Site Environment: Final product manipulation or administration at the clinical site in non-cGMP environments introduces a final point of potential contamination [67].
Q2: Why are standard viral clearance methods often insufficient for cell therapy products?
Unlike traditional biopharmaceuticals, cell and gene therapy products have unique characteristics that limit the use of standard viral clearance techniques:
- Product Sensitivity: The living cells that constitute the therapy are often damaged or killed by harsh viral inactivation methods (e.g., solvent/detergent treatment, low pH incubation) [67].
- Filtration Limitations: Viral retentive filters, commonly used for proteins, are not feasible as the cell product itself is too large and would be removed [67].
- Short Shelf Life: For fresh cell products, the limited time between manufacturing and administration does not allow for comprehensive product testing before release [67].
Q3: What are the recommended biosafety levels for handling specimens potentially containing SARS-CoV-2?
The recommended biosafety level depends on the specific procedures being performed:
- BSL-2: Is the minimum recommended for activities with clinical specimens, environmental samples, and for diagnostic research, anatomic pathology, and virus propagation. This requires enhanced work practices and primary containment within a Class II Biological Safety Cabinet (BSC) [68] [69].
- BSL-3: Is required for procedures involving virus isolation, propagation, and intentional infection of animals [68] [69].
- Inactivated Samples: Work on samples that have been chemically or heat-inactivated, or involve extracted nucleic acids, can generally be handled at BSL-2 [69].
Q4: What personal protective equipment (PPE) is recommended for personnel handling high-risk samples?
For routine handling of potentially infectious materials in a BSL-2 setting, enhanced PPE is recommended [69]:
- A dedicated lab coat with a disposable liquid-resistant apron or a closed-front liquid barrier gown.
- Double gloves.
- Eye protection (goggles or face shield).
- Respiratory protection as determined by risk assessment. For aerosol-generating procedures, an N95 respirator or higher is recommended [70].
Troubleshooting Common Scenarios
Scenario 1: A manufacturing operator reports symptoms compatible with COVID-19.
- Problem: Risk of an infected operator contaminating the product or manufacturing environment.
- Solution:
- Immediate Exclusion: The operator must immediately leave the manufacturing area and not return until they have met the criteria for discontinuing isolation [71].
- Contact Tracing: Identify and assess other personnel who had close contact with the individual.
- Environmental Decontamination: Perform enhanced cleaning and disinfection of all work surfaces and equipment the operator contacted, using an EPA-registered disinfectant effective against SARS-CoV-2 [68].
- Product Risk Assessment: If the operator was involved in an open or semi-open manufacturing process, the impacted product batch must be quarantined and a risk assessment performed. Voluntary testing of the final drug product for SARS-CoV-2 may be considered for high-risk allogeneic products [67].
Scenario 2: A cell donor tests positive for SARS-CoV-2 after leukapheresis but before product infusion.
- Problem: The starting biological material (HCT/P) may be contaminated.
- Solution:
- Process Continuation: The manufacturing process can typically continue, as the product is often cryopreserved at intermediate steps [72].
- Infusion Delay: The infusion of the final CAR T-cell product (or other cell therapy) should be postponed until the patient has clinically recovered [72].
- Product Testing: The final cell product should be tested for SARS-CoV-2 by qPCR before it is deemed acceptable for infusion [72].
- Donor Screening: This incident underscores the necessity of rigorous donor screening, including assessment of symptoms, travel history, and exposure risks in the 28 days prior to donation, even if definitive testing is not yet available [67].
Scenario 3: Aerosols are unexpectedly generated during a sample processing step outside a BSC.
- Problem: Uncontrolled release of potentially infectious aerosols into the laboratory.
- Solution:
- Immediate Cessation: Stop the procedure immediately.
- Evacuation and Securing: Alert all personnel, evacuate the area, and secure the room by closing the door. Post a sign to prevent entry.
- Decontamination Wait-Time: Allow a period of time (e.g., 1 hour) for aerosols to settle, with ventilation systems active, before re-entering to decontaminate.
- Surface Decontamination: Wipe down all affected surfaces with an EPA-registered disinfectant qualified for use against SARS-CoV-2 [68].
- Procedure Review: Revise the Standard Operating Procedure (SOP) to mandate that all procedures with a high likelihood of generating aerosols be performed within a certified BSC or other physical containment device [68].
Experimental Protocols & Data
Protocol for Safe Collection and Handling of Clinical Specimens
This protocol is adapted from established biosafety guidelines for working with samples from patients with suspected or known COVID-19 [69].
1. Principle: To safely collect and handle primary human specimens for research while minimizing the risk of SARS-CoV-2 transmission to personnel.
2. Materials:
- Personal Protective Equipment (PPE): N95 respirator, eye protection (face shield or goggles), hair net, gown, double gloves [69].
- Sample collection kits (appropriate swabs, tubes, containers).
- Plastic biohazard bags (double-bagging system).
- EPA-registered disinfectant effective against coronaviruses.
- Transport container.
3. Procedure:
- Step 1: Pre-collection. Obtain informed consent and ensure procedures are overseen by a qualified physician. De-identify samples in accordance with HIPAA and institutional policies [69].
- Step 2: Donning PPE. Don appropriate PPE in accordance with the healthcare facility's local infection control protocol before patient contact [69].
- Step 3: Sample Collection. Collect the specimen (e.g., peripheral blood via catheter, swab) using standard clinical procedures.
- Step 4: Initial Decontamination. Remove and discard the outer set of gloves. Place the primary sample container into a plastic biohazard bag. Wipe the outside of the bag with disinfectant [69].
- Step 5: Secondary Containment. Place the first bag into a second clean plastic biohazard bag and wipe the outside of this second bag with disinfectant [69].
- Step 6: Transport. Place the double-bagged sample into a secure transport container for movement to the BSL-2 laboratory.
- Step 7: Laboratory Receipt. In the lab, all manipulations of the potentially infectious specimen must be performed in a Class II BSC by trained personnel using enhanced work practices [69].
Protocol for Inactivating SARS-CoV-2 in Patient Samples
1. Principle: To render SARS-CoV-2 non-infectious while preserving sample integrity for downstream research applications, enabling safer handling at a reduced biosafety level [69].
2. Materials:
- Heat block or water bath.
- Chemical fixatives (e.g., formaldehyde, paraformaldehyde).
- Lysis buffer (for nucleic acid extraction).
- Class II BSC.
3. Procedure:
- Method A: Heat Inactivation.
- Bring sample to a temperature of 56°C - 65°C for 15 - 90 minutes [69].
- Note: Time and temperature must be validated for the specific sample matrix to ensure viral inactivation while preserving the analytes of interest.
- Method B: Chemical Fixation.
- Treat the sample with traditional fixatives like 4% paraformaldehyde.
- These agents destroy the viral protein and lipid envelope, effectively inactivating the virus [69].
- Method C: Nucleic Acid Extraction.
- Extract RNA or DNA using commercial kits with lysis buffers that inactivate viruses.
- Note: The isolated SARS-CoV-2 genomic RNA is a positive-sense strand and is considered an immediate precursor to infection. While the intact virus is inactivated, manipulated nucleic acids should still be handled with care at BSL-2 [69].
Table 1: Risk Tier for Cell and Gene Therapy Products and Mitigation Strategies
| Risk Tier | Product Type | Key Risk Factors | Recommended Mitigation Strategies [67] |
|---|---|---|---|
| Tier 1 (Highest Risk) | Allogeneic "off-the-shelf" cell therapies, Tissue-engineered products | Inability to filter or inactivate virus; large batch size exposes many patients | Voluntary donor screening & testing; operator testing; rigorous cGMPs; final product testing |
| Tier 2 (Medium Risk) | Autologous cell therapies (e.g., CAR-T) | Inability to filter or inactivate virus; batch size is one patient | Donor screening; controlled, segregated manufacturing; process controls in BSC |
| Tier 3 (Lower Risk) | Acellular products (e.g., exosomes, AAV vectors) | Potential for filtration or inactivation steps; more akin to biotech products | Implement viral clearance steps (filtration, inactivation) where possible |
Table 2: Summary of SARS-CoV-2 Inactivation Methods for Laboratory Research
| Method | Mechanism of Action | Key Parameters | Post-Treatment BSL | Notes |
|---|---|---|---|---|
| Heat Inactivation [69] | Denaturation of viral proteins and lipid envelope | 56°C - 65°C for 15-90 mins | BSL-2 | Must be validated for sample type; may degrade sensitive analytes |
| Chemical Fixation (e.g., PFA) [69] | Cross-linking and destruction of proteins and lipid envelope | Varies by fixative (e.g., 4% PFA) | BSL-2 | Preserves morphology for imaging; viral genome may remain intact |
| Detergent-based Lysis (RNA extraction) [69] | Disruption of lipid envelope and capsid | Varies by commercial kit | BSL-2 | Caution: Isolated viral RNA is still considered potentially infectious [69] |
Visual Workflows and Pathways
Sample Handling and Inactivation Workflow
This diagram outlines the decision-making process for handling and inactivating samples from donors or patients with suspected or known SARS-CoV-2 infection.
Manufacturing Risk Mitigation Logic
This diagram illustrates the logical flow for implementing illness-based access restrictions and contamination controls during cell therapy manufacturing.
The Scientist's Toolkit: Essential Reagents & Materials
Table 3: Key Research Reagent Solutions for Viral Contamination Control
| Item | Function/Application | Key Considerations |
|---|---|---|
| EPA-Registered Disinfectants [68] | Surface decontamination; inactivation of viral particles on equipment. | Must be on EPA's List N and qualified for use against SARS-CoV-2. Follow manufacturer's dilution, contact time, and handling instructions. |
| Class II Biological Safety Cabinet (BSC) [68] [69] | Primary engineering control; provides a sterile, contained work area for manipulating infectious materials. | Must be certified regularly; all aerosol-generating procedures must be performed inside the BSC. |
| Viral Nucleic Acid Extraction Kits | Isolate viral RNA for PCR-based detection and research; lysis buffer inactivates the virus. | Isolated SARS-CoV-2 RNA is positive-sense and should be handled with care as a potential precursor to infection [69]. |
| Chemical Fixatives (e.g., Paraformaldehyde) [69] | Inactivates virus by destroying proteins and lipid envelope; preserves cell morphology for imaging. | Effective for inactivation, but viral genomic material may remain intact. |
| NIOSH-Approved N95 Respirators [71] [70] | Respiratory protection for personnel during aerosol-generating procedures or when working with infectious materials outside a BSC. | Requires fit-testing. In contingency settings, reprocessing or extended use with a face shield cover may be considered [70]. |
| SARS-CoV-2 qPCR Test Kits | Detection of viral RNA in donor samples, environmental swabs, or final cell products for risk assessment. | Critical for donor and product screening; should be performed by a CLIA-certified lab or equivalent if used for product release decisions [67]. |
FAQs: Scaling Up Cell Therapy Manufacturing
Q1: What are the primary contamination risks when transitioning from manual to automated processing?
The transition introduces several contamination risks, primarily at connection points between systems and during material handling. Operators themselves are the leading source of bacterial and viral contamination in cell therapy manufacturing [9]. Open system operations, particularly working outside safety cabinets or temporary open operations, create significant contamination pathways, with 50% of operators citing this as a primary concern [10]. Additionally, material uncertainties pose risks, as 60% of operators express concerns that materials may not be adequately disinfected or completely sterile [10]. Implementing closed systems through tube welding or sterile connectors significantly reduces these risks by minimizing operator-product interaction [9] [24].
Q2: How can we validate that automated processes maintain product quality compared to manual methods?
Validation requires demonstrating process comparability between manual and automated methods. This involves rigorous assessment of critical quality attributes including viability, cell count, phenotype, and biological activity [73]. Manufacturers should implement advanced analytical methods such as flow cytometry (for viability and cell count) and specialized potency assays that demonstrate consistent biological activity of the transgene in target cells [24]. Additionally, the revised European Pharmacopoeia chapters (implemented in 2025) support a risk-based approach to validation, allowing manufacturers to use advanced methods like droplet digital PCR instead of traditional qPCR for impurity testing [24].
Q3: What psychological factors should managers consider during technology transition?
The psychological burden on operators is significant and often overlooked. Recent survey data reveals that 72% of operators express concern about contamination, while only 18% report direct experiences with contamination incidents, indicating that perceived risk exceeds actual risk [10]. This disparity creates substantial stress. Additionally, operational complacency affects approximately 17% of operators, particularly concerning repetitive tasks where experienced staff might develop lax attitudes toward protocols [10]. Implementing nonjudgmental monitoring systems that reinforce bacterial flora as normal, while strictly controlling transfer to sterile products, can reduce stress and improve compliance [9].
Troubleshooting Guides
Contamination Issues in Scale-Up
Table: Common Contamination Sources and Mitigation Strategies
| Contamination Source | Symptoms | Immediate Actions | Long-Term Prevention |
|---|---|---|---|
| Operator Error | Turbid culture media, pH shifts, microscopic contamination | Quarantine affected batch, document deviation | Enhance aseptic technique training with native language protocols [9] |
| Raw Materials | Multiple batches affected, endotoxin presence | Test retained samples, suspend material use | Validate suppliers with GMP-like standards; require Certificates of Analysis [9] |
| Open Process Connections | Localized contamination at connection points | Implement additional sterile barriers | Transition to closed systems (isolators) and single-use sterile connectors [9] [24] |
| Inadequate Environmental Control | Random contamination patterns, airborne microorganisms | Review cleanroom certification, increase monitoring | Install Grade A isolators in Grade C/D cleanrooms instead of BSCs in Grade A/B rooms [9] [24] |
Process Performance Issues
Table: Scale-Up Process Challenges and Solutions
| Performance Issue | Root Causes | Corrective Measures | Process Optimization |
|---|---|---|---|
| Variable Cell Yields | Donor material variability, inconsistent process parameters | Analyze donor factors (genetic background, medical history) | Implement automated process control for improved reproducibility [73] |
| Product Aggregation | Clogging filters, similar physiochemical properties to contaminants | Implement product-specific analytical methods | Develop sensitive, product-specific assays; use risk-based approach to impurity testing [24] |
| Inconsistent Potency | Genetic instability, epigenetic drifts in viral vectors | Enhance characterization of starting materials | Establish robust reference standards and complex potency assays [24] |
Experimental Protocols for Process Validation
Protocol: Comparability Testing Between Manual and Automated Processes
Objective: Demonstrate that automated processing maintains equivalent critical quality attributes compared to established manual methods.
Materials:
- Cell Source: Identical starting material aliquots
- Manual System: Biological Safety Cabinet with standard manual processing equipment
- Automated System: Closed, automated bioreactor or processing system
- Analysis Equipment: Flow cytometer, cell counter, sterility testing materials
Methodology:
- Split-batch Design: Divide identical starting material into two equivalent groups after initial processing
- Parallel Processing: Process one group via established manual methods, the other through the automated system
- Critical Parameter Monitoring: Track viability (using flow cytometry per Ph. Eur. 2.7.24), cell count, phenotype, and sterility throughout
- Endpoint Analysis: Compare final products for:
- Nucleated cell viability (Ph. Eur. 2.7.29)
- Microbiological examination (Ph. Eur. 2.6.27)
- Endotoxin levels (using recombinant Factor C, Ph. Eur. 2.6.14)
- Biological potency through appropriate functional assays
Acceptance Criteria: Automated process must demonstrate non-inferiority within predefined equivalence margins (typically ≤10% difference) for all critical quality attributes [73].
Protocol: Closed System Validation for Contamination Control
Objective: Validate that closed systems maintain sterility throughout manufacturing process.
Materials:
- Test System: Closed processing equipment with sterile connectors
- Culture Media: Growth-supportive sterile media
- Environmental Monitoring: Active air samplers, surface contact plates
- Microbiological Testing: Sterility testing kits, rapid microbial detection systems
Methodology:
- Media Fill Simulation: Process sterile growth media through the entire closed system following standard operating procedures
- Challenge Testing: Introduce controlled interventions at connection points to establish maximum acceptable intervention parameters
- Environmental Monitoring: Document bioburden levels throughout process using active air sampling and surface monitoring
- Incubation and Evaluation: Incubate media fill units for 14 days, monitoring for turbidity indicating microbial growth
- Data Analysis: Compare contamination rates with historical open process data
Validation Criteria: Media fill simulation should yield 0% contamination rate, demonstrating system closure integrity [24].
Process Transition Workflow
Contamination Control Strategy
Research Reagent Solutions
Table: Essential Materials for Contamination Control in Scale-Up
| Reagent/Material | Function | Application Notes |
|---|---|---|
| Recombinant Factor C | Endotoxin testing | Alternative to LAL; follows Ph. Eur. 2.6.14; reduces animal-derived components [24] |
| Sterile Single-Use Connectors | Closed system connections | γ-irradiated, autoclaved; require E&L studies; enable Grade C cleanroom operation [24] |
| Validated Cell Culture Media | Cell growth and expansion | Must be sterile, endotoxin-free, virus-free; require supplier Certificates of Analysis [9] |
| Rapid Microbial Detection Systems | Bioburden monitoring | Advanced methods like ddPCR for impurity testing; support risk-based approach per Ph. Eur. [24] |
| Specialized Potency Assays | Biological activity assessment | Demonstrate consistent transgene activity; critical for genetic stability in viral vectors [24] |
Evaluating Centralized vs. Decentralized Manufacturing Models for Contamination Control
Contamination control is a critical discipline in cell and gene therapy (CGT) manufacturing, where products cannot be terminally sterilized. A Contamination Control Strategy (CCS) is defined as a planned set of controls for microorganisms, endotoxin/pyrogen, and particles, derived from current product and process understanding that assures process performance and product quality [74]. For cell-based medicinal products, the consequences of contamination extend beyond batch loss—for autologous therapies, it may mean the irreversible loss of a patient's only treatment opportunity [17]. The field faces a fundamental strategic decision: whether to utilize centralized manufacturing facilities that serve broad geographic areas or implement decentralized manufacturing networks with multiple smaller production sites closer to patients.
This technical resource center provides troubleshooting guidance and frameworks for selecting and optimizing manufacturing approaches to minimize contamination risks while maintaining therapeutic accessibility.
Foundational Concepts & Regulatory Framework
What is a Contamination Control Strategy (CCS)?
According to EU GMP Annex 1, a CCS is a comprehensive, scientifically justified approach that encompasses all controls designed to minimize contamination risks throughout the pharmaceutical product lifecycle [74]. The strategy should be holistic and cover multiple elements, which are summarized in the table below.
Table: Core Elements of a Contamination Control Strategy
| Element Category | Key Components | Implementation Considerations |
|---|---|---|
| Facility & Equipment | Cleanroom design, air control systems (HEPA), material flows, maintenance [75] | Qualification of cleanrooms per ISO standards; validated cleaning of equipment [76] |
| Personnel | Training, gowning procedures, aseptic technique qualification, psychological stress management [74] [10] | Behavior training, monitoring, addressing operator stress (72% express contamination concerns [10]) |
| Process & Controls | Process design (prefer closed systems), validated hold times, raw material controls [75] [74] | Risk assessment of raw materials; validation of aseptic processes [76] |
| Monitoring & Continuous Improvement | Environmental monitoring, trend analysis, deviation investigation, CAPA [75] [77] | Use of data analytics for predictive insights; regular strategy review [77] |
Regulatory Expectations
Global regulatory bodies emphasize the importance of a robust, documented CCS. The EU GMP Annex 1 (2023) mandates a formal CCS document, providing details on 16 specific points that must be addressed [74]. Similarly, the United States Pharmacopeia (USP) has published a draft chapter on CCS, building a bridge between CFR requirements and international standards [75]. These guidelines advocate for a risk-based approach utilizing Quality Risk Management (QRM) principles to identify, analyze, and control potential contamination sources throughout the manufacturing process [74] [75].
Manufacturing Models: Comparative Analysis
Centralized Manufacturing Model
The centralized model involves production in a single, large-scale facility or a limited number of regional facilities that serve a wide geographic area [78] [79]. This traditional approach benefits from consolidated expertise and infrastructure.
- Contamination Control Advantages: Centralized facilities typically feature established, high-grade cleanrooms and standardized supply chains for raw materials [78]. They enable consistency in process execution and easier implementation of a unified Quality Management System (QMS), simplifying compliance and oversight [78] [76]. The concentration of resources also facilitates significant investment in advanced environmental monitoring and control technologies.
- Operational and Contamination Challenges: The primary contamination risk in this model lies in the complex and extended supply chain. Transporting patient-specific starting materials and finished products over long distances introduces risks related to temperature excursions, delays, and potential breaches in sterile packaging [78] [17]. A process failure in a centralized facility can impact a large number of batches.
Decentralized (Point-of-Care) Manufacturing Model
Decentralized manufacturing involves producing therapies at multiple locations, often at or near the point of care (POC), such as academic hospitals or regional centers [78] [80]. This model aims to address challenges of access and logistics for autologous therapies.
- Contamination Control Advantages: The most significant advantage is the elimination or radical reduction of transport logistics for the living cell product, thereby minimizing risks associated with shipping [78] [80]. This is particularly beneficial for products with very short shelf lives. It also allows for the use of closed, automated, and compact manufacturing technologies (e.g., "GMP-in-a-box") designed for use in lower-grade cleanrooms [80].
- Operational and Contamination Challenges: The model's main challenge is ensuring consistent contamination control across multiple sites. Each site must harmonize on identical manufacturing protocols, quality programs, and testing methods [78]. This creates complexity in training, auditing, and maintaining uniform standards. There is a high reliance on local personnel, and recruiting specialized staff for every unit can be difficult [78] [10]. The operational overhead for governing a network of sites can be significant [78].
Table: Quantitative Comparison of Manufacturing Models
| Factor | Centralized Model | Decentralized Model |
|---|---|---|
| Typical Facility Footprint | Large-scale cleanroom suites [76] | Compact, automated systems (e.g., POCare units) [80] |
| Impact of Batch Failure | High (Affects more patients per event) [78] | Contained to a single site [78] |
| Supply Chain Complexity | High (Risks during transport) [78] [17] | Low (Minimized transport) [78] [80] |
| Operational Overhead for Governance | Lower (Single or few sites) [78] | Higher (Multi-site coordination) [78] |
| Staffing Requirements | Concentrated, specialized teams [78] | Distributed, can be difficult to recruit [78] [10] |
| Process Consistency | High (within the facility) [78] | Must be actively managed and harmonized across sites [78] [80] |
Troubleshooting Guides & FAQs
Frequently Asked Questions
Q1: What are the most common sources of contamination in cell processing facilities (CPFs)? The primary sources can be categorized using a 5M approach (Machine, Manpower, Medium, Method, Material) [74]. Survey data from 47 CPFs indicates that operators are most concerned about uncertainties in material sterility (60%), contamination from open handling (50%), and physical contact during operations (47%) [10]. Personnel remain a significant vector, highlighting the need for rigorous training and aseptic technique qualification.
Q2: How can operator stress impact contamination risk? Psychological stress imposes a considerable burden on Cell Processing Operators (CPOs). Intricate cell culture procedures and stringent sterility requirements are key stressors, with 72% of operators expressing concern about contamination [10]. This stress can lead to reduced work efficiency, increased errors, and potential health issues, thereby indirectly increasing contamination risk. Mitigation strategies include enhanced training, clear protocols, and a supportive work environment.
Q3: Our organization is considering decentralized manufacturing. What is the single most important quality system to put in place? The cornerstone for successful decentralized manufacturing is a comprehensive Quality Management System (QMS) with a centralized "Control Site" model [80]. This Control Site acts as the regulatory nexus, maintaining master files (e.g., POCare Master File) and ensuring consistency, oversight, and quality assurance across all manufacturing nodes. It serves as the single point of contact for regulatory agencies [80].
Q4: Can automated systems fully eliminate contamination risks in decentralized units? While automation significantly reduces risks by limiting manual interventions and enabling closed processing, it cannot fully eliminate contamination risk [81]. Automated systems are susceptible to "islands of automation" if unit operations are not fully integrated [81]. Success depends on using closed systems, robust training of local operators, and a harmonized CCS applied across all units [78].
Troubleshooting Common Contamination Issues
Table: Troubleshooting Guide for Contamination Control
| Problem | Potential Root Cause | Corrective & Preventive Actions (CAPA) |
|---|---|---|
| Recurrent microbial contamination in batches | - Inadequate cleaning/disinfection validation.- Failure in HVAC/air filtration system.- Compromised aseptic technique by personnel. | - Review and validate cleaning/disinfection procedures and agents [75].- Re-qualify cleanroom and HEPA filters [76].- Enhance personnel training and re-qualify aseptic technique [74]. |
| High particulate counts in product | - Shedding from personnel gowning.- Equipment wear and tear.- Ineffective room sanitization. | - Review and reinforce gowning procedures [75].- Implement preventative equipment maintenance [74].- Review cleaning protocols and environmental monitoring data for trends [77]. |
| Cross-contamination between patient samples | - Failure in spatial or temporal segregation.- Inadequate cleaning between batches. | - Establish and validate unidirectional material and personnel flows [76].- Implement and validate dedicated equipment or clean-in-place (CIP) systems for different products [74]. |
| Inconsistent product quality across decentralized sites | - Lack of harmonized processes and quality programs.- Variable operator skill and training. | - Implement a central Control Site to oversee a unified QMS and POCare Master File [80].- Standardize training platforms and leverage automated, closed-system technologies to minimize variability [78] [80]. |
The Scientist's Toolkit: Essential Reagents & Materials
Table: Key Research Reagent Solutions for Contamination Control
| Reagent / Material | Function in Contamination Control | Key Considerations |
|---|---|---|
| Validated Disinfectants | Used for cleaning and disinfection of cleanroom surfaces and equipment [75]. | Select sporicidal agents with validated efficacy; rotate disinfectants to prevent resistance; always use sterile water for dilution [74]. |
| Sterile Pharmaceutical Grade Water | Used as a solvent in media and for cleaning [75]. | Must be regularly tested for microbial contamination and endotoxins per pharmacopoeial standards (e.g., USP, EurPh) [76]. |
| Sterile Process Gases | Used in cell culture processes (e.g., CO₂ incubators). | Gases in direct contact with the product must be filtered using 0.2 µm sterilizing filters, which should be integrity-tested regularly [75]. |
| Quality-Approved Raw Materials | Includes cell culture media, supplements, and growth factors. | Subject materials to a risk-based assessment; require Certificates of Analysis from suppliers; perform incoming inspection and testing where appropriate [74] [76]. |
The choice between centralized and decentralized manufacturing models is not a one-size-fits-all solution but must be driven by specific product and patient needs. Centralized manufacturing currently remains the dominant model, offering economic and consistency advantages for many therapies [78]. However, decentralized manufacturing presents a viable alternative for treatments requiring rapid turnaround, such as those for aggressive cancers, or for ultra-rare conditions where centralized scaling is impractical [78] [80].
The future of contamination control in both models will be shaped by advanced automation, digitalization, and AI. Integrating closed, automated systems from the start of process development is crucial to avoid "islands of automation" and minimize manual interventions [81]. Furthermore, leveraging data analytics and AI for real-time monitoring and predictive process control will enable more robust and proactive contamination prevention strategies [77]. Ultimately, regardless of the chosen model, a holistic, well-documented, and dynamically managed Contamination Control Strategy, underpinned by a strong quality culture, is fundamental to producing safe and effective cell therapies.
Validating Control Strategies and Comparing Technological Solutions
This technical support center provides troubleshooting guides and FAQs to help researchers and scientists address specific challenges in cell therapy manufacturing, with a focus on reducing contamination risk in line with the latest regulatory updates.
Troubleshooting Guide: Contamination Control in Cell Therapy Manufacturing
| Problem | Possible Root Cause | Recommended Solution | Relevant Regulatory Context |
|---|---|---|---|
| High bioburden levels in final drug product [24] | - In-process removal of contaminants is challenging due to product properties (large, unstable, clogs filters).- Inadequate aseptic technique during open processing steps. | - Implement closed systems (e.g., tube welding, sterile connectors) to minimize open processing [9] [24].- Operate processes in a Grade C cleanroom using closed systems instead of open processes in higher-grade rooms [24]. | Annex 1 (2023) explicitly encourages the use of closed systems and a risk-based approach to environmental classification [24]. |
| Particulate contamination (cellular debris, foreign materials) [82] | - Aggregation of therapeutic cells.- Introduction of extrinsic particles during manufacturing (e.g., from tube welding).- In-process filtration is not feasible as it removes the active cellular ingredient [82]. | - Use advanced analytical instruments (e.g., Aura CL) that combine microscopy approaches to characterize and differentiate cells from other particles [82].- Optimize manufacturing processes to minimize particulate generation [82]. | USP 1046 provides guidelines for the characterization of cell culture products, including assessing purity and particulates [82]. |
| Bacterial or viral contamination from operators [9] | - Operator is the leading source of bacterial and viral contamination.- Inadequate staff training or hygiene protocols. | - Invest in routine aseptic technique training.- Deliver hygiene protocols in staff's native languages to ensure comprehension.- Institute non-judgmental operator flora monitoring [9]. | cGMP requires a Contamination Control Strategy (CCS) as part of ensuring safety, purity, and efficacy [25]. |
| Inconsistent product quality and potency [24] | - Variable purity of patient-derived starting material.- Lack of sensitive, product-specific analytical methods. | - Implement updated Ph. Eur. methods: Use flow cytometry (2.7.24) for viability/count and BET using recombinant Factor C (2.6.14) [24].- Adopt a risk-based approach to impurity testing (e.g., using ddPCR instead of qPCR where justified) [24]. | Ph. Eur. General Chapter 5.34 (2025) supports a risk-based approach for impurity testing, allowing for advanced methods with scientific justification [24]. |
Frequently Asked Questions (FAQs)
On Contamination Control Strategy (CCS)
What are the core elements of a Contamination Control Strategy (CCS) for a cell therapy product? A CCS is a holistic system for identifying, evaluating, and controlling risks to product quality and patient safety. For cell therapies, key elements include: prioritizing staff training and monitoring; using closed systems like isolators or bioreactors to minimize open processing; ensuring all raw materials are sterile and endotoxin-free; and validating suppliers with GMP-like standards [9]. In 2025, a CCS is a regulatory expectation integrated across the entire product lifecycle, from facility design and raw material handling to process validation [24].
How has the revised Annex 1 influenced cleanroom design for cell therapy manufacturing? Annex 1 (2023) encourages the use of closed systems and a risk-based approach to environmental classification [24]. This has led to a shift from traditional Biosafety Cabinets (BSCs) in Grade A/B cleanrooms towards installing Grade A isolators (RABS) within lower-grade (e.g., Grade C/D) cleanrooms [24]. This strategy enhances aseptic performance and allows for more flexible facility layouts, such as producing multiple products side-by-side in a "ballroom" setting [24].
On Regulatory and Quality Testing
What are the key Ph. Eur. updates in 2025 that affect quality control for cell and gene therapies? The European Pharmacopoeia has been updated with several critical texts. Of particular importance is General Chapter 5.34 on gene therapy medicinal products, which supports a more flexible, risk-based approach to testing [24]. For example, it allows for the use of droplet digital PCR (ddPCR) instead of traditional qPCR, and replication-competent virus (RCV) testing may be omitted from final lots if adequately performed earlier [24]. Furthermore, specific method updates include Flow cytometry (2.7.24) for viability and cell count, and BET using recombinant Factor C (2.6.14) [24].
Where can I find the full list of new and revised Ph. Eur. drafts for comment? All new and revised drafts are published in Pharmeuropa 37.3 for public consultation [83]. The deadline for comments on this set of drafts is 30 September 2025 [83]. It is critical to provide feedback during this period, as once adopted, these texts become legally binding standards in all Ph. Eur. member states.
Experimental Protocols for Key Tests
Protocol 1: Implementing a Risk-Based Impurity Testing Strategy
Objective: To justify and apply advanced analytical methods for impurity testing in a gene therapy product, as per Ph. Eur. Chapter 5.34 [24].
Methodology:
- Risk Assessment: Conduct a systematic risk assessment of your manufacturing process to identify potential sources and types of process-related impurities (e.g., host cell DNA, residual plasmids).
- Method Selection: Based on the risk profile, select an advanced analytical method that offers superior sensitivity or specificity. For example, choose droplet digital PCR (ddPCR) for the precise quantification of residual host cell DNA if traditional qPCR lacks the required sensitivity or dynamic range.
- Scientific Justification: Document the justification for the method substitution. This should include data demonstrating that the new method (ddPCR) is superior or equivalent to the standard method (qPCR) for your specific product and impurity.
- Validation: Validate the chosen method according to ICH Q2(R1) guidelines to ensure its suitability for its intended purpose [84].
Protocol 2: Viability and Cell Count Using Flow Cytometry
Objective: To determine the viability and count of nucleated cells in a cell therapy product using Flow Cytometry (Ph. Eur. 2.7.24) [24].
Methodology:
- Sample Preparation: Prepare a single-cell suspension of your therapeutic cell product.
- Staining: Stain the cell sample with a viability dye (e.g., Propidium Iodide or 7-AAD) and a fluorescent dye specific for nucleated cells (e.g., DAPI) according to the dye manufacturer's instructions.
- Instrument Setup: Calibrate the flow cytometer using appropriate size and fluorescence calibration beads. Set up the instrument to trigger on the nucleic acid stain to focus on nucleated cells.
- Acquisition and Analysis: Acquire a statistically significant number of events. Use forward and side scatter properties to gate on the cell population of interest. The viability dye-negative and nucleated stain-positive population represents viable nucleated cells. The count is derived from the absolute number of events in this gate.
Visualizing Strategies and workflows
Contamination Control Strategy Workflow
Risk-Based Impurity Testing Logic
The Scientist's Toolkit: Key Research Reagent Solutions
| Item | Function in Cell Therapy Manufacturing |
|---|---|
| Closed System Bioreactor (e.g., G-Rex) | Enables cell culturing in a closed, scalable system, significantly reducing the risk of contamination from the external environment [25]. |
| Grade A Isolators (RABS) | Provides high-level separation between the operator and the product, allowing for processing in lower-grade cleanrooms and enhancing aseptic performance [24]. |
| Sterile, Single-Use Connectors & Tubing | Pre-assembled, sterilized (e.g., γ-irradiated) components that create closed pathways for fluid transfer, eliminating a major source of contamination [24]. |
| Viability Dyes (e.g., Propidium Iodide) | Used in flow cytometry (Ph. Eur. 2.7.24) to distinguish and quantify live cells from dead cells in a therapeutic product [24]. |
| Recombinant Factor C Assay | A non-animal-based method endorsed by Ph. Eur. (2.6.14) for the highly sensitive detection of bacterial endotoxins, a critical safety test [24]. |
| Droplet Digital PCR (ddPCR) | An advanced, precise method for quantifying impurities like residual host cell DNA, alignable with the risk-based approach in Ph. Eur. 5.34 [24]. |
Validation of Decontamination Cycles and Cleaning Protocols
Troubleshooting Guide: Validation of Autoclave Decontamination Cycles
Problem: Biological Indicators (BIs) show positive growth after a standard autoclave cycle for infectious waste.
This indicates that the sterilization process has failed to achieve sterility assurance. The following guide will help you systematically identify and correct the issue.
Phase 1: Understand the Problem
- Ask Specific Questions:
- What is the exact composition of the load? (e.g., animal carcasses, bedding, liquid waste)
- What was the weight and density of the total load?
- Were any items in the load frozen or at room temperature at the start of the cycle?
- Where exactly in the load were the positive BIs found? (e.g., inside animal carcasses, center of a bag)
- Gather Information:
- Review the autoclave's physical chart data (temperature, pressure, F0 value) for the failed cycle.
- Examine the calibration records for the thermocouples (TCs) and the autoclave's internal temperature probe.
- Check the certificate of analysis for the BIs to ensure they are within their use-by date and have been stored correctly.
- Reproduce the Issue:
- Run a simulated cycle with an identical load configuration, using TCs and BIs placed in the same locations to confirm the problem and gather precise data [85].
Phase 2: Isolate the Issue
Simplify the problem by investigating the most common causes. Change one variable at a time between tests.
- 1. Check Load Configuration and Density:
- Action: Redistribute the load to ensure steam penetration. Avoid overloading the chamber and ensure bags are not tightly packed. Leave space between items.
- Evidence: A study found that factory settings failed when processing dense loads of frozen guinea pig carcasses and water-saturated bedding. Redistributing the load into specific cycles for carcasses and for bedding was necessary for validation [85].
- 2. Verify Cycle Parameters are Sufficient for the Load:
- Action: Compare your current cycle parameters (temperature, time, number of pre-vacuum pulses) against validated parameters for similar challenging loads.
- Evidence: Research showed that a factory default cycle of 121°C for 60 minutes with 3 pre-vacuum pulses was insufficient. Validation required more aggressive parameters, such as 130°C for 95 minutes with 10 pre-vacuum pulses for animal carcasses [85].
- 3. Identify and Remove Air Pockets:
- Action: Increase the number of pre-vacuum pulses in the cycle. Ensure the steam sterilizer is maintained correctly and that there are no air leaks.
- Evidence: Air is an insulator that prevents steam from contacting all surfaces. Pre-vacuum pulses remove air from the chamber and the load, which is critical for dense, non-homogeneous loads [85].
- 4. Confirm Equipment is Functioning Correctly:
- Action: Perform routine maintenance and calibration. Check for steam leaks, clogged filters, and malfunctioning valves.
- Evidence: The FDA guidance on cleaning validation emphasizes that equipment design, particularly hard-to-clean elements like ball valves, must be considered, and operators must be properly trained on the system [86].
Phase 3: Find a Fix or Workaround
Once the root cause is isolated, implement a solution.
- Solution 1: Revise and Revalidate the Cycle.
- Based on your findings, develop a new cycle protocol. For challenging loads, consider significantly increasing the temperature, exposure time, and number of pre-vacuum pulses. Formally validate this new cycle with three consecutive successful runs using BIs and TCs throughout the load [85].
- Solution 2: Segregate and Process Waste by Type.
- Implement a waste segregation policy. Use one validated cycle for solid, dense waste (like animal carcasses) and another, potentially less intensive, cycle for liquid or loose solid waste [85].
- Solution 3: Implement a Preventive Workflow.
- Adopt a standardized workflow for all decontamination processes to ensure consistency and prevent future failures. The diagram below outlines a logical workflow for establishing a validated cycle.
Frequently Asked Questions (FAQs) on Decontamination and Cleaning
1. Why is validation of decontamination cycles necessary if the autoclave has factory settings? Factory settings are often generic and may not account for the specific challenges of sterilizing dense, heterogeneous, or heat-resistant loads like infectious biological waste. Validation confirms that your specific cycle parameters consistently achieve sterility for your specific waste stream [85].
2. What is the difference between cleaning and decontamination/sterilization?
- Cleaning: The physical removal of soil, residues, and contaminants from equipment surfaces. It is a prerequisite for effective decontamination.
- Decontamination/Sterilization: A process, such as steam autoclaving, that inactivates microbial life to a specified level. Validation of cleaning processes ensures that residues are reduced to an "acceptable level" to prevent cross-contamination, while validation of decontamination proves the complete inactivation of biological agents [86].
3. What is an F0 value and why is it important? The F0 value is a measure of lethality, expressed as the equivalent time in minutes at a temperature of 121°C delivered to a load. It allows for the comparison of the sterilization effect of cycles running at different temperatures. A higher F0 value indicates a greater microbial kill. Monitoring F0 is crucial for validating that the entire load has received sufficient heat treatment [85].
4. What are the key parameters to define when validating a cleaning process? According to FDA guidance, you must define [86]:
- Responsible Personnel: Who performs and approves the study.
- Acceptance Criteria: Scientifically justifiable residue limits (e.g., 10 ppm, 1/1000 of a therapeutic dose).
- Sampling Methods: How residues will be measured (e.g., swabbing, rinse water).
- Analytical Methods: The specific, sensitive methods used to detect residues.
- Revalidation Schedule: When the process will be re-evaluated (e.g., after equipment or process changes).
5. How can we prevent cross-contamination in a multi-product cell therapy facility? A robust Contamination Control Strategy (CCS) is required by cGMP. This includes [25]:
- Using closed system bioreactors and processing systems where possible.
- Dedicating equipment for specific products or processes, especially for hard-to-clean items.
- Employing validated cleaning and decontamination procedures between product campaigns.
- Implementing rigorous environmental monitoring and aseptic techniques.
The Scientist's Toolkit: Key Reagents & Materials for Validation
The table below lists essential materials required for the experimental validation of decontamination and cleaning protocols.
| Item Name | Function/Brief Explanation |
|---|---|
| Biological Indicators (BIs) | Strips or vials containing a known population of bacterial spores (e.g., Geobacillus stearothermophilus at 10^6 spores). Used as a direct challenge to the sterilization process to prove lethality [85]. |
| Thermocouples (TCs) | Temperature sensors placed throughout the autoclave load to map the physical heat distribution and identify cold spots. Data is used to calculate the F0 value [85]. |
| Chemical Indicators | Strips or tape that change color after exposure to specific sterilization conditions (e.g., temperature). Used for immediate, visual confirmation that an item has been processed. |
| Validated Swab Kits | Sterile swabs and solvents used for taking defined surface samples from equipment after cleaning. The samples are analyzed to quantify residual contaminants [86]. |
| Sensitive Analytical Methods | Methods like HPLC, TLC, or conductivity meters. Used to detect and quantify specific chemical or biological residues down to pre-defined acceptance limits [86]. |
| Data Loggers | Electronic devices that record time-temperature data. Used for mapping and monitoring cycle performance during validation and routine operation. |
Frequently Asked Questions (FAQs)
Q1: Does using cryopreserved peripheral blood mononuclear cells (PBMCs) instead of fresh material negatively impact the critical quality attributes of my CAR-T cell product?
No, a comprehensive 2025 comparative study demonstrated that CAR-T cells generated from PBMCs cryopreserved for up to two years exhibited comparable expansion potential, cell phenotype, differentiation profiles, and cytotoxicity against target cancer cells to those derived from fresh PBMCs [87]. While a minor, statistically significant decrease in cell viability (4.00% to 5.67%) was observed post-thaw, this did not translate to significant impacts on final CAR-T fold expansion, transduction efficiency, or CD4+/CD8+ ratios [87].
Q2: What is the single most effective strategy to reduce contamination risk when handling cryopreserved starting materials?
Prioritize the use of closed processing systems [88] [9]. Moving from open-system processing (using bags, tubes, and bottles in biosafety cabinets) to closed systems with sterile tube welders and connectors provides a physical barrier against the environment. This significantly reduces microbial contamination risk and can allow the process to be executed in a less stringent, controlled environment, optimizing costs without compromising safety [88].
Q3: We see variability in post-thaw recovery. What are the key cryopreservation process parameters we should focus on to ensure consistency?
The consistency of your cryopreserved starting material is highly dependent on controlling these key parameters [89] [90]:
- Freezing Rate: Controlled-rate freezing is preferred over passive freezing for its ability to define and control critical process parameters like cooling rate, which directly impacts cell viability and recovery [89].
- Thawing Rate: Non-controlled thawing can cause osmotic stress and ice crystal formation, leading to poor viability. Using a controlled thawing device with a defined, rapid warming rate is crucial for reproducible recovery [89].
- Cryopreservation Media Formulation: Using an intracellular-like, serum-free, GMP-manufactured cryomedium can minimize cold-induced cellular stresses during freezing by reducing the ionic gradient across the cell membrane, thereby improving post-thaw health and function [90].
Q4: Are there rapid methods to test for microbial contamination in starting materials before initiating a costly manufacturing process?
Yes, novel rapid microbiological methods (RMMs) are emerging. One 2025 study describes a method using ultraviolet (UV) absorbance spectroscopy combined with machine learning to provide a definitive yes/no contamination assessment for cell therapy products within 30 minutes [91]. This method is label-free, non-invasive, and can be used for early and continuous safety testing during manufacturing, enabling timely corrective actions [91].
Troubleshooting Guide: Cryopreserved Starting Materials
| Problem | Potential Root Cause | Recommended Solution |
|---|---|---|
| Low post-thaw cell viability | Suboptimal freezing or thawing rate causing intracellular ice crystallization or osmotic stress [89] [90]. | Implement and validate a controlled-rate freezer (CRF) and a controlled-rate thawing device. Avoid non-controlled methods like direct placement in a -80°C freezer or unvalidated water baths [89]. |
| High variability in CAR-T cell expansion | Inconsistent quality of the cryopreserved PBMC starting material; high levels of non-T cells (e.g., NK cells, B cells) that are more sensitive to cryopreservation [87]. | Perform T-cell enrichment (e.g., CD4/CD8 magnetic bead selection) from the PBMCs prior to cryopreservation. This ensures a more consistent and robust T-cell population for manufacturing [87]. |
| Positive sterility test (microbial contamination) | Introduction of contaminants during open processing steps in the cryopreservation workflow [88] [9]. | Transition to a closed processing system using sterile tube welders and connectors. Enforce rigorous staff training in aseptic techniques and use sterile, endotoxin-free single-use materials [88] [9]. |
| Low recovery of specific T cell subtypes (e.g., T naïve) | Cryopreservation media formulation is causing excessive cellular stress or is not optimal for preserving more sensitive cell subtypes [90]. | Optimize the cryopreservation media. Switch from traditional "home-brew" serum-containing formulas to a GMP-manufactured, intracellular-like, and serum-free formulation designed to minimize cold-induced apoptosis [90]. |
Comparative Data: Cryopreserved vs. Fresh PBMCs in CAR-T Manufacturing
The following table summarizes key quantitative findings from a 2025 study that directly compared CAR-T cells generated from fresh and cryopreserved PBMCs using the PiggyBac transposon system [87].
Table 1: Comparison of CAR-T Cells from Fresh vs. Cryopreserved PBMCs [87]
| Quality Attribute | Fresh PBMCs (Reference) | Cryopreserved PBMCs (2 Years) | Statistical Significance |
|---|---|---|---|
| PBMC Viability | Baseline | 4.00% - 5.67% decrease | Significant, but minimal impact |
| T-cell Proportion in PBMCs | Stable baseline | Remained relatively stable | Not Significant |
| CAR-T Expansion (Fold) | Baseline | Slight reduction, within range | Not Significant |
| Transduction Efficiency | Consistent | Consistent | Not Significant |
| CD4+/CD8+ Ratio | Consistent | Consistent | Not Significant |
| Cytotoxicity (at E:T 4:1) | 91.02% - 100.00% | 95.46% - 98.07% | Not Significant |
| Tn and Tcm Proportions | Stable baseline | No significant changes | Not Significant |
| Exhaustion Markers (e.g., PD-1) | Stable baseline | Consistent with fresh | Not Significant |
Experimental Protocol: Comparative Study Workflow
The diagram below outlines the experimental workflow used to generate the comparative data in Table 1.
Protocol Steps:
- PBMC Collection & Arm Separation: Collect PBMCs from healthy donors and split into two arms: "Fresh" and "Cryopreserved" [87].
- Cryopreservation: Cryopreserve the designated PBMCs for various durations (3 months to 2 years) to test stability [87].
- Thawing & Recovery: Thaw cryopreserved PBMCs using a controlled method and allow for recovery.
- T Cell Enrichment: Isulate T cells from both fresh and thawed PBMCs using CD4/CD8 magnetic bead selection to ensure a pure starting population [87].
- Activation & Transfection: Activate T cells for 48 hours, then introduce the CAR transgene using the PiggyBac transposon system via electroporation [87].
- Cell Culture & Expansion: Culture the transfected cells for 11 days to generate the final CAR-T product [87].
- Analytical Comparison: Perform head-to-head analysis of cell phenotype, expansion, cytotoxicity, and cytokine release between the two arms [87].
The Scientist's Toolkit: Essential Reagents & Materials
Table 2: Key Research Reagents for Cryopreservation Comparability Studies
| Reagent / Material | Function in the Process | Key Consideration |
|---|---|---|
| PiggyBac Transposon System [87] | A non-viral method for integrating the CAR gene into the T-cell genome. | Reduces cost and immunogenicity risk compared to viral systems; allows for larger genetic cargo [87]. |
| Defined, Serum-Free Cryomedium [90] | Protects cells during freezing and thawing. Intracellular-like formulations minimize ionic stress. | Using a GMP-manufactured, serum-free formula reduces contamination risk and improves lot-to-lot consistency [90]. |
| CD4/CD8 Magnetic Beads [87] | Isolates and enriches T cells from PBMCs prior to activation and transduction. | Ensures a consistent and pure T-cell starting population, reducing variability from donor PBMC composition [87]. |
| Controlled-Rate Freezer (CRF) [89] | Precisely controls the cooling rate during cryopreservation. | Critical for process consistency and superior post-thaw recovery compared to passive freezing methods [89]. |
| Sterile Single-Use Connectors [88] [9] | Connects fluid pathways in a closed system during processing. | Eliminates open processing steps, which is the most effective strategy for mitigating microbial contamination [88] [9]. |
Troubleshooting Guides & FAQs
ddPCR for Vector Copy Number Analysis
Q: What are the critical parameters to optimize when establishing a ddPCR assay for Vector Copy Number (VCN) in CAR-T cells?
A: Successful ddPCR assay development requires optimization of several key parameters to ensure accurate and reproducible VCN quantification [92].
- Primer/Probe Design: Ensure assays target a unique, stable genomic region and the transgene. Avoid regions prone to recombination or structural variations [92].
- DNA Quality and Digestion: High-quality, high-molecular-weight DNA is essential. Incomplete restriction digestion can lead to partitioned droplets containing multiple genome copies, resulting in underestimation of VCN. Always include a digestion efficiency control [93].
- Droplet Generation and Threshold Setting: Ensure consistent droplet generation. Set fluorescence amplitude thresholds carefully based on clear separation between positive and negative droplet populations to avoid miscalling [92].
Common Problems & Solutions for ddPCR VCN Assays
| Problem | Potential Cause | Recommended Solution |
|---|---|---|
| Low droplet count | Clogged cartridge, viscous sample | Centrifuge sample pre-loading; check cartridge lot consistency [93] |
| Poor amplitude separation | Probe degradation, suboptimal annealing temperature | Titrate probe concentration; perform temperature gradient for thermal cycling [92] |
| High coefficient of variation between replicates | Inconsistent droplet generation, pipetting error | Implement stringent pipetting protocols; use automated droplet generators [93] |
| VCN values lower than expected | Incomplete genomic DNA digestion | Optimize restriction enzyme type and concentration; check digestion efficiency via gel electrophoresis [92] |
Enhanced Potency Assays
Q: How can we address high variability in cell-based potency assays used for lot release of our cell therapy product?
A: Cell-based potency assay variability stems from multiple sources. A systematic approach to control them is crucial [93].
- Control Biological Reagents: Use a well-characterized, stable reference standard aligned with an in-house or pharmacopeial standard. Properly manage the cell bank for reporter cell lines to limit passage number and prevent phenotypic drift [93].
- Instrument Qualification and Monitoring: Ensure all instruments (plate readers, cell counters, incubators) undergo installation, operational, and performance qualification (IQ/OQ/PQ). Implement continuous performance monitoring [93].
- Assay Procedure Standardization: Lock down critical parameters like cell passage number, seeding density, serum lots, and incubation times in a standardized protocol. Train analysts thoroughly to minimize operator-induced variability [94] [93].
Q: Our potency assay is specific but does not reflect the product's known Mechanism of Action (MoA). Will this be acceptable for late-phase clinical trials?
A: No. Regulatory authorities expect potency assays to be based on the product's defined MoA. The FDA's 2023 draft guidance on potency assays for Cell and Gene Therapy (CGT) products emphasizes that the potency assurance strategy must link to biological activity relevant to the intended therapeutic effect [94]. A mere identity-based assay is insufficient. You must develop a bioassay that measures a specific biological activity tied to your therapy's efficacy, such as target cell killing for a CAR-T product or a specific secretory profile for a mesenchymal stromal cell product [92] [93].
Contamination Risk Reduction
Q: What rapid methods can be implemented for in-process monitoring of microbial contamination during cell culture, beyond traditional 14-day sterility tests?
A: Novel methods are emerging to drastically reduce contamination detection time [91]:
- Machine Learning-Aided UV Absorbance Spectroscopy: This label-free, non-invasive method analyzes the UV absorbance pattern of cell culture media. Machine learning models are trained to recognize spectral "fingerprints" associated with microbial contamination, providing a yes/no result in under 30 minutes. This allows for early detection and corrective actions during the manufacturing process [91].
- PCR-Based Testing: Quantitative PCR (qPCR) is a standard method for detecting specific contaminants like mycoplasma. It can provide results within a few hours [38] [92].
- Rapid Microbiological Methods (RMMs): These can reduce the testing window to about seven days but often still require enrichment steps and are more complex than the novel UV method [91].
Q: Survey data suggests operators are highly stressed about causing contamination. What strategies can mitigate this risk?
A: Addressing the human factor is a critical part of a contamination control strategy. Key approaches include [10] [9]:
- Enhanced Training: Invest in routine, hands-on aseptic technique training delivered in the operator's native language to ensure comprehension [9].
- Normalized Environmental Monitoring: Implement non-punitive operator flora monitoring to demonstrate that bacterial presence on personnel is normal, reinforcing that the goal is to prevent its transfer to the product [9].
- Closed System Adoption: Transition from open manipulations in Biosafety Cabinets (BSCs) to closed processing systems (e.g., isolators, connected bioreactor systems like the G-Rex) to physically separate the operator from the product [25] [9].
Experimental Protocols
Protocol 1: Droplet Digital PCR (ddPCR) for Vector Copy Number (VCN) Analysis
Purpose: To accurately quantify the average number of vector copies integrated per cell in a genetically modified cell therapy product [92].
Reagents & Materials:
- Sample genomic DNA (from test article)
- Restriction Enzyme (e.g., HindIII or EcoRI) and appropriate buffer
- ddPCR Supermix for Probes (No dUTP)
- FAM-labeled TaqMan assay targeting the transgene
- HEX-labeled TaqMan assay targeting a reference single-copy gene (e.g., RPP30)
- DG8 Cartridges and Droplet Generation Oil
- ddPCR Plate Sealer
- C1000 Touch Thermal Cycler (or equivalent)
- QX200 Droplet Reader
- Workflow: The diagram below outlines the key steps in the ddPCR VCN analysis protocol.
Procedure:
- DNA Digestion: Digest 1-2 µg of genomic DNA with a frequent-cutting restriction enzyme (e.g., 20 units of HindIII) for 1-2 hours to break up the DNA and prevent multiple copies from residing in a single droplet. Include a control for digestion efficiency [92].
- Reaction Setup: Prepare the ddPCR reaction mix on ice:
- 10 µL ddPCR Supermix for Probes
- 1 µL FAM-labeled transgene assay (20X)
- 1 µL HEX-labeled reference gene assay (20X)
- 50-100 ng of digested DNA
- Nuclease-free water to a final volume of 20 µL.
- Droplet Generation: Transfer 20 µL of the reaction mix into a DG8 cartridge. Carefully add 70 µL of Droplet Generation Oil. Place the cartridge into the QX200 Droplet Generator to create ~20,000 nanodroplets.
- PCR Amplification: Transfer the emulsified droplets to a 96-well PCR plate. Seal the plate and run the PCR protocol on a thermal cycler. A standard two-step protocol is: 95°C for 10 min (enzyme activation), then 40 cycles of 94°C for 30 sec and 60°C for 60 sec, followed by a 98°C hold for 10 min and a 4°C hold.
- Droplet Reading: Place the plate in the QX200 Droplet Reader. The reader streams each droplet past a two-color (FAM/HEX) optical detection system.
- Data Analysis: Use the manufacturer's software to analyze the data. The software assigns each droplet as positive (FAM+, HEX+, or both) or negative. VCN is calculated using the formula: VCN = (Number of FAM-positive droplets / Number of HEX-positive droplets) × (Copy number of reference gene). Report the average VCN from at least three replicate wells [92].
Protocol 2: Implementing a Novel, Rapid Contamination Screening Method
Purpose: To perform early, in-process screening for microbial contamination in cell culture fluids within 30 minutes using UV spectroscopy and machine learning [91].
Reagents & Materials:
- Cell culture supernatant (test article)
- Sterile, low-absorbance quartz cuvettes or microplate
- UV-Vis Spectrophotometer (capable of 200-300 nm scan)
- Pre-trained machine learning model (as described in SMART CAMP research)
- Workflow: The diagram below illustrates the streamlined process for rapid contamination screening.
Procedure:
- Sample Collection: Aseptically collect a small volume (e.g., 100-500 µL) of cell culture supernatant at a designated in-process time point.
- Spectrum Measurement: Transfer the sample to a UV-transparent cuvette. Using the spectrophotometer, obtain a full absorbance spectrum across the UV range (e.g., 200-300 nm). Use sterile culture medium as a blank/reference.
- Model Analysis: Input the raw or processed spectral data into the pre-trained, validated machine learning model.
- Result Interpretation: The model will output a binary classification (e.g., "Contaminated" or "Not Contaminated"). This is a rapid screening test.
- Action: A "Contaminated" result should trigger immediate corrective actions, such as quarantining the batch and initiating confirmatory testing using a validated Rapid Microbiological Method (RMM) or traditional sterility test. A "Not Contaminated" result allows the manufacturing process to proceed [91].
The Scientist's Toolkit: Research Reagent Solutions
Essential materials and reagents for implementing the advanced analytical methods discussed.
| Item | Function & Application | Key Considerations |
|---|---|---|
| ddPCR Supermix for Probes | Enables probe-based digital PCR for absolute quantification of VCN and residual host cell DNA [92]. | Ensure the formulation is compatible with your restriction enzymes and does not contain dUTP if uracil-digestion is not part of your protocol. |
| TaqMan Assay Kits | Provide sequence-specific primers and probes for targeting transgenes and reference genes with high specificity [92]. | Validate assays for efficiency and specificity. Use a reference gene with a stable, known copy number in the host genome. |
| Restriction Enzymes | Digest high-molecular-weight genomic DNA to ensure single-copy encapsulation in droplets for accurate ddPCR [92]. | Select enzymes that do not cut within your assay target sequences. Verify digestion efficiency. |
| Pre-trained ML Model for Contamination | Provides a rapid, label-free, non-invasive method for early detection of microbial contamination [91]. | The model must be validated for your specific cell type and manufacturing process. It is intended for screening, not final lot release. |
| Cell-Based Potency Assay Kits | Provide standardized reagents (e.g., target cells, detection antibodies) for measuring biological activity [93]. | The assay must be relevant to the product's Mechanism of Action (MoA). Control for critical reagents like cell passage number and serum lots is vital [94]. |
| Flow Cytometry Antibody Panels | Used for identity testing (immunophenotyping) and characterization of cell therapy products [92] [93]. | Panels should be designed to confirm desired markers and detect impurities. Requires rigorous validation of antibody specificity and staining protocols. |
Supplier Validation with GMP-Like Standards and Quality Audits
Frequently Asked Questions
Q1: What is supplier qualification in GMP environments and why is it critical for cell therapy research? Supplier qualification is a systematic process of evaluating and approving vendors to ensure they reliably provide materials that meet predefined quality, traceability, and regulatory compliance standards [95]. In cell therapy research, this process is mission-critical because raw materials come into direct contact with living cellular products, which cannot be terminally sterilized [96] [76]. Using a non-qualified supplier introduces risks of microbiological contamination, impurities, and batch failures that can compromise patient safety and therapy efficacy [95] [9].
Q2: How should we classify suppliers based on risk? A risk-based classification system ensures that oversight efforts are proportionate to the potential impact on product quality. Suppliers are typically categorized into three tiers [95]:
- Critical Suppliers: Provide materials with direct impact on product safety, sterility, and efficacy. Examples include Active Pharmaceutical Ingredients (APIs), cell culture media, and cytokines.
- Major Suppliers: Provide materials with significant indirect impact. Examples include primary packaging materials and key reagents.
- Minor Suppliers: Provide materials with minimal quality impact. Examples include standard lab consumables and office supplies.
Q3: What are the core pillars of a supplier qualification process? A robust qualification process is built on four key pillars [95] [97]:
- Initial Evaluation: Assess potential suppliers through questionnaires, document reviews (e.g., ISO 9001, ISO 13485 certifications), and evaluation of their quality management system.
- Risk-Based Audit: Conduct on-site or remote audits, with the scope and duration based on the supplier's risk classification. The audit verifies adherence to relevant GMP and GDP standards.
- Approval & Documentation: Maintain a centralized qualification dossier for each approved supplier, containing the risk assessment, audit reports, and quality agreements.
- Ongoing Monitoring & Re-qualification: Implement periodic performance reviews and re-audits. High-risk suppliers should be re-qualified annually, while lower-risk vendors may follow a 2-3 year cycle [95].
Q4: What is the role of a Quality Agreement? A Quality Agreement is a legally binding document that clearly defines the roles, responsibilities, and quality expectations between you and your supplier. It is a GMP requirement and should specify terms for change notifications, quality control testing, and non-conformance management [95] [97].
Q5: A key raw material is only available through a broker. How do we qualify them? Brokers must be qualified by taking into account the provisions laid down in the EU Good Distribution Practice (GDP) Guidelines, Chapter 10 [97]. Your qualification process must ensure the broker can provide full traceability for the material back to the original manufacturer and confirm that the material has been stored and distributed under appropriate GDP conditions.
Troubleshooting Guides
Problem: Recurrent contamination traced to a raw material. Solution:
- Isolate and Identify: Immediately quarantine all batches of the suspect material. Perform identity and sterility tests on the retained samples from the affected batches.
- Investigate Deviations: Review the supplier's batch records and Certificate of Analysis (CoA) for any deviations. Check your own incoming inspection records to rule out handling errors in your lab.
- Escalate to Supplier: Initiate a formal complaint with the supplier, requesting their investigation report and Corrective and Preventive Action (CAPA) plan.
- Implement CAPA: Based on the findings, your CAPA may involve increasing your testing frequency for that material, requiring the supplier to implement additional controls, or disqualifying the supplier and sourcing from an alternative, qualified vendor [95].
Problem: A supplier makes a major process change without prior notification. Solution:
- Assess Impact: Halt the use of materials from the changed process until a impact assessment is completed. The assessment should determine if the change affects the material's critical quality attributes.
- Formal Communication: Issue a formal observation to the supplier for violating the change notification clause typically stipulated in the Quality Agreement.
- Require Additional Data: Request supplementary data from the supplier, such as updated quality documentation, comparative testing results, or even a re-audit, to justify the continued use of the material [97].
Problem: Inconsistent cell culture performance, suspecting serum variability. Solution:
- Review Supplier Documentation: Scrutinize the CoAs from multiple batches to check for variations in key attributes like growth promotion testing, endotoxin levels, and origin.
- Perform In-house Testing: Beyond the CoA, conduct your own bio-functionality tests using a standardized cell culture assay to compare new batches against a proven reference batch.
- Audit the Supplier: If variability is confirmed, a focused audit of the supplier's manufacturing and testing processes is recommended to identify the root cause at its source [95].
Supporting Data & Procedures
Table 1: Supplier Risk Classification and Control Strategy
| Risk Level | Material Examples | Qualification Requirements | Re-qualification Frequency |
|---|---|---|---|
| Critical | Active Pharmaceutical Ingredients (APIs), FBS, Cytokines, Cell Culture Media [95] | Full quality questionnaire, on-site GMP audit, signed Quality Agreement, review of batch CoAs [95] [97] | Annual re-audit and performance review [95] |
| Major | Primary Packaging, Key Reagents, Single-Use Bioreactors [95] | Quality questionnaire, desktop or remote audit, signed Quality Agreement | Every 2 years |
| Minor | Standard Lab Consumables, Non-GMP Supplies [95] | Basic supplier questionnaire and certification review | Every 3 years or as needed |
Table 2: Quantitative Data on Contamination Concerns in Cell Processing (2025 Survey)A 2025 survey of 125 operators across 47 cell processing facilities highlights the critical need for rigorous raw material control.
| Survey Metric | Percentage of Operators | Sample Size (n) |
|---|---|---|
| Expressed concern about cell contamination | 72% | 125 [10] |
| Had direct experience with contamination incidents | 18% | 125 [10] |
| Attributed contamination to raw materials or materials | ~18% | 125 [10] |
Experimental Protocol: Conducting a Remote Desktop Audit of a Supplier
Objective: To assess a supplier's quality system and GMP compliance without an on-site visit. Materials: Supplier completed questionnaire, supplier quality manuals (e.g., QMS, deviation, CAPA), key personnel CVs, facility layout, list of equipment, and product CoAs. Methodology:
- Document Review: Systematically examine all provided documents for compliance with relevant GMP regulations (e.g., EU GMP Chapter 5, ICH Q7).
- Virtual Interview: Schedule video conferences with the supplier's Quality Head and production personnel. Use a predefined question list to probe their deviation management, change control, and staff training processes.
- Record Review: Request redacted copies of recent deviation reports, CAPA records, and internal audit reports to verify the effectiveness of their quality system.
- Data Integrity Check: For critical materials, review the structure and security of the system used to generate CoAs. Reporting: Document all findings, including any deficiencies and agreed-upon CAPAs, in a formal audit report. The report should provide a clear rationale for an approval or rejection decision [95].
The Scientist's Toolkit: Research Reagent Solutions
Table 3: Essential Materials for Contamination-Control in Cell Therapy Research
| Material / Reagent | Critical Function in Contamination Control | Key Quality Attributes to Validate with Supplier |
|---|---|---|
| Cell Culture Media | Provides nutrients for cell growth. A primary vector for microbial and viral contamination. | Sterility (bacteria, fungi), Mycoplasma, Endotoxin level, Virus-free, Growth promotion testing [76] [9] |
| Fetal Bovine Serum (FBS) | Complex growth supplement. High risk for viral and prion contamination. | Origin/traceability, Virus testing, Endotoxin level, Gamma-irradiation certification [76] |
| Trypsin/Enzymes | Detaches adherent cells for passaging. | Sterility, Purity (absence of host cell proteins/DNA), Activity/ Potency, Endotoxin level [76] |
| Single-Use Bioreactors & Bags | Provides a closed, sterile environment for cell expansion. | Sterility (validated irradiation dose), Extractables & Leachables profile, Bioburden, Endotoxin level, Material integrity [96] [9] |
| Ancillary Materials (e.g., Cytokines, Antibodies) | Directs cell differentiation and function. | Purity (SDS-PAGE/HPLC), Identity (Mass Spec), Sterility, Endotoxin level, Potency (cell-based assay) [95] |
Supplier Qualification Workflow
The following diagram illustrates the end-to-end process for qualifying and managing a supplier in a GMP-like environment.
Supplier Risk Assessment Logic
This diagram outlines the decision-making process for classifying supplier risk, which determines the intensity of the qualification effort.
Within the critical field of cell therapy manufacturing, controlling contamination is not merely a technical prerequisite but a fundamental pillar ensuring both product safety and process reliability. Viral transduction, a core technique for introducing genetic material into patient cells, presents unique contamination risks that can compromise entire production batches. This case study examines contamination control within the broader thesis objective of de-risking cell therapy manufacturing. The psychological burden on Cell Processing Operators (CPOs) is significant, with surveys indicating that 72% of operators express concern about contamination, a perceived risk that notably exceeds the actual reported contamination incidence of 0.06%–18% [10] [31]. This disparity highlights the need for robust, evidence-based protocols to mitigate both real and perceived risks. The following sections provide a detailed troubleshooting guide and FAQ to address specific contamination-related challenges in viral transduction processes.
Contamination Risk Assessment: Quantitative Data
Understanding the frequency and sources of contamination is the first step in its control. The following table summarizes key quantitative data from cell processing environments.
Table 1: Contamination Statistics in Cell Processing Facilities
| Metric | Reported Value | Context and Source |
|---|---|---|
| Operator Concern Rate | 72% | Percentage of Cell Processing Operators (CPOs) who expressed concern about cell contamination [10]. |
| Direct Contamination Experience | 18% | Percentage of CPOs who reported directly experiencing a contamination incident [10]. |
| Actual Contamination Incidence | 0.06% | Contamination rate observed across 29,858 batches of autologous immune cell production [31]. |
| Primary Attributed Cause | Intrinsic Contamination | Majority of the 0.06% incidents were regarded as originating from the collected blood (raw material) [31]. |
Frequently Asked Questions (FAQs) and Troubleshooting Guides
The common sources of contamination, as derived from operator concerns, can be categorized as follows [10]:
- Uncertainty in Materials and Environment (60%): Concerns that materials may not be adequately wiped, disinfected, or are not completely sterile. Worries about the work environment, particularly safety cabinets and isolators.
- Risks from Open Handling (50%): Contamination risks associated with open system operations, temporary open operations, and airflow disturbances.
- Physical Contact During Operations (47%): Potential for contamination from actions like opening flask lids, handling centrifuge tubes, and manipulating tissues on Petri dishes.
- Inadequate Cleaning Procedures (40%): Questions about the sufficiency of disinfection methods, especially on uneven surfaces that are difficult to wipe clean.
FAQ 2: My viral transduction efficiency is low. Could contamination be the cause?
While low transduction efficiency is often related to vector or target cell issues, contamination can indirectly affect cell health and thus efficiency. First, rule out common technical problems using the troubleshooting guide below. If all other factors are optimized, assess cell health and viability for signs of microbial contamination.
Table 2: Troubleshooting Guide for Low Transduction Efficiency & Other Issues
| Problem | Potential Cause | Recommended Solution |
|---|---|---|
| Low Transgene Expression | Low viral titer | Concentrate viral stock via ultracentrifugation or use commercial concentrators [98] [99]. |
| Low Multiplicity of Infection (MOI) | Optimize MOI by performing a pilot experiment with a reporter virus (e.g., GFP) on your target cells [99]. | |
| Poor virus-cell contact | Use a transduction enhancer like Polybrene (1–8 μg/mL) or Fibronectin to increase adsorption [98] [99]. | |
| Target cell confluency | Transduce cells at an optimal confluency (e.g., 25-50%); over-confluent cells have poor growth [99]. | |
| Promoter silencing | If using a CMV promoter, consider switching to a cell-type-specific promoter like EF1α or PGK [99]. | |
| Low Viral Titer | Improper storage/freeze-thaw | Avoid freeze-thaw cycles; aliquot stocks. Titer loss can be 25-50% per cycle [98] [99]. |
| Large gene insert | Ensure your insert is within the viral packaging limits (e.g., <8kb for lentivirus, <4.7kb for AAV) [99]. | |
| DNA rearrangements | Amplify viral vectors in specialized bacteria like Stbl3 E. coli to minimize LTR recombination [100]. | |
| Low Target Cell Viability | Cytotoxicity from high MOI | Decrease the amount of virus used or increase the confluency of target cells at transduction [99]. |
| Toxicity from enhancers | Use less Polybrene or try a less toxic alternative like ViralEntry enhancer, especially for sensitive cells [99]. | |
| Unhealthy cells at transduction | Ensure cells are contaminant-free (e.g., test for Mycoplasma), have high viability (>90%), and are not over-passaged [99]. |
Essential Experimental Protocols for Contamination Control
Protocol 1: Aseptic Material Handling and BSC Operation
This protocol is critical for preventing extrinsic contamination.
- Material Introduction: All materials must be disinfected and wiped with a sterile, appropriate disinfectant (e.g., 70% ethanol) before being introduced into the Biological Safety Cabinet (BSC) [10].
- Outer Packaging: Remove outer packaging of multiple packages outside the BSC. Where available, use a decontamination pass-box for material transfer [10].
- Ancillary Materials: Clean paper (e.g., for record-keeping) should be autoclaved or wiped with ethanol before introduction. Sterile water should be used for all solutions [10].
- BSC Practice: Allow the BSC to run for an appropriate time (e.g., 15 minutes) before starting work and maintain uncluttered workflows to minimize airflow disturbances.
Protocol 2: Production and Handling of Viral Stocks
Proper handling of viral vectors themselves is key to maintaining both sterility and functionality.
- Harvesting: Collect viral supernatant 48-72 hours post-transfection of packaging cells. Remove packaging cell debris by filtration (0.45 µm or 0.22 µm filter) or low-speed centrifugation (5 min at 300-500 g) to prevent contamination of the stock [98].
- Concentration (Optional): To increase titer and reduce volume, concentrate the virus via ultracentrifugation (75,000 - 225,000 g for 1.5–4 hours at 4°C). Resuspend the visible white pellet in cold, sterile PBS [98] [99].
- Storage: Aliquot the viral stock into single-use volumes. Avoid freeze-thaw cycles, as each cycle can lead to significant titer loss. Store at -80°C. Adding PEG6000 to a final concentration of 5% before freezing can help stabilize the virus [98] [99].
Protocol 3: Monitoring for Contamination and Transduction Success
- Check Packaging Cells: To verify viral production, check if the packaging cells themselves have been infected. If the viral vector contains an antibiotic resistance gene, subject the packaging cells to antibiotic selection ~72 hours post-transfection. A surviving population of 20-50% indicates successful viral production. Alternatively, if a fluorescent protein is encoded, the packaging cells should appear fluorescent under a microscope [98].
- Monitor Cell Health: Regularly check target cells for signs of contamination (e.g., rapid pH change, cloudiness, unusual morphology) and general health before and after transduction.
Workflow Visualization: Contamination Control in Viral Transduction
The following diagram illustrates a generalized workflow for a viral transduction process, integrating key contamination control points to ensure a sterile and successful experiment.
The Scientist's Toolkit: Essential Research Reagents and Materials
Table 3: Key Reagents for Viral Transduction and Contamination Control
| Reagent/Material | Function | Key Considerations |
|---|---|---|
| Polybrene | Cationic polymer that reduces electrostatic repulsion between viral particles and cell membranes, enhancing transduction efficiency [98] [99]. | Can be cytotoxic; requires concentration optimization (typically 1-8 μg/mL). Store in single-use aliquots to avoid freeze-thaw degradation [98]. |
| Fibronectin | Membrane-interacting protein used to enhance transduction efficiency, particularly for Polybrene-sensitive cells (e.g., hematopoietic, primary cells) [98]. | Shown to increase transduction efficiency by approximately 1.5-fold [98]. |
| Lenti-X Concentrator | A commercial reagent that simplifies the concentration of lentiviral supernatants via standard centrifugation, increasing viral titer [101]. | An alternative to ultracentrifugation; follow manufacturer's protocol for incubation and spinning times. |
| Stbl3 E. coli | A bacterial strain with a recA13 mutation designed for cloning lentiviral constructs, minimizing unwanted recombination between LTRs [100]. | Crucial for maintaining the genetic integrity of lentiviral plasmids during amplification. |
| Ultracentrifugation | A method to pellet viral particles from large-volume supernatants, significantly concentrating the viral stock [98] [99]. | Precede with a filtration or low-speed spin to remove cell debris. Resuspend pellet gently in cold, sterile PBS or buffer. |
| Serotype-Specific AAV | Adeno-associated viruses with engineered capsids (serotypes) that exhibit specific tropism for different target tissues (e.g., CNS, liver, muscle) [99]. | Selecting the correct serotype (e.g., AAV1, AAV2, AAVDJ) is critical for achieving high transduction efficiency in your target cell type. |
Conclusion
Reducing contamination risk in cell therapy manufacturing demands a multi-layered, science-driven strategy that integrates people, processes, and technology. A successful Contamination Control Strategy (CCS) is built on a foundation of rigorous risk assessment, is implemented through the adoption of closed systems and automation, and is sustained by a culture of continuous monitoring and improvement. The evolving 2025 regulatory environment emphasizes this holistic, risk-based approach. Future success will hinge on the wider adoption of advanced analytics, AI for process monitoring, and the development of more robust, interconnected automated systems. By embracing these principles, the field can overcome critical manufacturing hurdles, enhance product quality and patient safety, and ultimately fulfill the promise of cell and gene therapies for a broader population.
References
- 1. Cell Culture Contamination | Thermo Fisher Scientific - US [https://www.thermofisher.com/us/en/home/references/gibco-cell-culture-basics/biological-contamination.html]
- 2. A Beginner's Guide to Cell Culture: Practical Advice for ... [https://pmc.ncbi.nlm.nih.gov/articles/PMC10000895/]
- 3. Contamination Control for Cell Therapy [https://www.biopharminternational.com/view/contamination-control-cell-therapy]
- 4. Autologous vs. Allogeneic Cell Therapies: Promises & ... [https://www.genedata.com/resources/learn/details/blog/autologous-allogeneic-cell-therapies]
- 5. Contamination Control Strategies [https://www.ecolab.com/articles/2025/04/contamination-control-strategies]
- 6. Reducing Microbial Contamination Risk in Biotherapeutic ... [https://www.bioprocessintl.com/bioanalytical-methods/reducing-microbial-contamination-risk-in-biotherapeutic-manufacturing]
- 7. Identify and Resolve Cell Therapy Batch Manufacturing ... [https://www.emersonautomationexperts.com/2018/industry/life-sciences-medical/identify-resolve-cell-therapy-batch-manufacturing-exceptions/]
- 8. Desalting and Gel Filtration Chromatography [https://www.thermofisher.com/us/en/home/life-science/protein-biology/protein-biology-learning-center/protein-biology-resource-library/pierce-protein-methods/desalting-gel-filtration-chromatography.html]
- 9. 7 Expert Strategies to Control Contamination in Cell & ... [https://www.biopharminternational.com/view/7-expert-strategies-to-control-contamination-in-cell-gene-therapy-manufacturing]
- 10. Operator stress factors and cell contamination risks in ... [https://pmc.ncbi.nlm.nih.gov/articles/PMC12019840/]
- 11. Contamination Control Challenges Facing Cell Therapy ... [https://www.biomerieux.com/corp/en/education/resource-hub/pharma-quality-control/webinars/contamination-control-challenges-facing-cell-therapy-facilities.html]
- 12. Experience of contamination during autologous cell ... [https://pmc.ncbi.nlm.nih.gov/articles/PMC6581811/]
- 13. Process FAQ | Discover Cell Therapy Insights [https://www.celltherapy.me/processfaq]
- 14. Cell and Gene Therapy: Opportunities and Risks for ... [https://pharmatechassociates.com/blog/cell-and-gene-therapy-opportunities-and-risks-for-manufacturers/]
- 15. Process Steps in Cell Therapy Manufacturing [https://www.cellandgene.com/topic/cell-therapy-manufacturing]
- 16. A straightforward tool for developing a raw material supply ... [https://www.insights.bio/cell-and-gene-therapy-insights/journal/article/3067/A-straightforward-tool-for-developing-a-raw-material-supply-strategy-for-cell-gene-therapies]
- 17. Navigating cell therapy's maze of risks [https://www.cellgenetherapyreview.com/3975-Featured-Articles/621117-Navigating-a-maze-of-risks/]
- 18. Sterile Fluid Transfer for Cell Therapy Manufacturing—The ... [https://pmc.ncbi.nlm.nih.gov/articles/PMC8931546/]
- 19. Single-Use Sterile Connectors for Cell Therapy [https://www.cpcworldwide.com/Biopharma/Cell-Therapy]
- 20. Proposed Best Practices For Cell & Gene Therapy Aseptic Process Simulation [https://www.cellandgene.com/doc/proposed-best-practices-for-cell-gene-therapy-aseptic-process-simulation-0001]
- 21. A Novel Approach To Managing Risks In Aseptic ... [https://www.cellandgene.com/doc/a-novel-approach-to-managing-risks-in-aseptic-processing-of-cell-gene-therapies-0001]
- 22. Aseptic Process Simulation: Cell and Gene Therapy ... [https://www.americanpharmaceuticalreview.com/Featured-Articles/607960-Aseptic-Process-Simulation-Cell-and-Gene-Therapy-Manufacture/]
- 23. Closed and Aseptic Processes for Cell Therapy Manufacturing [https://cellculturedish.com/closed-aseptic-processes-cell-therapy-manufacturing/]
- 24. Regulatory Landscape and the Evolution of Contamination ... [https://progress-lifesciences.nl/publicaties/regulatory-landscape-and-the-evolution-of-contamination-control-in-2025/]
- 25. Preventing cross-contamination in cell therapy production [https://www.insights.bio/cell-and-gene-therapy-insights/webinars/625/preventing-crosscontamination-in-cell-therapy-production]
- 26. Closed System Automation for Cell Therapy [https://www.thermofisher.com/blog/behindthebench/closed-system-automation-cell-therapy/]
- 27. Advantages of Closed-System Cell Processing [https://www.origen.com/news-and-insights/advantages-of-closed-system-cell-processing]
- 28. FAQs on Revised EU GMP Annex 1 Contamination Control ... [https://www.westpharma.com/blog/2025/september/eu-gmp-annex-1-contamination-control-strategies-faqs?srsltid=AfmBOopaKCw6ANq74Ou9EHMgWA2yUCJqja3IKprGT2-p58Z9mWwJiRCk]
- 29. Best Practices in Qualification of Single-Use Systems [https://www.biopharminternational.com/view/best-practices-qualification-single-use-systems]
- 30. How Single-Use and Closed Systems Work Better Together [https://www.enablebiotech.com/news/maximizing-impact-in-cell-therapy-manufacturing-how-single-use-and-closed-systems-work-better-together]
- 31. Experience of contamination during autologous cell ... [https://www.sciencedirect.com/science/article/pii/S235232041630027X]
- 32. BioPhorum's closure analysis risk assessment [https://www.biophorum.com/news/closed-systems-in-cnc-space-risk-assessment-with-clara-biophorum/]
- 33. Contamination Control Considerations For ... [https://www.cellandgene.com/doc/contamination-control-considerations-for-cell-and-gene-therapy-facilities-0001]
- 34. What is the future of automation in closed systems for cell ... [https://www.cleanroomtechnology.com/the-future-of-automation-in-closed-systems-for]
- 35. Closed-Loop Manufacturing Is The Cell Therapy ... [https://www.cellandgene.com/doc/closed-loop-manufacturing-is-the-cell-therapy-revolution-we-need-0001]
- 36. FDA Warning Letter: Missing Identity Tests, Unverified ... [https://www.gmp-compliance.org/gmp-news/fda-warning-letter-missing-identity-tests-unverified-coas-and-inadequate-deg-eg-controls]
- 37. Cell Culture Contamination: Experts on How to Minimize ... [https://www.corning.com/worldwide/en/products/life-sciences/resources/stories/at-the-bench/how-to-minimize-contamination-risk-and-protect-your-cultures.html]
- 38. Troubleshooting Cell Culture Contamination [https://www.creative-bioarray.com/support/troubleshooting-cell-culture-contamination-a-comprehensive-guide.htm]
- 39. Bacterial Endotoxin Testing Market Size 2025 to 2034 [https://www.precedenceresearch.com/bacterial-endotoxin-testing-market]
- 40. The environmental microbial retrieving assessment of cell- ... [https://pmc.ncbi.nlm.nih.gov/articles/PMC11448444/]
- 41. Environmental Monitoring of cGMP Cleanroom Facilities for ... [https://pmc.ncbi.nlm.nih.gov/articles/PMC11471380/]
- 42. Environmental Monitoring for Cell Therapies [https://www.thermofisher.com/ru/en/home/life-science/bioproduction/contaminant-and-impurity-testing/cell-therapy/environmental-monitoring.html]
- 43. Navigating the manufacturing, testing and regulatory ... [https://pmc.ncbi.nlm.nih.gov/articles/PMC12307197/]
- 44. Isolator-based point-of-care manufacturing - PubMed Central [https://pmc.ncbi.nlm.nih.gov/articles/PMC12440961/]
- 45. Overcoming common cell therapy manufacturing ... [https://www.thermofisher.com/blog/behindthebench/overcoming-common-cell-therapy-manufacturing-challenges-with-a-closed-modular-and-automated-solution/]
- 46. Automated manufacturing of cell therapies [https://www.sciencedirect.com/science/article/pii/S0168365925001701]
- 47. Frontiers | Comparative of Efficacy Methods for... Decontamination [https://www.frontiersin.org/journals/cellular-and-infection-microbiology/articles/10.3389/fcimb.2025.1591478/abstract]
- 48. Current Challenges in Environmental Decontamination and ... [https://pmc.ncbi.nlm.nih.gov/articles/PMC11583872/]
- 49. Effectiveness of ultraviolet devices and hydrogen peroxide ... [https://pmc.ncbi.nlm.nih.gov/articles/PMC7132689/]
- 50. Review of aerosolized hydrogen peroxide, vaporized ... [https://pmc.ncbi.nlm.nih.gov/articles/PMC8233052/]
- 51. Selecting Decontamination Technology: Aerosolized vs. VHP [https://sg.sterislifesciences.com/Resources/Technical-Learning-Library/Technical-Learning-Library-Folder/White-Papers/Selecting-Decontamination-Technology---Aerosolized-vs-VHP]
- 52. HHP vs. VPHP vs. Aerosolized Hydrogen Peroxide [https://curissystem.com/resources/blog/hydrogen-peroxide-biodecontamination-ahp-vphp-hhp-what-is-the-difference]
- 53. Disinfection FAQs [https://curissystem.com/resources/faqs]
- 54. Qualitative Comparison of Hydrogen Peroxide ... [https://www.mdpi.com/2813-8856/1/2/10]
- 55. Design optimization and validation of UV-C illumination ... [https://pmc.ncbi.nlm.nih.gov/articles/PMC10909644/]
- 56. Review of aerosolized hydrogen peroxide, vaporized ... [https://www.sciencedirect.com/science/article/abs/pii/S0196655321004314]
- 57. Cell culture challenges: Contamination & prevention [https://greenelephantbiotech.com/blog/cell-culture-challenges-contamination-prevention/]
- 58. How to prevent in contamination culture | INTEGRA cell [https://www.integra-biosciences.com/china/en/stories/tips-preventing-contamination-cell-culture]
- 59. and Avoiding Preventing Culture Cell Contamination [https://www.technologynetworks.com/cell-science/how-to-guides/preventing-and-avoiding-cell-culture-contamination-299231]
- 60. What Is Aseptic Technique? 2025 Guide to Infection Control [https://learntastic.com/blog/what-is-aseptic-technique]
- 61. Aseptic Laboratory Techniques and Safety in Cell Culture [https://www.thermofisher.com/us/en/home/references/gibco-cell-culture-basics/aseptic-technique.html]
- 62. and Non-Viable Particle Monitoring Aseptic Processing [https://www.news-medical.net/whitepaper/20200514/Aseptic-Processing-and-Non-Viable-Particle-Monitoring.aspx]
- 63. Lyophillizer Validations , Aseptic simulations design-Lyo... Process [https://www.lyophilizationworld.com/post/lyophillizer-validations-aseptic-process-simulations-design-lyo-process-and-rationale-for-hold-dura-1]
- 64. Selecting the right equipment for aseptic processing [https://www.getinge.com/us/insights/articles/pharmaceutical-production/selecting-the-right-equipment-for-aseptic-processing/]
- 65. Contamination Control Strategies: You have questions, we ... [https://www.pda.org/pda-letter-portal/home/full-article/contamination-control-strategies-you-have-questions-we-have-answers]
- 66. Contamination Control for Cell and Gene Therapies Needs ... [https://www.pharmtech.com/view/contamination-control-for-cell-and-gene-therapies-needs-new-analytics]
- 67. Manufacturing Considerations for Cell and Gene Therapy ... [https://www.parexel.com/insights/blog/manufacturing-considerations-cell-and-gene-therapy-products-mitigate-risk-covid-19-disease-transmission]
- 68. Laboratory Biosafety Guidelines for working with SARS- ... [https://www.cdc.gov/covid/php/lab/index.html]
- 69. Practical Guidelines for Collection, Manipulation and ... [https://pmc.ncbi.nlm.nih.gov/articles/PMC7300551/]
- 70. COVID-19 Guideline, Part 2: Infection Prevention [https://www.idsociety.org/practice-guideline/covid-19-guideline-infection-prevention/]
- 71. Infection Control Guidance: SARS-CoV-2 | COVID-19 [https://www.cdc.gov/covid/hcp/infection-control/index.html]
- 72. Manufacturing and Management of CAR T-Cell Therapy in ... [https://pmc.ncbi.nlm.nih.gov/articles/PMC7593817/]
- 73. Process Scale-Up And Scale-Out, Closure And Automation [https://www.cellandgene.com/doc/process-scale-up-and-scale-out-closure-and-automation-cdmo-services-0001]
- 74. EU GMP Annex 1. Implementation of Contamination ... [https://www.pda.org/pda-letter-portal/home/full-article/eu-gmp-annex-1.-implementation-of-contamination-control-strategy]
- 75. USP publishes Draft Chapter on Contamination Control ... [https://www.gmp-compliance.org/gmp-news/usp-publishes-draft-chapter-on-contamination-control-strategy]
- 76. Cell therapy: cGMP facilities and manufacturing - PMC [https://pmc.ncbi.nlm.nih.gov/articles/PMC3666518/]
- 77. EU GMP Annex 1: Best Practices in Contamination Control [https://www.westpharma.com/blog/2025/june/eu-gmp-annex-1-contamination-control-guidelines?srsltid=AfmBOorv5ATuo9xYCVuPIHfGuZxjYmWZ86hgBVzfby84jv8wRS37IKTi]
- 78. The Cell and Gene Therapy Dilemma Centralized Vs ... [https://www.cellandgene.com/doc/the-cell-and-gene-therapy-dilemma-centralized-vs-decentralized-manufacturing-0001]
- 79. Centralized vs Decentralized Manufacturing [https://industrytoday.com/centralized-vs-decentralized-manufacturing/]
- 80. Implementation of a quality management system for ... [https://pmc.ncbi.nlm.nih.gov/articles/PMC12361990/]
- 81. Scalable Manufacturing: The Make-or-Break Factor for Cell ... [https://cellinobio.com/press/scalable-manufacturing-the-make-or-break-factor-for-cell-gene-and-tissue-therapies]
- 82. Managing Particulate Contamination in Cell Therapy [https://www.halolabs.com/blog/particulate-contamination-in-cell-therapy/]
- 83. Pharmeuropa 37.3 just released - European Directorate for the Quality of Medicines & HealthCare - EDQM [https://www.edqm.eu/en/-/pharmeuropa-37.3-just-released]
- 84. Guidelines relevant for advanced therapy medicinal products [https://www.ema.europa.eu/en/human-regulatory-overview/advanced-therapy-medicinal-products-overview/guidelines-relevant-advanced-therapy-medicinal-products]
- 85. Development and Validation of Waste Decontamination ... [https://pmc.ncbi.nlm.nih.gov/articles/PMC9134633/]
- 86. Validation of Cleaning Processes (7/93) [https://www.fda.gov/inspections-compliance-enforcement-and-criminal-investigations/inspection-guides/validation-cleaning-processes-793]
- 87. Comparative analysis and process optimization for ... [https://www.nature.com/articles/s41598-025-89686-7]
- 88. Practice of Cryopreservation of Cellular Starting Materials from ... [https://pmc.ncbi.nlm.nih.gov/articles/PMC12446400/]
- 89. Cryopreservation - Key Survey Findings from the ISCT ... [https://www.isctglobal.org/telegrafthub/blogs/ken-ip1/2025/05/28/cryopreservation-key-survey-findings-from-the-isct]
- 90. Process development considerations for cryopreservation ... [https://www.insights.bio/cell-and-gene-therapy-insights/journal/article/64/Process-development-considerations-for-cryopreservation-of-cellular-therapies]
- 91. Novel method detects microbial contamination in cell cultures [https://news.mit.edu/2025/novel-method-detects-microbial-contamination-smart-0425]
- 92. Cell and Gene Therapy Quality Control & Assurance [https://www.cellandgene.com/topic/cell-gene-therapy-qa-qc]
- 93. Cell-Based Potency Assay Development [https://www.bioprocessintl.com/product-characterization/analytical-methods-for-cell-therapies-method-development-and-validation-challenges]
- 94. Draft guidance on potency assays for CGT products ... [https://www.agencyiq.com/blog/draft-guidance-on-potency-assays-for-cgt-products-garners-extensive-stakeholder-input/]
- 95. Mastering Supplier Qualification and Management in GMP ... [https://www.labmanager.com/mastering-supplier-qualification-and-management-in-gmp-environments-a-practical-guide-for-laboratory-professionals-34063]
- 96. GMP compliance in Cell Therapy & AAV manufacturing [https://greenelephantbiotech.com/blog/gmp-compliance-in-cell-therapy-aav-manufacturing/]
- 97. What are the GMP Requirements for Supplier Qualification? [https://www.gmp-compliance.org/gmp-news/what-are-the-gmp-requirements-for-supplier-qualification]
- 98. 5 Tips for Troubleshooting Viral Transductions [https://blog.addgene.org/5-tips-for-troubleshooting-viral-transductions]
- 99. Cell Culture – How to Optimize your Viral Transduction [https://info.abmgood.com/cell-culture-optimizing-viral-transduction]
- 100. Lentiviral Gene Delivery for Mammalian Expression— ... [https://www.thermofisher.com/us/en/home/technical-resources/technical-reference-library/protein-expression-support-center/lentiviral-gene-delivery-support/lentiviral-gene-delivery-support-troubleshooting.html]
- 101. Viral product learning center [https://www.takarabio.com/learning-centers/gene-function/viral-transduction?srsltid=AfmBOoqFO2_6rc6gh1ISWbWhiUX2Wic4IvyVd87Y5uNOrkvu8SHzfdYB]