Mini-Tissues and Microtissues in Bioprinting: Revolutionizing Drug Discovery and Disease Modeling
This article provides a comprehensive overview of 3D bioprinted mini-tissues and microtissues, engineered living constructs that replicate the structure and function of human organs.
Mini-Tissues and Microtissues in Bioprinting: Revolutionizing Drug Discovery and Disease Modeling
Abstract
This article provides a comprehensive overview of 3D bioprinted mini-tissues and microtissues, engineered living constructs that replicate the structure and function of human organs. Tailored for researchers, scientists, and drug development professionals, it explores the foundational principles of these models, the advanced bioprinting methodologies used to create them, and key strategies for optimizing their biological relevance and reproducibility. It further evaluates their application in predictive drug screening and toxicology, comparing their performance against traditional 2D and animal models. The synthesis offers insights into how these human-relevant systems are addressing critical bottlenecks in pharmaceutical development and regenerative medicine.
What Are Bioprinted Mini-Tissues? Defining the Next Generation of Preclinical Models
The field of tissue engineering is undergoing a significant transformation, moving away from traditional two-dimensional (2D) cell cultures towards complex three-dimensional (3D) structures that more accurately recapitulate human physiology. Mini-tissues and microtissues represent foundational concepts in this shift, serving as the fundamental building blocks for advanced bioprinting research and regenerative medicine [1] [2]. These structures are crucial for bridging the translational gap between conventional cell culture and in vivo conditions, a gap evidenced by the high failure rate of drugs in development, approximately 90% of which fail to receive full FDA approval, often due to inadequate predictive models [2]. While the terms are sometimes used interchangeably in literature, they can represent distinct conceptual approaches to assembling living constructs. This technical guide delineates their definitions, fabrication methodologies, and critical applications within the context of a broader thesis on 3D bioprinting, providing researchers and drug development professionals with a framework for their use in creating more predictive biological models.
Defining the Building Blocks: Mini-Tissues vs. Microtissues
In 3D bioprinting, the creation of complex biological structures is often based on three core strategic approaches: biomimicry, autonomous self-assembly, and the use of mini-tissue building blocks [1] [3] [4]. The terminology of "mini-tissues" and "microtissues" is intrinsically linked to these strategies, particularly the third.
Conceptual Definitions and Strategic Context
- Mini-Tissues: The term "mini-tissue" is strategic and conceptual. It refers to the smallest structural and functional units of an organ, which are then assembled into a larger macrotissue [1] [3]. This approach combines elements of both biomimicry and autonomous self-assembly. The mini-tissues themselves can be fabricated using either strategy and are defined by their function as the fundamental component of the final tissue [1]. For instance, a kidney nephron or a liver lobule could be considered a mini-tissue unit.
- Microtissues: The term "microtissue" is often used more broadly to describe 3D cellular aggregates or spheroids that serve as the physical, fabricated realization of a building block. They are typically scaffold-free spheroidal clusters of cells that form through self-assembly in a liquid suspension or using low-attachment molds [5] [2]. In many contexts, "microtissues" are the experimental manifestation of the "mini-tissue" concept. The NIH Record notes that spheroids, a common type of microtissue, are 3D clusters made from mature primary cells or pre-differentiated induced pluripotent stem cells (iPSCs) that can assemble without the need for further differentiation, making them a faster route to 3D models [2].
Comparative Analysis: Strategic and Physical Attributes
The table below summarizes and contrasts the key characteristics of these two interrelated concepts.
Table 1: Strategic and Physical Attributes of Mini-Tissues and Microtissues
| Attribute | Mini-Tissue (Conceptual Building Block) | Microtissue (Fabricated Spheroid) |
|---|---|---|
| Definition | Smallest structural/functional unit of an organ; a strategic concept [1] | Physical, scaffold-free 3D cellular aggregate; a common physical realization [5] [2] |
| Primary Context | A top-down strategic approach to organ design [1] [4] | A bottom-up fabrication technique for 3D culture [5] |
| Scaffold Requirement | Can be scaffold-based or scaffold-free [1] | Typically scaffold-free [5] |
| Key Advantage | Potential to solve limitations in engineering complex tissues like vascular networks; scalable for automation [1] | Faster to create than organoids; more physiologically relevant than 2D cultures; suitable for high-throughput screening [2] |
| Typical Size Range | Defined by functional unit, can vary widely | Tunable from ~150 μm to over 300 μm based on cell seeding density [5] |
| Complexity | High, as it aims to replicate a functional unit | Moderate, typically containing one or a few cell types in a cohesive aggregate |
The Relationship to Organoids
It is crucial to distinguish microtissues from organoids. While both are 3D structures, organoids are more complex and are derived from stem cells (often iPSCs) that undergo a process of self-organization and differentiation to recapitulate key aspects of an organ's microarchitecture and function [2]. This process can take many weeks or months. Microtissues (spheroids), in contrast, are often formed from primary cells or already-differentiated iPSCs and assemble without this extensive differentiation phase, making them a less complex but faster model system [2].
Fabrication Methodologies for Microtissues
The creation of consistent, scaffold-free microtissues is a critical step in the bottom-up approach to tissue engineering. The following section details a proven, high-throughput protocol.
High-Throughput Scaffold-Free Microtissue Generation
A study demonstrated the use of consumer-grade 3D printing to fabricate custom 96-well inserts for the consistent formation of spheroidal microtissues [5]. This method is accessible, cost-effective, and allows for precise control over spheroid size.
Table 2: Experimental Protocol for 3D Printed Microtissue Inserts [5]
| Protocol Step | Detailed Description | Critical Parameters |
|---|---|---|
| 1. Insert Fabrication | - Design: 96-well inserts designed in CAD software (e.g., TinkerCAD) with internal tapering for pipette guidance and negative hemispherical well bottoms.- Printing: Inserts are 3D printed inverted (180°) using Polylactic Acid (PLA) filament at 205°C with support structures turned off.- Post-Processing: Removal of print defects, sterilization in 70% ethanol for 24 hours, and air-drying in a sterile hood. | Nozzle temperature, layer height, and elimination of support structures to ensure smooth well surfaces. |
| 2. Cell Preparation | - Culture human cells (e.g., glioblastoma U87, mesenchymal stem cells, intestinal smooth muscle) to confluency.- Trypsinize (0.2%/4 mM EDTA) and resuspend in complete DMEM media (10% FBS, 1% P/S, 4.5 g/L glucose). | Cell viability post-trypsinization is critical. Use a defined, serum-containing "insert media." |
| 3. Microtissue Seeding | - Place sterilized 3D printed inserts into a standard flat-bottom 96-well plate.- Seed 40 μL of cell suspension into each well of the insert. Pipette slowly to allow a droplet to form and be suspended underneath the insert. | Uniform pipetting speed and volume are essential for consistent droplet and spheroid formation. |
| 4. Incubation & Maturation | - Incubate seeded inserts at 37°C, 7.5% CO₂, and 100% humidity for 72 hours.- Monitor spheroid formation periodically using phase-contrast microscopy. | Maintain constant humidity to prevent evaporation of the 40 μL droplet. 72 hours is typically sufficient for single-spheroid formation. |
| 5. Analysis & Transfer | - After 72 hrs, tap plate gently or use centrifugation to dislodge formed spheroids to the well bottom for easy imaging and access.- Use fluorescence microscopy with live-dead stains (e.g., Calcein-AM, Ethidium Homodimer-1) for viability assessment. | NIH ImageJ or similar software can be used to measure spheroid diameter and quantify circularity. |
Quantitative Analysis of Microtissue Formation
The aforementioned protocol allows for "tunable" control of microtissue size based on initial cell seeding density. Research with human placental-derived mesenchymal stem cells (h-PMSC) demonstrated a direct correlation between cell number and final spheroid diameter [5].
Table 3: Cell Density-Dependent Sizing of Microtissues [5]
| Initial Seeding Cell Count | Resulting Mean Spheroid Diameter (μm ± SD) | Morphological Observations |
|---|---|---|
| 14,251 cells | 304.3 ± 20.8 | Symmetrical and tightly formed spheroids |
| 7,125 cells | 245.8 ± 23.2 | Symmetrical and tightly formed spheroids |
| 1,781 cells | 187.3 ± 21.3 | Symmetrical and tightly formed spheroids |
| 890 cells | 149.8 ± 15.0 | Less symmetrical and loosely formed spheroids |
The Scientist's Toolkit: Essential Research Reagents and Materials
Successful fabrication and application of microtissues require a suite of specialized reagents and materials. The following table details key solutions used in the featured protocol and the wider field.
Table 4: Essential Research Reagent Solutions for Microtissue Research
| Reagent / Material | Function and Description | Example from Protocol |
|---|---|---|
| 3D Printed Microtissue Insert | A custom-fabricated mold, typically from PLA, designed to hold nanoliter-to-microliter volumes of cell suspension in a hemispherical bottom, promoting cell aggregation into a single spheroid. | Polylactic Acid (PLA) 96-well insert [5] |
| Bioink / Cell Suspension | A solution containing living cells and culture media. In scaffold-free approaches, this is a simple cell suspension. In other bioprinting contexts, bioink includes a hydrogel carrier like collagen or alginate. | Cell suspension in DMEM with 10% FBS [5] |
| Induced Pluripotent Stem Cells (iPSCs) | Adult stem cells that can be differentiated into any cell type. They are a versatile source for generating patient-specific tissue models, including organoids and some microtissues. | Used as a cell source for more complex models [2] |
| Primary Cells | Cells isolated directly from human or animal tissues. They are mature, tissue-specific cells (e.g., fibroblasts, chondrocytes) used to form microtissues without a differentiation step. | Human glioblastoma (U87), intestinal smooth muscle cells [5] |
| Growth Factors | Signaling proteins (e.g., FGF, TGF-β, EGF) that regulate cellular processes like proliferation, differentiation, and migration. Essential for directing stem cell fate in organoid formation. | Component of bioinks and differentiation media [6] |
| Live/Dead Viability Assay | A fluorescent staining kit (e.g., containing Calcein-AM for live cells and Ethidium Homodimer-1 for dead cells) to assess cell viability within 3D constructs post-printing or post-assembly. | Used to confirm viability of formed microtissues [5] |
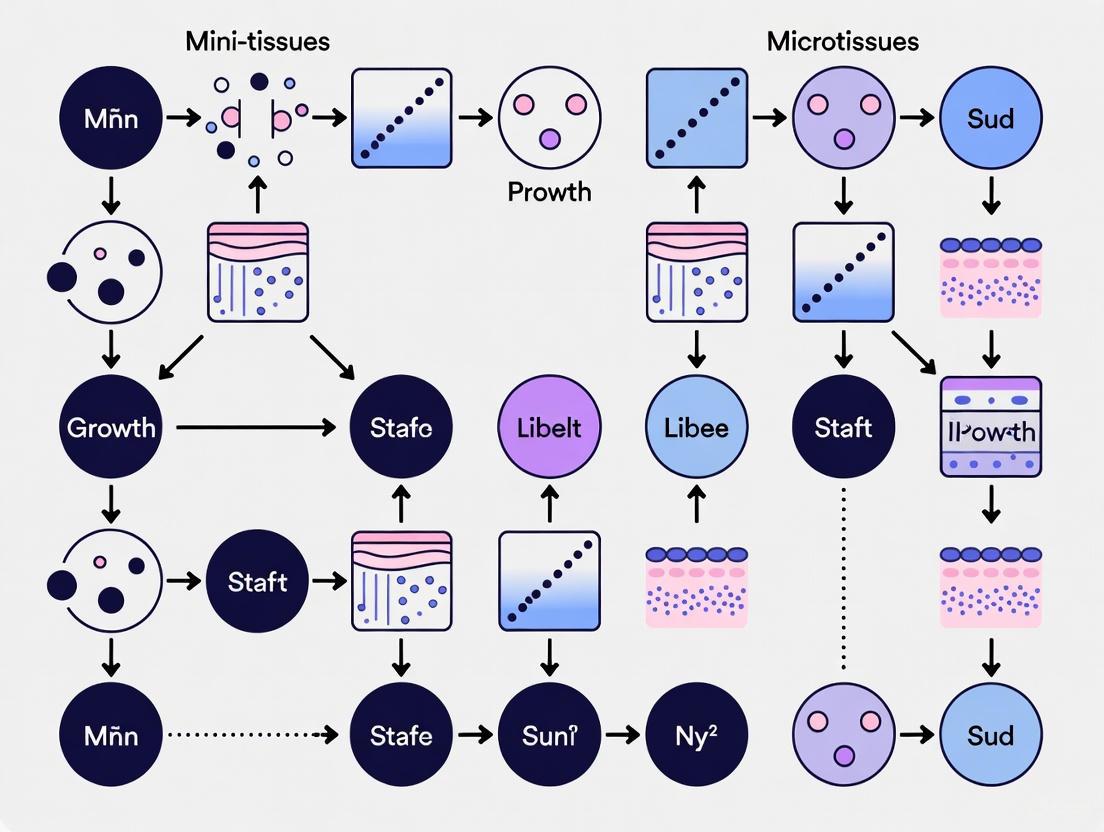
Advanced Workflow: From Microtissues to Macrotissues
The ultimate goal of creating microtissues is often their assembly into larger, functional macrotissues or their use in sophisticated drug screening platforms. The following diagram illustrates the integrated workflow from design to final application.
Applications in Drug Development and Future Perspectives
Microtissues and mini-tissues are pivotal in addressing the high attrition rates in drug development by providing more human-relevant models for preclinical testing [2]. Their applications are multifaceted:
- Improved Disease Modeling: 3D microtissues replicate cell-cell and cell-ECM interactions critical for in vivo function, making them superior for modeling diseases like cancer. For instance, tumor spheroids can be used to study cancer invasion and metastasis [5] [2].
- High-Throughput Drug Screening: The 96-well insert format enables the rapid, parallel production of uniform microtissues, making them ideal for screening the efficacy and toxicity of bioactive agents and pharmaceuticals [5]. This allows researchers to weed out ineffective compounds early in the development process.
- Building Blocks for Engineered Tissues: As the "mini-tissue" concept suggests, these units are the foundation for building larger tissues. Research has shown the ability to assemble microtissue building blocks into mature, functional tissues, such as blood vessels and cartilage strands [1].
- Future Outlook: The field is moving towards greater integration with microphysiological systems (MPS), such as organ-on-a-chip platforms that incorporate fluid flow to mimic blood vessels [2] [7]. Furthermore, advancements in 3D bioprinting process control, including AI-driven real-time monitoring, are emerging to improve the reproducibility and quality of bioprinted tissues, accelerating their translation into real-world applications [7].
The strategic concepts of "mini-tissues" and their physical realization as "microtissues" represent a foundational paradigm in modern tissue engineering and bioprinting research. By moving beyond 2D cultures to these 3D structures, researchers can create models that more faithfully mimic the complexity of human tissues. The scaffold-free, high-throughput fabrication methods available make microtissues a powerful and accessible tool for drug development professionals. As the technology for assembling these building blocks advances, particularly with improvements in bioprinting fidelity and the integration of dynamic MPS, their role in refining disease models, enhancing drug discovery pipelines, and ultimately engineering functional tissue grafts will only become more pronounced.
In bioprinting research, mini-tissues and microtissues represent three-dimensional (3D) engineered tissue constructs designed to mimic the architectural and functional characteristics of native human tissues on a miniature scale. These constructs serve as vital models for drug screening, disease modeling, and fundamental biological research, bridging the gap between two-dimensional cell cultures and full-scale organs [8] [9]. The fabrication of physiologically relevant mini-tissues hinges upon the precise integration of three core components: bioinks, living cells, and scaffolds. These elements work in concert to create biomimetic environments that support cell viability, differentiation, and functional tissue formation [9] [10]. This technical guide examines the critical role of each component, detailing their composition, properties, and interplay in advancing bioprinting research and applications.
The evolution of bioprinting has introduced multiple fabrication approaches, including extrusion-based, droplet-based, and laser-assisted bioprinting, each with specific advantages for different mini-tissue applications [9]. The successful implementation of any technique depends fundamentally on the careful selection and optimization of its core components to ensure the creation of complex, functional tissue structures that accurately recapitulate in vivo conditions for research and therapeutic purposes.
Core Component 1: Bioinks – The Living Materials
Composition and Functional Requirements
Bioinks represent the cornerstone of bioprinting, comprising a combination of biomaterials, living cells, and biological factors. These specialized materials must fulfill stringent functional requirements to successfully fabricate viable mini-tissues. Printability refers to the bioink's rheological properties that enable precise deposition and shape fidelity during the printing process, while biocompatibility ensures the material supports cell viability and function without inducing adverse responses [9] [10]. Furthermore, bioinks must provide appropriate mechanical properties to match the target tissue and maintain structural integrity post-printing.
The biomaterial components of bioinks typically include natural polymers such as alginate, collagen, fibrin, hyaluronic acid, and decellularized extracellular matrix (dECM). These materials inherently possess biological recognition sites that facilitate cell adhesion, proliferation, and tissue formation [10]. Synthetic polymers like PLA (polylactic acid) and PEG (polyethylene glycol) are also employed, offering enhanced tunability of mechanical properties and degradation rates but often requiring modification with bioactive motifs to improve their biological functionality [9].
Advanced Bioink Formulations and Classification
Advanced bioink development has focused on creating composite systems that leverage the advantages of multiple material classes. These hybrid bioinks combine natural polymers for their bioactivity with synthetic components for enhanced mechanical control, addressing the challenge of simultaneously meeting biological and structural requirements [9]. Additionally, sacrificial bioinks have emerged as a powerful strategy for creating complex vascular networks within mini-tissues; these materials are printed to form channel structures that are subsequently removed to create perfusable lumens [8].
Bioinks can be classified based on their cellular content into cell-laden and acellular formulations. Cell-laden bioinks contain living cells suspended within the biomatrix and are directly deposited during printing, enabling precise cell positioning. In contrast, acellular bioinks consist solely of biomaterials and are typically used to create scaffolds that are seeded with cells after printing [10]. The choice between these approaches depends on the specific application, printing technology, and cell sensitivity to the mechanical stresses encountered during bioprinting.
Table 1: Classification of Common Bioink Materials and Their Properties
| Material Class | Examples | Key Advantages | Limitations | Primary Applications |
|---|---|---|---|---|
| Natural Polymers | Alginate, Collagen, Fibrin, Hyaluronic acid | High biocompatibility, inherent bioactivity | Limited mechanical strength, batch-to-batch variability | Soft tissue models (skin, cartilage), Drug screening platforms |
| Synthetic Polymers | PLA, PEG, Pluronics | Tunable mechanical properties, reproducible fabrication | Lack of bioactive sites, potential degradation products | High-fidelity scaffolds, Composite bioinks |
| Hybrid/Composite | GelMA-PEG, Alginate-Gelatin | Balanced mechanical and biological properties | Complex formulation process | Vascularized tissues, Complex organ models |
| dECM-based | Liver dECM, Heart dECM | Tissue-specific biochemical composition | Weak mechanical properties, difficult to standardize | Patient-specific disease models, Organ-on-chip systems |
Core Component 2: Cells – The Biological Engine
The cellular component constitutes the living element of bioprinted mini-tissues, ultimately determining their biological functionality. Primary cells isolated directly from human tissues represent the gold standard for creating physiologically relevant models as they maintain native phenotypes and functions. However, their limited expansion capacity and donor-dependent variability constrain their widespread application [10]. Stem cells, including mesenchymal stem cells (MSCs) and induced pluripotent stem cells (iPSCs), offer a powerful alternative with their self-renewal capability and differentiation potential into multiple cell lineages [8].
The advent of iPSC technology has been particularly transformative for bioprinting, enabling the generation of patient-specific mini-tissues for personalized disease modeling and drug testing. These cells allow researchers to create mini-tissues that genetically match individual patients, facilitating the study of patient-specific disease mechanisms and treatment responses [8]. For instance, iPSC-derived cardiomyocytes have been successfully utilized to bioprint cardiac microtissues for drug toxicity screening and disease modeling.
Cell Viability and Functionality Considerations
Maintaining cell viability during and after the bioprinting process presents a significant challenge, as cells encounter various stressors including shear forces during extrusion, pressure changes in droplet-based systems, and potential UV exposure in stereolithography printing [9]. Different bioprinting techniques exhibit varying impacts on cell survival, with laser-assisted bioprinting generally demonstrating the highest viability rates (>95%) due to its non-contact nature, though with limitations in scalability [9].
Beyond mere survival, preserving cellular functionality post-printing is essential for creating physiologically relevant mini-tissues. This requires careful optimization of bioink composition to support specific cellular activities, including proliferation, migration, and differentiation into mature phenotypes. For example, in skin bioprinting, keratinocytes must stratify and form tight junctions to recreate the epidermal barrier function, while dermal fibroblasts should secrete appropriate extracellular matrix components to support dermal structure [10]. Different cell types also exhibit varying sensitivity to bioprinting parameters, necessitating customized approaches for different tissue applications.
Core Component 3: Scaffolds – The Structural Framework
Architectural and Mechanical Requirements
Scaffolds provide the 3D structural framework that supports cell organization and tissue development in bioprinted constructs. These structures must replicate the complex architecture of native tissues, incorporating features such as pores and channels that facilitate nutrient diffusion, waste removal, and cell migration [9]. The mechanical properties of scaffolds, including stiffness, elasticity, and compressive strength, must be carefully matched to the target tissue to ensure proper cell signaling and tissue functionality.
The fabrication of scaffolds with integrated vascular networks represents a critical frontier in bioprinting, as the absence of perfusable channels limits the size and viability of thick tissues [8]. Advanced strategies such as FRESH (Freeform Reversible Embedding of Suspended Hydrogels) printing and sacrificial writing have enabled the creation of complex, hierarchical vascular patterns within mini-tissues, enhancing nutrient delivery and supporting larger tissue volumes [8]. These approaches typically involve the simultaneous printing of both structural and sacrificial materials to create interconnected lumen structures.
Biomaterial-Scaffold Interactions
The choice of biomaterial profoundly influences scaffold performance and cellular responses. Natural biomaterials like collagen and fibrin inherently promote cell adhesion and proliferation but often lack the mechanical strength required for certain applications [10]. Synthetic polymers offer superior mechanical tunability but may require surface modification with bioactive peptides (e.g., RGD sequences) to enhance cell interaction. Hydrogels represent the most widely used scaffold materials in bioprinting due to their high water content, which facilitates nutrient diffusion and mimics the native extracellular environment [9].
The degradation profile of scaffold materials must be synchronized with the rate of new tissue formation to ensure a seamless transition from an artificial support to a natural tissue structure. Rapid degradation can lead to premature structural failure, while overly slow degradation may impede tissue maturation and remodeling [10]. Advanced scaffold designs now incorporate multiple materials with complementary properties to create composite structures that better mimic the heterogeneous nature of native tissues, such as osteochondral constructs with distinct bone and cartilage regions.
Table 2: Scaffold Design Considerations for Different Mini-Tissue Applications
| Tissue Type | Key Structural Requirements | Mechanical Properties | Material Considerations | Vascularization Strategy |
|---|---|---|---|---|
| Skin Models | Stratified layers (epidermis/dermis), Porous architecture | Elastic modulus: 0.1-0.3 MPa | Collagen, Fibrin, Chitosan | Endothelial cell incorporation, Angiogenic factor delivery |
| Cardiac Patches | Aligned fiber organization, Electrically conductive pathways | Elastic modulus: 10-50 kPa | GelMA, Alginate with carbon nanotubes | Channel incorporation, Sacrificial printing |
| Hepatic Tissues | High porosity for metabolite exchange, Lobular morphology | Elastic modulus: 0.5-1 kPa | Hyaluronic acid, dECM from liver | Endothelial network, Spheroid packing |
| Bone Grafts | Interconnected pores (>100μm), Mineralized matrix | Compressive strength: 2-30 MPa | PLA-HA composites, Bioactive glass | Channel design for nutrient transport, Growth factor gradients |
Experimental Protocols for Mini-Tissue Fabrication
Standardized Bioprinting Workflow
A robust protocol for mini-tissue fabrication begins with bioink preparation, which involves mixing selected biomaterials with cells at appropriate concentrations (typically 1-20 million cells/mL depending on cell type and application) [10]. The bioink must be thoroughly homogenized while maintaining sterility and cell viability. For temperature-sensitive materials, precise thermal control during handling is critical to prevent premature gelation or degradation.
The printing process itself requires optimization of numerous parameters including printing pressure (for extrusion-based systems), printing speed, nozzle diameter (typically 100-500 μm), and build plate temperature [9]. Following deposition, crosslinking is initiated through mechanisms specific to the bioink chemistry, such as ionic crosslinking (e.g., CaCl₂ for alginate), photo-crosslinking (UV exposure with photoinitiators like LAP or Irgacure 2959), or thermal gelation [10]. Post-printing, constructs undergo maturation in culture systems designed to support tissue development, which may include specialized bioreactors that provide mechanical stimulation or perfusion to enhance tissue functionality.
Quality Assessment and Functional Validation
Comprehensive characterization of bioprinted mini-tissues involves multiple assessment modalities. Cell viability is typically quantified at multiple time points post-printing using live/dead staining assays (e.g., calcein AM/ethidium homodimer), with acceptable thresholds generally exceeding 80% for functional tissues [10]. Metabolic activity can be monitored using assays such as AlamarBlue or MTT, while molecular analysis including qPCR, immunohistochemistry, and Western blotting provides information on gene expression and protein synthesis specific to the target tissue.
Functional validation depends on the intended application of the mini-tissue. Drug screening platforms require demonstration of physiological responses to pharmaceutical compounds, such as dose-dependent toxicity in hepatic models or contractile changes in cardiac tissues [8]. Disease models must recapitulate key pathological features, which might include inflammatory responses, fibrotic deposition, or metabolic dysfunction. For implantation applications, assessment of tissue integration and functional recovery in animal models provides critical preclinical data.
The Scientist's Toolkit: Essential Research Reagents and Materials
Successful fabrication of mini-tissues requires a comprehensive suite of specialized reagents and materials. This toolkit encompasses everything from base biomaterials to sophisticated analytical tools for quality assessment. The selection of appropriate components directly influences the physiological relevance and functionality of the resulting constructs.
Table 3: Essential Research Reagents and Materials for Mini-Tissue Bioprinting
| Category | Specific Items | Function/Purpose | Application Notes |
|---|---|---|---|
| Base Biomaterials | Alginate, Gelatin, Collagen, Hyaluronic acid, Fibrin | Provide structural support and biochemical cues | Natural polymers often require modification or blending for optimal properties |
| Synthetic Polymers | PLA, PEG, Pluronics, PU | Enhance mechanical properties and printability | May require functionalization with bioactive motifs for cell adhesion |
| Crosslinking Agents | CaCl₂ (for alginate), Genipin, UV photoinitiators (LAP, Irgacure) | Stabilize printed structures post-deposition | Concentration and exposure time must be optimized for cell viability |
| Cells and Culture Reagents | Primary cells, Stem cells (iPSCs, MSCs), Culture media, Growth factors | Provide living component and support tissue development | Cell passage number and density critically impact tissue functionality |
| Vascularization Agents | VEGF, bFGF, HUVECs, Sacrificial materials (Pluronic F127, Gelatin) | Promote blood vessel formation within constructs | Essential for thick tissues (>200μm) to prevent necrotic cores |
| Characterization Tools | Live/Dead assay kits, Histology reagents, Mechanical testers | Assess viability, structure, and function | Multi-modal analysis provides comprehensive quality assessment |
The field of bioprinting continues to evolve rapidly, with ongoing advances in all three core components driving the development of increasingly sophisticated mini-tissues and microtissues. Future progress will likely focus on the creation of multi-material systems that better capture the heterogeneity of native tissues, incorporating increasingly complex vascular and neural networks to enhance tissue functionality and integration potential [8]. The integration of advanced manufacturing technologies such as artificial intelligence for print parameter optimization and in-situ monitoring systems will further enhance the reproducibility and quality of bioprinted constructs [11].
As these technologies mature, bioprinted mini-tissues are poised to transform biomedical research and clinical practice, offering more physiologically relevant models for drug development and personalized medicine approaches. The continued refinement of bioinks, cell sourcing strategies, and scaffold design methodologies will undoubtedly expand the applications and impact of this promising technology in the coming years, potentially addressing critical challenges in organ transplantation and regenerative medicine [8] [12].
The traditional path of drug development is fraught with inefficiency and high failure rates. The average new drug requires over 15 years and $2 billion to journey from discovery to full approval [13]. A critical point of failure is the preclinical stage, where a heavy reliance on animal models often yields data that does not translate to humans. It is reported that 60% of Phase I and II clinical trials fail due to lack of efficacy, and 30% fail due to toxicity—issues that were not predicted by animal testing [13]. This high attrition rate creates a significant bottleneck, delaying treatments for patients and inflating R&D costs.
In response, a paradigm shift is underway, moving toward more predictive, human-relevant models. This shift is being catalyzed by regulatory change; the U.S. Food and Drug Administration (FDA) has begun a groundbreaking initiative to phase out animal testing requirements for specific drug classes, including monoclonal antibodies [14]. This move encourages the use of New Approach Methodologies (NAMs), such as advanced computer simulations and human-based lab models [14]. Among the most promising of these human-relevant approaches are 3D-bioprinted mini-tissues and microtissues. These constructs, which include organoids and tissue spheroids, are designed to mimic the complexity of native human tissues more accurately than flat, 2D cell cultures or animal models [15] [16]. By providing a superior platform for disease modeling and drug screening, they hold the potential to de-risk drug development and accelerate the delivery of new therapies.
The Scientific and Regulatory Impetus for Change
The Limitations of Animal Models
The scientific case for moving beyond animal models is robust. Key distinctions between humans and animals include fundamental differences in how drugs are broken down and cleared from the body, difficulties in replicating relevant human disease pathophysiology, and a lack of human-representative genetic diversity in inbred rodent populations [13]. The predictivity of animal tests is inconsistent; while some adverse events like cardiac effects may be forecasted, the lack of toxicity in animals has very low predictivity for a lack of adverse events in humans for some organs [13].
The Regulatory Landscape Evolves
Recognizing these challenges, regulators are actively creating pathways for the adoption of modern testing tools. The FDA Modernization Act 2.0, signed into law in December 2022, explicitly sanctions the use of alternatives to animal testing for Investigational New Drug (IND) applications [13]. This legislative change is being followed by concrete action. In September 2024, the FDA's Center for Drug Evaluation and Research (CDER) accepted its first letter of intent for an organ-on-a-chip technology as a drug development tool, a key step toward its formal qualification [13]. Furthermore, the FDA's "Fit-for-Purpose Initiative" aims to facilitate the regulatory acceptance of computational and in-silico drug development tools [13]. These developments signal a definitive move toward a regulatory framework that prioritizes human-relevant data over traditional animal studies.
3D Bioprinting and the Advent of Mini-Tissues
Defining Mini-Tissues and Microtissues in Bioprinting
Within bioprinting research, the terms "mini-tissues" and "microtissues" generally refer to small-scale, three-dimensional tissue constructs engineered to replicate key aspects of human biology. Unlike traditional 2D cell cultures, which grow cells in a single layer on plastic, these 3D models facilitate direct cell-cell signaling and cell-matrix interactions, creating a native-like tissue microenvironment [15]. This architecture leads to improved biological functions, making 3D models more physiologically relevant for testing [15]. Common forms of these microtissues include:
- Tissue Spheroids and Cell Aggregates: Dense, spherical clusters of cells used as building blocks for larger structures or as models for drug screening [15].
- Organoids: More complex, self-organizing 3D structures derived from stem cells that can mimic the complexity of an organ [17].
- Bioprinted Constructs: Larger tissues or scaffolds created by the precise, layer-by-layer deposition of bioinks (which can contain cells, spheroids, or biomaterials) to form a predefined 3D structure [15] [18].
3D Bioprinting Fundamentals
3D bioprinting is an additive manufacturing process that enables the precise arrangement of biological materials, living cells, and biochemicals to form 3D structures [18]. The process typically relies on three primary bioprinting approaches, each with its own methodologies and compatible bioinks, as detailed in the table below.
Table 1: Fundamental 3D Bioprinting Technologies
| Bioprinting Method | Core Mechanism | Key Considerations | Compatible Bioinks |
|---|---|---|---|
| Extrusion-Based | Biomaterials are forced through a microscale nozzle via pneumatic or mechanical pressure, forming a continuous filament deposited layer-by-layer [18]. | Shear stress on cells can affect viability, adhesion, proliferation, and morphology [16]. | Gelatin, Hyaluronic Acid, Collagen, Alginate, Chitosan, Pluronics [18]. |
| Droplet-Based (Inkjet) | Bioink is sprayed onto a hydrogel surface in a non-contact process using thermal or piezoelectric actuators [18]. | Phototoxicity from UV or near-UV light can cause DNA damage [16]. | Low-viscosity natural and synthetic polymers [15]. |
| Laser-Assisted (LAB) | A pulsed laser interacts with a ribbon coated with biological materials, causing evaporation and transfer of the material onto a receiving substrate [18]. | Phototoxicity from UV or near-UV light can cause DNA damage [16]. | Specific light-sensitive hydrogels and polymer coatings [18]. |
The following diagram illustrates the core workflow and decision-making process in 3D bioprinting for drug development.
Bioprinting Model Development Workflow
The Critical Role of Bioinks
Bioinks are specialized materials that enable the printing of living cells and biomolecules, ensuring their proper transport and organization [18]. They are fundamental to the success of bioprinted mini-tissues. An ideal bioink must be non-toxic, bioactive, and capable of being processed at low temperatures. Key materials include natural polymers like gelatin, prized for its biocompatibility and support for cell adhesion, and hyaluronic acid (HA), a natural ECM component known for its biodegradability and flexibility [18]. Research has shown that integrating HA into a polylactic acid (PLA) bioink improves the mechanical properties of printed cartilage and enhances cellular activity [18]. The global 3D bioprinting market reflects this material importance, with the "Living Cells" segment holding about 40% of the market share, as they are essential for creating functional tissues [17].
Experimental Protocols for Characterizing Bioprinted Tissues
Rigorous characterization of bioprinted mini-tissues is essential to confirm they accurately model human biology. Moving beyond simple viability checks to a multi-faceted assessment is critical for generating meaningful drug screening data [16].
Comprehensive Viability and Apoptosis Analysis
While live/dead assays (e.g., using Calcein AM for live cells and Ethidium Homodimer-1 for dead cells) provide a basic snapshot, they are insufficient alone [16]. A more robust protocol involves differentiating between apoptotic and necrotic cell death to understand the full impact of the bioprinting process.
- Protocol:
- At defined time points post-bioprinting (e.g., 1, 3, and 7 days), wash constructs with phosphate-buffered saline (PBS).
- Incubate with Annexin-V (a marker for phosphatidylserine exposure in early apoptosis) and Propidium Iodide (PI) (a marker for late apoptosis and necrosis) according to manufacturer specifications.
- Image using confocal microscopy. Cells negative for both markers are considered live; Annexin-V positive/PI negative are early apoptotic; Annexin-V positive/PI positive are late apoptotic/necrotic [16].
- As an alternative, use a caspase 3/7 DEVD-peptide substrate that becomes fluorescent upon cleavage, allowing for time-lapsed imaging of apoptosis [16].
Immunofluorescence for Phenotype and Proliferation
Immunofluorescent (IF) staining is a highly versatile method to examine cell identity, proliferation, and organization within the 3D construct [16].
- Protocol:
- Fix bioprinted tissues with 4% paraformaldehyde and permeabilize with Triton X-100.
- Block non-specific binding with a serum protein solution.
- Incubate with primary antibodies targeting:
- Proliferation Markers: Ki67 or PCNA.
- Cell-Specific Markers: e.g., Albumin for hepatocytes, MAP2 for neurons, to verify phenotype.
- Functional Markers: e.g., ZO-1 for tight junctions, E-cadherin for cell-cell adhesion.
- Incubate with fluorophore-conjugated secondary antibodies and counterstain nuclei with DAPI.
- Image using high-content confocal or light-sheet microscopy. AI-powered segmentation is often necessary to analyze the large 3D datasets generated [16].
Metabolic and Functional Characterization
Understanding the metabolic state of cells within the construct is vital, as gradients of oxygen and nutrients can create zones of varying cell health.
- Protocol:
- Fluorescent Lifetime Imaging (FLIM): Measure the decay time of endogenous fluorophores like NAD(P)H and FAD. The ratio of free to protein-bound NAD(P)H provides insight into the metabolic state of cells (e.g., glycolytic vs. oxidative phosphorylation) [16].
- Spatial Metabolomics: Perform mass spectrometry imaging on cryosections of the bioprinted tissue to map the spatial distribution of metabolites, revealing metabolic heterogeneity similar to native tissue [16].
Table 2: Key Research Reagents for Characterizing Bioprinted Tissues
| Reagent / Tool | Function | Example Application in 3D Models |
|---|---|---|
| Calcein AM / EthD-1 | Live/Dead Viability Stain | Distinguishes metabolically active (live) from membrane-compromised (dead) cells; provides initial quality control [16]. |
| Annexin-V / PI | Apoptosis/Necrosis Detection | Differentiates modes of cell death induced by shear stress or cytotoxicity during bioprinting [16]. |
| Ki67 Antibody | Proliferation Marker | Identifies and quantifies the proportion of cycling cells within the 3D construct over time [16]. |
| Cell-Lineage Specific Antibodies | Cell Phenotype Validation | Confirms the maintenance or acquisition of correct cell identity (e.g., osteoblast, hepatocyte) post-printing [16]. |
| NAD(P)H / FLIM | Metabolic Imaging | Interrogates cellular metabolic states without labels, identifying nutrient/oxygen gradients in the tissue [16]. |
| AI Segmentation Software | High-Content Image Analysis | Automates the quantification of cell number, morphology, and marker expression in large 3D image datasets [16]. |
Impact and Future Directions
The integration of 3D-bioprinted human tissues into drug development is already yielding significant benefits. The global 3D bioprinting market, valued at around USD 1.3 billion in 2024, is projected to grow at a CAGR of 13.6% to reach USD 2.8 billion by 2030 [17]. This growth is fueled by the technology's application in creating low-cost, high-accuracy tissue models for preclinical testing, which can help overcome the 90% failure rate of medicines that occurs when relying on animal models [17].
Furthermore, the field is rapidly advancing through the integration of stem cells and organoids, which are used in about 70% of global research projects to create highly functional tissues [17]. These innovations are positioned to drastically reduce the cost of preclinical trials by providing more human-predictive data. The convergence of bioprinting with AI and machine learning is also improving the precision of the process by optimizing printing parameters and predicting cell growth patterns, thereby increasing productivity and decreasing errors [17]. As these technologies mature and regulatory pathways solidify, human-relevant, bioprinted mini-tissues will become an indispensable tool for breaking the drug development bottleneck, enabling safer and more effective therapies to reach patients faster and more reliably.
The pursuit of creating functional, lab-grown biological constructs hinges upon the faithful replication of the native tissue microenvironment. Mini-tissues and microtissues in bioprinting research are three-dimensional (3D) tissue constructs engineered to mimic key aspects of their in vivo counterparts for applications in disease modeling, drug screening, and regenerative medicine [7] [19]. Unlike simple 3D cell cultures, these constructs are precisely fabricated using bioprinting technologies to recapitulate a defined architecture and composition. Their value lies in providing a more physiologically relevant platform than traditional two-dimensional cultures, potentially leading to more accurate predictions of human drug responses and disease pathology. The critical determinants of their functionality are the triad of physiological complexity, cell-cell interactions, and the extracellular matrix (ECM), which are deeply interdependent. This technical guide delves into these core characteristics, providing an in-depth analysis for researchers and drug development professionals.
The Role of the Extracellular Matrix in Bioprinting
The ECM is not merely a passive scaffold but an active, information-rich network that provides structural, mechanical, and biochemical support to cells [20]. It is a complex assembly of proteins (e.g., collagen, elastin), glycoproteins (e.g., fibronectin, laminin), and proteoglycans that varies in composition and organization across different tissues. In the context of bioprinting, the ECM's role is primarily fulfilled by the bioink.
ECM-Based Bioinks: Types and Significance
Bioinks are substances or materials, often hydrogels, that support living cells and are used as the raw material in 3D bioprinting processes [20]. They must exhibit excellent biocompatibility, printability, and possess mechanical and degradation properties suited to the target tissue [20]. ECM-based biomaterials are particularly advantageous because they can mitigate foreign body responses by presenting native ECM molecules at the interface between the material and tissue, thereby promoting better integration and innate immune responses that lead to constructive remodeling [20].
Table 1: Categories and Characteristics of ECM-Based Bioinks
| Bioink Category | Description | Examples | Advantages | Limitations |
|---|---|---|---|---|
| Native ECM Derivatives | Decellularized ECM from tissues or isolated ECM components. | Collagen, Methacrylated Collagen (CollMA), Laminin-111, Fibronectin [20]. | High bioactivity; presents natural biochemical cues. | Often weak mechanical properties; low viscosity; long gelation time [20]. |
| Synthetic Biomaterials | Polymers with tunable properties, sometimes functionalized with ECM motifs. | Polylactic Acid (PLA), Polycaprolactone (PCL) [20]. | Adjustable mechanical and degradation properties; high printability. | Generally poor innate biocompatibility and cell adhesion. |
| ECM Composites and Blends | Combinations of natural ECM components and synthetic polymers. | Collagen-Alginate, Hyaluronic Acid-PEG blends [20]. | Balances bioactivity with improved mechanical integrity and printability. | Requires optimization to ensure component synergy. |
Experimental Protocol: Bioprinting with Methacrylated Collagen
A common protocol for creating cell-laden structures involves using photosensitive ECM derivatives. For instance, Isaacson et al. 3D-bioprinted corneal structures using a methacrylated collagen bioink [20].
- Bioink Preparation: A solution of methacrylated collagen is prepared and mixed with corneal keratinocytes at a specified density (e.g., 5-10 million cells/mL).
- Printing: The cell-laden bioink is loaded into a bioprinter and extruded through a micronozzle (e.g., 27G) according to a digital model of the corneal structure, typically into a support bath to maintain shape.
- Cross-linking: Immediately after deposition, the printed structure is exposed to UV light (e.g., 365 nm wavelength) at a specific intensity (e.g., 5-10 mW/cm²) for a brief period (e.g., 30-60 seconds) to photopolymerize the CollMA and stabilize the structure.
- Post-processing and Maturation: The cross-linked construct is transferred to a cell culture medium and incubated. Viability is assessed at day 1 and day 7 post-printing, with well-optimized parameters yielding viability >90% at day 1 and >83% at day 7 [20].
Cell-Cell Interactions and Signaling Networks
In native tissues, cells constantly communicate with each other through direct contact (e.g., gap junctions, adhesion receptors) and paracrine signaling. Recapitulating these dense communication networks is vital for the self-organization and emergent functionality of mini-tissues. Bioprinting facilitates this by allowing the precise spatial positioning of multiple cell types in close proximity, encouraging the formation of natural signaling gradients and juxtacrine signaling events. These interactions are crucial for coordinated behaviors such as synchronized contraction in cardiac tissue, neural network firing in brain tissue, and angiogenic sprouting in vascularized tissues. The following diagram illustrates the key signaling interactions that govern the development and function of a bioprinted cardiac mini-tissue.
Engineering Physiological Complexity: From 3D to 4D Bioprinting
Physiological complexity refers to the architectural, mechanical, and functional attributes of a living tissue. Traditional 3D bioprinting aims to recreate the final anatomical shape of an organ, but this often overlooks the dynamic processes that occur during embryonic development [19]. A groundbreaking approach to addressing this is 4D bioprinting, where the fourth dimension is time, and the bioprinted structure evolves its shape and function post-printing.
The 4D Bioprinting Breakthrough in Heart Tissue
Researchers at the University of Galway have developed a novel 4D bioprinting technique for creating heart tissues that change shape in a programmable way due to cell-generated forces, mirroring developmental processes [19].
- Mechanism: Tissues are bioprinted using embedded bioprinting within a granular support hydrogel. The encapsulated cells generate contractile forces, which guide the predictable morphing of the initial print geometry [19].
- Control Parameters: The magnitude of shape-changing can be controlled by modifying the initial print geometry and the stiffness of the bioink [19].
- Functional Outcome: This shape-morphing was found to sculpt cell alignment and significantly enhance the contractile properties of the bioprinted heart tissues, making them beat stronger and faster—a key step toward functional maturity [19].
The workflow below outlines the integrated process of designing, printing, and validating a physiologically complex mini-tissue, incorporating both advanced imaging and 4D bioprinting concepts.
Quantitative Functional Outcomes in Bioprinted Tissues
The ultimate validation of a mini-tissue's physiological complexity is its functional performance. The table below summarizes key quantitative metrics from recent studies, highlighting the impact of different engineering strategies.
Table 2: Functional Outcomes of Advanced Bioprinting Strategies
| Bioprinting Strategy | Tissue Type | Key Quantitative Outcome | Significance |
|---|---|---|---|
| 4D Shape-Morphing [19] | Heart Tissue | Enhanced contractile strength and rate. | Addresses the major challenge of limited tissue maturity, leading to functionally superior constructs. |
| AI-Enhanced Process Control [7] | Engineered Tissues (General) | Reduced print defects (e.g., over-/under-deposition); improved inter-tissue reproducibility. | Increases reliability and resource efficiency, crucial for drug screening and potential implantation. |
| ECM-Based Bioink (Methacrylated Collagen) [20] | Corneal Structure | High cell viability: >90% (Day 1), 83% (Day 7). | Demonstrates the high biocompatibility of ECM-derived materials for constructing complex, cell-dense tissues. |
The Scientist's Toolkit: Essential Research Reagents and Materials
The successful fabrication of mini-tissues relies on a suite of specialized reagents and materials. The following table details key components for a lab setting engaged in this research.
Table 3: Essential Reagents and Materials for Mini-Tissue Research
| Research Reagent / Material | Function | Example Application |
|---|---|---|
| Methacrylated Collagen (CollMA) | A photosensitive ECM-derived bioink; provides a biomimetic environment and can be rapidly stabilized via UV cross-linking [20]. | Bioprinting of corneal, cardiac, and vascular tissues [20]. |
| Granular Support Hydrogel | A self-healing suspension used as a support bath for embedded 3D and 4D bioprinting, allowing freeform fabrication of complex structures [19]. | Enabling 4D bioprinting of shape-morphing tissues by providing a temporary, non-reactive environment. |
| Laminin-111 and Fibronectin | Glycoprotein components of the native ECM that promote cell adhesion, spreading, and signaling [20]. | Added to bioinks to enhance cell attachment and function, as in the fabrication of a human luminal muscle pump [20]. |
| Modular Imaging & AI Analysis Platform | A low-cost (<$500) add-on system for real-time, layer-by-layer monitoring of the print process, using an AI pipeline to compare prints to the digital design [7]. | Identifying optimal print parameters and detecting defects like over- or under-deposition of bioink in real-time [7]. |
The convergence of advanced bioinks that mimic the ECM, strategies to promote robust cell-cell interactions, and innovative techniques like 4D bioprinting is rapidly advancing the physiological complexity of mini-tissues. These engineered constructs are becoming increasingly sophisticated models for human biology. Future research must focus on scaling these approaches to create human-sized tissues, which will require the successful integration of vascular networks to maintain cell viability [19]. Furthermore, the adoption of intelligent process control and standardization, as seen with AI-driven monitoring, will be critical for achieving the reproducibility needed for high-throughput drug screening and eventual clinical translation [7]. As these technologies mature, bioprinted mini-tissues are poised to fundamentally reshape disease modeling, drug discovery, and the future of regenerative medicine.
Building Better Models: Techniques and Real-World Applications in Bioprinting
Within bioprinting research, microtissues (also referred to as mini-tissues) are three-dimensional (3D) cell clusters engineered to emulate the complexity and function of human tissues on a miniature scale [21] [22]. Unlike traditional two-dimensional (2D) cell cultures, microtissues provide a more realistic microenvironment that promotes critical cell-to-cell signaling and cell-matrix interactions, closely mimicking native tissue physiology [15]. These constructs are revolutionizing regenerative medicine, disease modeling, and drug discovery by offering a more ethical and physiologically relevant alternative to animal models and simple cell cultures [21] [22].
The fabrication of these microtissues represents a significant challenge, requiring precise spatial control over biological materials and living cells. Bioprinting has emerged as a transformative approach, enabling the detailed layering of bioinks to craft microtissues with complex, tissue-like 3D structures [22]. This technical guide examines three core bioprinting technologies—Extrusion, Inkjet, and Stereolithography—detailing their methodologies, capabilities, and applications in the fabrication of advanced microtissues.
Core Bioprinting Technologies for Microtissue Engineering
The following table provides a quantitative comparison of the three primary bioprinting technologies used in microtissue fabrication.
Table 1: Comparative Analysis of Core Bioprinting Technologies
| Characteristic | Extrusion-Based Bioprinting | Inkjet-Based Bioprinting | Stereolithography (Vat Polymerization) |
|---|---|---|---|
| Fundamental Principle | Pneumatic or mechanical forcing of bioink through a nozzle to create continuous filaments [23] [24] | Thermal or piezoelectric ejection of discrete bioink droplets [23] [24] | Selective solidification of a liquid bioink reservoir using light (e.g., UV, laser) [25] [26] |
| Typical Resolution | 100 - 1000 µm [27] [25] | 50 - 300 µm [23] [25] | 10 - 50 µm [25] |
| Bioink Viscosity | High (highly viscous) [24] | Low (low viscosity) [23] | Low to medium (photopolymerizable resins) [23] [25] |
| Printing Speed | Medium | High [23] | High (for entire layers) |
| Cell Viability | Can be lower due to shear stress [27] | High (>85%) [23] | High, but potential for UV damage |
| Key Advantage | Versatility with materials; ability to create large structures [23] [24] | High speed, resolution, and suitability for multiple cell types [23] | Superior resolution and smooth surface finish [25] |
| Primary Limitation | Lower resolution; potential for cell damage from shear forces [27] | Blockages with high cell densities; limited bioink viscosity [27] | Limited material choice; potential cytotoxicity from photoinitiators [25] |
| Ideal Microtissue Application | Large, dense tissues; vascular scaffolds [27] | High-resolution patterning; drug screening models [28] | Architecturally complex, high-resolution structures [25] |
Extrusion-Based Bioprinting: Protocol for Fabricating a Cellular Scaffold
Extrusion bioprinting is the most prevalent bioprinting platform, ideal for creating microtissue scaffolds that require mechanical robustness [27]. The following is a generalized protocol for fabricating a cell-laden hydrogel construct.
Step 1: Pre-Bioprinting and Design
- Bioink Preparation: A bioink is formulated by mixing a hydrogel precursor (e.g., gelatin methacryloyl (GelMA), alginate) with a cultured patient cell suspension. The bioink must be optimized for viscosity and cross-linking kinetics [23] [15].
- 3D Model Creation: A digital model of the desired microtissue structure is created using computer-aided design (CAD) software or medical imaging data. This model is digitally sliced into individual layers [23].
Step 2: The Bioprinting Process
- The bioink is loaded into a sterile syringe-based printhead.
- Using pneumatic pressure or a mechanical piston, the bioink is extruded through a micronozzle, depositing a continuous filament according to the path defined by the first layer of the digital model [23] [24].
- The process is repeated layer-by-layer to build the 3D structure.
Step 3: Post-Bioprinting and Maturation
- Cross-linking: The deposited structure is cured into a stable gel. For alginate, this may involve immersion in a calcium chloride solution; for GelMA, exposure to UV light is required [23].
- Incubation: The printed construct is transferred to a bioreactor that provides nutrient media, gas exchange, and mechanical stimulation (e.g., perfusion, stretching) to promote tissue maturation and functionality before application [23].
Diagram 1: Extrusion Bioprinting Workflow
Inkjet-Based Bioprinting: Protocol for High-Throughput Drug Screening
Inkjet bioprinting is renowned for its high resolution and speed, making it suitable for creating microtissue arrays for pharmaceutical testing [28].
Step 1: Bioink and Substrate Preparation
- A low-viscosity bioink containing the target cells is prepared and loaded into a cartridge. The bioink must be carefully filtered to prevent nozzle clogging [23] [27].
- A multi-well plate or a substrate coated with a thin layer of culture medium is prepared and placed on the printer's build platform.
Step 2: Droplet Ejection and Patterning
- A thermal or piezoelectric actuator in the printhead creates a pressure wave, ejecting picoliter-sized droplets of bioink [23].
- The printhead moves rapidly over the substrate, depositing droplets in precise, pre-defined patterns to form microtissue arrays in each well.
Step 3: Post-Printing Handling and Assaying
- The printed plates are carefully transferred to an incubator.
- After a period allowing for cell attachment and spheroid formation, different drug compounds are added to the wells.
- The microtissues are monitored over time using high-content imaging systems to analyze drug efficacy and toxicity [21].
Stereolithography Bioprinting: Protocol for a High-Resolution Construct
Stereolithography (SLA) and its advanced form, Two-Photon Polymerization (2PP), achieve the highest resolution, enabling the fabrication of microtissues with intricate internal architectures [25].
Step 1: Resin and Digital Model Preparation
- A vat is filled with a photopolymerizable bioink resin. This resin consists of light-sensitive polymers (e.g., poly(ethylene glycol) diacrylate - PEGDA) and photoinitiators, which may be blended with cells [25].
- A digital model of the construct is sliced into 2D layers.
Step 2: Layer-by-Layer Photopolymerization
- A light source (e.g., UV laser, digital light projector) projects the pattern of the first layer onto the bioink reservoir.
- The light exposure crosslinks the bioink in the illuminated areas, solidifying the first layer onto a build platform.
- The platform is raised, and the process repeats for each subsequent layer until the entire 3D structure is complete [25].
Step 3: Post-Processing and Culture
- The constructed microtissue is removed from the vat.
- Any uncured, potentially cytotoxic resin is thoroughly rinsed away using a sterile solution.
- The construct is then incubated in a bioreactor for further culture and maturation.
The Scientist's Toolkit: Essential Research Reagents and Materials
Successful microtissue bioprinting relies on a suite of specialized reagents and materials. The following table details key components of the research toolkit.
Table 2: Key Research Reagent Solutions for Bioprinting
| Toolkit Item | Function & Importance | Examples & Notes |
|---|---|---|
| Hydrogel Bioinks | Serve as the printable, water-swollen matrix that mimics the native extracellular matrix (ECM), providing structural support and biochemical cues for cells [15]. | Natural (Alginate, Gelatin, Collagen): High biocompatibility. Synthetic (PEGDA): Tunable mechanical properties [15]. |
| Photoinitiators | Chemicals that absorb light and generate reactive species to initiate the polymerization and cross-linking of light-sensitive bioinks [25]. | Critical for Stereolithography. Must be selected for cytotoxicity and absorption wavelength (e.g., LAP for 405 nm UV light) [25]. |
| Cross-linkers | Agents that induce the formation of stable 3D networks within bioinks, turning a liquid precursor into a solid gel [23]. | Ionic (CaCl₂ for Alginate), Enzymatic, Thermal, or Light-based. Choice depends on bioink chemistry and cell compatibility [23]. |
| Support Baths | A yield-stress fluid into which bioink is extruded, providing temporary physical support for printing complex, freeform structures that cannot support their own weight [7]. | Often composed of gelatin microparticles or carbomer hydrogels. Enables creation of overhangs and complex vasculature [7]. |
| Cell Culture Media | Nutrient-rich solutions designed to support the survival, proliferation, and maturation of cells within the bioprinted construct post-printing. | Often specialized for specific cell types (e.g., endothelial, hepatic). Used in bioreactors for long-term culture [23] [21]. |
Emerging Trends and Future Perspectives
The field of bioprinting for microtissue engineering is rapidly advancing, with several key trends shaping its future:
- In Situ Bioprinting: This approach involves directly depositing bioinks into or onto the body at the site of injury, using handheld or robotic bioprinters. It eliminates the need for external maturation and handling, reducing contamination risks and improving integration for applications like burn treatment and wound healing [24].
- Microfluidic Integration: The development of "printhead-on-a-chip" systems uses microfluidics to enable real-time switching between multiple bioinks, gradient formation, and enhanced printing resolution. This is crucial for creating the complex multi-material and multi-cellular heterogeneity found in native tissues [26].
- AI-Driven Process Control: Integrating artificial intelligence with in-line monitoring, as demonstrated by recent research from MIT, allows for real-time defect detection and correction during printing. This enhances reproducibility, reduces material waste, and accelerates process optimization [7].
- Vascularization: A primary focus is on creating microtissues with integrated, perfusable vascular networks. Co-axial extrusion within microfluidic nozzles is one technique being used to print hollow, cell-laden tubes that mimic blood vessels, which is essential for sustaining larger tissue constructs [26].
Extrusion, Inkjet, and Stereolithography bioprinting each offer a unique set of capabilities for fabricating microtissues, balancing trade-offs between resolution, speed, structural integrity, and biocompatibility. The choice of technology is dictated by the specific application, whether it is a dense tissue scaffold for implantation, a high-throughput array for drug screening, or a high-resolution model for studying disease mechanisms. As the field progresses through innovations in in situ printing, microfluidics, and intelligent process control, the precision and functionality of bioprinted microtissues will continue to advance, solidifying their role as indispensable tools in the future of regenerative medicine and pharmaceutical development.
The field of bioprinting research is increasingly focused on creating mini-tissues and microtissues—three-dimensional, physiologically relevant tissue constructs that replicate key aspects of native human tissue structure and function at a miniature scale. These constructs serve as vital platforms for disease modeling, drug screening, and regenerative medicine applications. A critical bottleneck in engineering clinically relevant mini-tissues has been the inability to replicate two fundamental physiological features: perfusable vascular networks for nutrient and gas exchange, and spatiotemporally controlled biochemical signaling for directing cell behavior. This whitepaper examines two advanced bioink strategies that address these challenges: sacrificial inks for creating complex vascular architectures and microsphere-incorporated bioinks for sustained biochemical cue presentation. Together, these technologies enable the fabrication of mini-tissues with enhanced physiological relevance and functionality, accelerating their translation from research tools to therapeutic solutions.
Sacrificial Inks for Vascularization in Mini-Tissues
Principles and Material Requirements
Sacrificial inks, also known as fugitive inks, are temporary printing materials used to create hollow, perfusable channels within bioprinted constructs. These inks are printed in the desired vascular architecture and subsequently removed, leaving behind patent channels that can be endothelialized to form functional vascular networks [29]. This approach is particularly valuable for creating the capillary-scale networks essential for sustaining mini-tissues beyond diffusion limits, which is approximately 100-200 μm [30].
For effective use in vascularization, sacrificial inks must meet specific rheological and functional requirements. The table below summarizes these key properties and their significance:
Table 1: Critical Properties of Sacrificial Inks for Vascularization
| Property | Principle | Significance in Vascularization |
|---|---|---|
| Appropriate Viscosity | Resistance of fluid to flow | Prevents droplet formation; ensures printing precision for fine channel features [29] |
| Yield Stress | Stress required to initiate flow | Maintains shape pre-printing; enables extrusion during printing [29] |
| Shear-Thinning | Viscosity decreases under shear stress | Facilitates smooth extrusion through nozzle; minimizes printing pressure [29] |
| Rapid Elastic Recovery | Quick viscosity recovery post-extrusion | Maintains structural fidelity of printed filaments; prevents channel collapse [29] |
| Mild Removal Conditions | Dissolution under physiological conditions | Preserves viability of surrounding cells; maintains integrity of primary matrix [29] |
Common Sacrificial Ink Materials and Their Applications
Several material systems have been developed and optimized as sacrificial inks for creating vascular networks in mini-tissues:
Gelatin-Based Inks: Gelatin's thermoreversible gelation property makes it an excellent sacrificial material. It remains solid at lower temperatures (typically below 25°C) and liquefies at physiological temperatures (37°C), allowing gentle removal through simple warming [29]. Gelatin exhibits excellent biocompatibility and minimal immunogenic response, making it suitable for creating channels that will be lined with sensitive endothelial cells.
Carbohydrate Glasses and Pluronic Hydrogels: These materials have been widely used as sacrificial inks in various vascularization strategies. Carbohydrate glasses can be printed into complex, branching architectures and subsequently dissolved using aqueous solutions without damaging surrounding cell-laden matrices [30]. Pluronic F127 exhibits similar sacrificial properties and has been employed in creating perfusable vascular networks.
Alginate-Based Systems: Alginate sacrificial inks can be removed using chelating agents that sequester crosslinking ions, causing dissolution of the printed structure. This method enables the creation of intricate vascular networks without thermal stress to cells [29].
Experimental Protocol: Creating Perfusable Channels Using Sacrificial Writing
The following protocol details a representative method for creating vascularized mini-tissues using sacrificial ink writing:
Sacrificial Ink Preparation: Prepare a gelatin-based sacrificial ink by dissolving gelatin (10-20% w/v) in deionized water at 50°C. Add a visible dye (e.g., trypan blue) for printing visualization if desired. Maintain the ink at 37°C to prevent gelation before printing.
Support Bath Preparation: Prepare a yield-stress support bath (e.g., Carbopol or gelatin microparticle slurry) that will temporarily support the sacrificial ink during printing. The support bath should have appropriate rheological properties to enable nozzle movement while maintaining the shape of printed filaments.
Printing Process: Using a coaxial printing system or sequential printing approach:
- Print the sacrificial ink filament network into the support bath at a temperature below gelatin's gelation point (typically 20-25°C).
- Immediately following sacrificial ink printing, encapsulate the entire structure within a primary bioink (e.g., collagen, fibrin, or GelMA) containing the desired parenchymal cells for the mini-tissue.
- Crosslink the primary bioink using appropriate methods (photo-crosslinking for GelMA, thermal gelation for collagen, enzymatic for fibrin).
Sacrificial Ink Removal: Transfer the construct to an incubator at 37°C for 15-30 minutes to liquefy the gelatin sacrificial ink. Gently flush the channels with warm culture medium to remove the liquefied gelatin, leaving behind patent, perfusable channels.
Endothelialization: Introduce an endothelial cell suspension (e.g., HUVECs) into the channels and allow cell attachment under static conditions for 4-6 hours. Initiate perfusion culture using a bioreactor system to promote endothelial maturation and barrier function.
This methodology enables the creation of mini-tissues with embedded vascular networks that support nutrient delivery and waste removal, enhancing tissue viability and function.
Microspheres for Controlled Release in Mini-Tissues
Microspheres as Bioactive Cue Reservoirs
Microspheres—spherical particles ranging from 1 to 1000 μm in diameter—serve as versatile delivery vehicles for controlled release of bioactive molecules within bioprinted mini-tissues [31]. When incorporated into bioinks, microspheres enable spatiotemporal control over the presentation of growth factors, cytokines, drugs, and other signaling molecules that direct cell fate and tissue maturation. This controlled release capability is particularly valuable in mini-tissues, where precise biochemical gradients and timing of cue presentation are essential for replicating native tissue development and function.
The controlled release profiles achievable with microspheres help maintain therapeutic concentrations within the optimal window, avoiding the peaks and valleys associated with conventional bolus dosing [32]. This sustained presentation mimics natural morphogen gradients during development and supports more physiologically relevant tissue formation.
Microsphere Fabrication Methods
Multiple fabrication methods exist for producing microspheres for bioprinting applications, each with distinct advantages and limitations:
Table 2: Microsphere Fabrication Methods for Bioprinting Applications
| Method | Mechanism | Particle Size Range | Advantages | Limitations |
|---|---|---|---|---|
| Mechanical Agitation | Shear forces from mixing | 10-500 μm | Simple setup; high throughput; established method [31] | Broad size distribution; lower uniformity [31] |
| Membrane Emulsification | Extrusion through microporous membrane | 5-200 μm | Better size control than mechanical agitation [31] | Membrane fouling potential; moderate throughput [31] |
| Microfluidics | Laminar flow focusing | 1-300 μm | High uniformity; precise size control; complex architectures [31] [33] | Lower production rate; technical complexity [31] |
| Electrospray | Electrical field disruption | 1-400 μm | Good size control; simple equipment [31] | Throughput limitations; conductivity requirements [31] |
| Precision Particle Fabrication (PPF) | Acoustic excitation of jet | 10-1000 μm | Exceptional uniformity; precise control [32] | Specialized equipment required; lower throughput [32] |
Advanced Microsphere Architectures for Enhanced Drug Loading
Recent advances in microsphere design have focused on increasing drug loading capacity to maximize therapeutic payload while minimizing excipient volume. Traditional microspheres often suffer from low loading capacity (typically <5 wt%) due to compatibility limitations between drug molecules and polymer carriers [33]. Innovative approaches have emerged to address this challenge:
Nano-in-Micro Structured Spheres: This architecture embeds numerous drug nanoparticles within a polymer matrix, dramatically increasing drug loading capacity. Using a controlled in-droplet precipitation strategy, researchers have achieved drug loading degrees of 21.8-63.1 wt% for various therapeutics—40-450 times higher than conventional methods [33]. This approach is particularly valuable for delivery scenarios with limited administration volumes, such as intrathecal injection for spinal cord injury treatment [33].
Double-Wall Microspheres: These sophisticated structures feature distinct core and shell regions composed of different materials, enabling complex release profiles including pulsatile or tandem release of multiple therapeutics [32]. The precise control over shell thickness and composition allows fine-tuning of release kinetics to match specific therapeutic requirements.
Liquid-Core Microcapsules: These microcapsules contain an aqueous core surrounded by a polymer shell, providing protection for sensitive biologics such as proteins, peptides, and nucleic acids. The core environment can be optimized to maintain bioactivity of encapsulated molecules during printing and subsequent release [32].
Experimental Protocol: Creating High Drug-Loaded Microspheres via In-Droplet Precipitation
This protocol describes a microfluidic method for producing high drug-loaded microspheres using controlled in-droplet precipitation:
Solution Preparation:
- Prepare the inner fluid: Dissolve polymer (e.g., AcDX or PLGA) and drug (e.g., methylprednisolone) in a mixture of primary solvent (ethyl acetate) and cosolvent (dimethyl sulfoxide). Typical polymer concentration: 2-5% w/v; drug concentration varies based on target loading.
- Prepare the outer fluid: Aqueous solution of surfactant (e.g., Poloxamer 407 at 1% w/v) to stabilize emulsion droplets.
Microsphere Fabrication:
- Use a microfluidic flow-focusing device with appropriate channel dimensions (typically 50-200 μm).
- Pump the inner and outer fluids through the device at precisely controlled flow rates (inner:outer typically 1:5 to 1:10 ratio).
- The faster diffusion of cosolvent (dimethyl sulfoxide) from droplets to the outer fluid causes supersaturation and precipitation of drug molecules, forming drug nanoparticles within the droplets.
- Subsequent solvent evaporation solidifies the polymer matrix around the drug nanoparticles, forming nano-in-micro structured microspheres.
Collection and Processing:
- Collect microspheres from the outlet stream by centrifugation.
- Wash multiple times with deionized water to remove residual solvents and surfactants.
- Lyophilize for long-term storage or suspend in appropriate medium for immediate incorporation into bioinks.
Characterization:
- Determine particle size distribution using laser diffraction or microscopic analysis.
- Quantify drug loading and encapsulation efficiency using HPLC or UV-Vis spectroscopy after solvent extraction.
- Analyze surface and internal morphology using scanning electron microscopy.
- Characterize release profile using dialysis membrane method in appropriate release medium with periodic sampling and analysis.
This method produces microspheres with high drug loading (up to 63.1 wt%) and uniform size distribution, making them ideal for incorporation into bioinks for creating mini-tissues with controlled biochemical signaling [33].
Integration Strategies for Functional Mini-Tissues
Combining Vascularization and Controlled Release in Multi-Material Bioprinting
The full potential of sacrificial inks and microspheres emerges when they are integrated to create mini-tissues with both perfusable vascular networks and spatiotemporal control over biochemical signaling. This integration requires careful consideration of material compatibility, printing sequence, and crosslinking strategies:
Sequential Printing Approach: First, print the sacrificial ink network into a support bath. Second, print the primary bioink containing microspheres and parenchymal cells around the sacrificial network. Finally, crosslink the primary matrix before removing the sacrificial ink. This approach preserves microsphere integrity and positioning during vascular channel creation.
Coaxial Printing Method: Use multi-channel printing systems to simultaneously deposit sacrificial ink cores surrounded by microsphere-laden bioink shells. This method enables direct creation of vessel-like structures with controlled release capabilities in the surrounding matrix.
Support Bath Embedding: Print both sacrificial and microsphere-containing bioinks within a yield-stress support bath that maintains structural fidelity during printing. This method is particularly useful for creating complex 3D architectures with overhanging features and branching networks.
The Scientist's Toolkit: Essential Research Reagents
Table 3: Essential Research Reagents for Advanced Bioink Strategies
| Reagent/Category | Specific Examples | Function in Mini-Tissue Engineering |
|---|---|---|
| Sacrificial Ink Materials | Gelatin, Carbohydrate Glass, Pluronic F127, Alginate | Create temporary templates for perfusable vascular channels that are removed post-printing [29] [30] |
| Microsphere Polymers | PLGA, AcDX, PLA, PEG, GelMA | Form biodegradable matrix for controlled release of bioactive molecules [31] [32] [33] |
| Support Bath Materials | Carbopol, Gelatin Microparticle Slurries, PF127 | Provide temporary support during printing of complex structures [29] |
| Crosslinking Agents | Calcium Chloride (alginate), Photoinitiators (GelMA), Enzymes (fibrin) | Stabilize printed structures; provide mechanical integrity [30] |
| Bioactive Cargos | VEGF, FGF, BMP, Methylprednisolone, Atorvastatin | Direct cell behavior; provide therapeutic effects; stimulate tissue maturation [31] [33] |
| Surfactants | Poloxamer 407, PVA, Span 80 | Stabilize emulsions during microsphere production; prevent aggregation [33] |
Emerging Trends and Future Perspectives
The field of advanced bioinks for mini-tissue engineering is rapidly evolving, with several emerging trends shaping future research directions:
4D Bioprinting with Shape-Morphing Systems: Recent breakthroughs in 4D bioprinting enable creation of tissues that undergo programmed shape changes after printing, mimicking developmental processes. Researchers have developed bioprinting approaches that allow cell-generated forces to guide tissue morphogenesis, resulting in improved structural and functional maturation of engineered tissues [19]. This approach is particularly promising for creating cardiac mini-tissues with enhanced contractile properties.
Intelligent Process Control: New monitoring techniques incorporating AI-based image analysis enable real-time detection of printing defects and adaptive correction during the bioprinting process. These systems improve reproducibility and reduce material waste while accelerating process optimization for complex mini-tissue fabrication [7].
Multi-Material and Multi-Cell Printing: Advanced printing systems capable of depositing multiple bioinks with different compositions and cell types within a single construct enable creation of more complex mini-tissues with region-specific properties. This capability is essential for replicating the architectural and cellular heterogeneity of native tissues.
Stimuli-Responsive and Smart Bioinks: Development of bioinks that respond to specific environmental cues (pH, temperature, enzymes) or external triggers (light, magnetic fields) enables dynamic control over tissue properties and drug release profiles after printing, creating more adaptive and functional mini-tissues.
As these technologies mature, they will enable fabrication of increasingly sophisticated mini-tissues that more accurately replicate human physiology, accelerating their application in drug development, disease modeling, and ultimately, regenerative medicine.
In the evolving landscape of biomedical research, mini-tissues and microtissues represent advanced three-dimensional (3D) cellular models that closely mimic the architecture and function of human organs. These constructs are typically generated through techniques such as 3D bioprinting or self-assembly of cells and serve as critical tools for bridging the gap between conventional 2D cell cultures and complex in vivo environments [15] [18]. Mini-tissues often refer to smaller, more simplified organ-like structures, while microtissues generally indicate engineered tissue constructs of microscopic scale, though the terms are frequently used interchangeably. Their significance in bioprinting research lies in the capacity to replicate patient-specific physiology and pathology, enabling more accurate disease modeling, drug screening, and personalized therapeutic development [19] [34].
The production of these tissues leverages core bioprinting technologies, including extrusion-based bioprinting, laser-assisted bioprinting, and inkjet bioprinting [18]. A critical component is the bioink—a substance often composed of natural or synthetic polymers that supports living cells and facilitates the printing process. Common bioink materials include gelatin, hyaluronic acid, collagen, and alginate, selected for their biocompatibility and ability to aid cell adhesion, proliferation, and differentiation [15] [18]. This technical guide explores the application of these sophisticated models in modeling cancer, neurological disorders, and liver toxicity, providing detailed methodologies and quantitative data for research scientists and drug development professionals.
Cancer Modeling: Preserving the Tumor Immune Microenvironment
The fidelity of cancer models for immunotherapy research hinges on their ability to preserve the native tumor immune microenvironment. Traditional models that enzymatically digest tumors into single cells often disrupt crucial cell-cell interactions and lose the endogenous immune components essential for predicting immunotherapy outcomes [35].
Key Experimental Protocol: Generating Air-Liquid Interface (ALI) Tumor Organoids
A pivotal advancement in this field is the use of mechanical microdissection to generate tumor fragments for ALI organoid culture, a method that maintains the original tumor's immune diversity [35].
- Tissue Acquisition and Preparation: Obtain fresh patient-derived or mouse-derived tumor specimens. For the µDicer device, pre-slice the bulk tissue using a Compresstome to a thickness matching the desired microtissue size (e.g., 200 µm, 400 µm, or 800 µm) [35].
- Mechanical Microdissection: The bulk tissue is dissected into submillimeter fragments using specialized microdevices, avoiding enzymatic digestion.
- µDicer Protocol: Transfer a tissue slice onto the µDicer, which features a hexagonal array of silicon microblades. Use a modified biopsy punch plunger to press the tissue slice through the device, dicing it into uniformly sized microtissues simultaneously [35].
- µGrater Protocol: Press the bulk tissue specimen perpendicularly and tangentially against the µGrater, a stainless-steel sheet with an array of sharp-edged rectangular holes (e.g., 400 µm wide × 500 µm long). This grates the tissue into numerous microtissues [35].
- Benchmarking: Manual mincing with scalpels or scissors is a common benchmark but is less reproducible and more time-consuming. The µGrater has been demonstrated to be 4.5 times faster than manual mincing [35].
- ALI Culture Establishment: Transfer the generated microtissues onto a membrane support in a Transwell-style insert. Culture them at an air-liquid interface, where the apical surface is exposed to air and the basolateral surface is in contact with a specialized culture medium. This environment promotes organoid growth and viability [35].
- Drug Testing and Immunotherapy Assay: To evaluate therapy response, treat the ALI organoids with immune checkpoint inhibitors such as anti-PD-1. Functional readouts include measuring T cell activation, expansion, and tumor-killing capacity through assays like flow cytometry, cytokine release profiling, and viability staining [35].
Table 1: Performance Comparison of Tumor Microdissection Methods [35]
| Method | Throughput | Microtissue Uniformity | Preservation of Immune Cells | Key Advantage |
|---|---|---|---|---|
| Manual Mincing | Baseline (Slow) | Low | Yes (but variable) | Low equipment cost |
| µDicer | Medium | High | Yes | Precise size control |
| µGrater | High (4.5x faster) | Medium-High | Yes | Speed and reproducibility |
The following workflow diagram illustrates the process of generating and utilizing ALI tumor organoids for immunotherapy testing:
Neurological Disorder Modeling: From Organoids to Assembloids
The complexity of the human brain presents a unique challenge for disease modeling. The field has moved from simple, region-specific organoids to more sophisticated multi-region and assembled models that can capture inter-regional interactions implicated in neurological disorders [34] [36].
Key Experimental Protocol: Generating a Multi-Region Brain Organoid (MRBO)
A recent protocol from Johns Hopkins University details the creation of a rudimentary whole-brain model [34].
- Cell Source and Differentiation: Use human induced pluripotent stem cells (iPSCs) and differentiate them into neural progenitor cells specific to different brain regions (e.g., cerebral, mid-hindbrain) in separate lab dishes. Simultaneously, grow rudimentary blood vessels from endothelial cells [34].
- Assembly and Fusion: The separately generated neural tissues and endothelial cells are combined using sticky proteins that act as a "biological superglue." The assembled structure is then allowed to fuse and form connections in a 3D culture [34].
- Long-term Maturation: Culture the fused organoid over weeks to allow for development. The resulting MRBOs exhibit electrical activity and network responses, resembling the brain of a ~40-day-old human fetus and containing a broad range of neuronal cell types [34].
- Disease Modeling and Functional Assessment: These organoids can be used to study disorders like autism and schizophrenia. Functional assessment includes measuring neural activity via calcium imaging or multi-electrode arrays, gene expression profiling, and interrogation of blood-brain barrier formation [34].
This model recapitulates early developmental stages, offering a window into neurodevelopmental disorders. The diagram below outlines the bioengineering workflow for creating multi-region brain organoids.
Liver Toxicity Modeling: Advanced Microtissues for DILI Prediction
Drug-induced liver injury is a leading cause of drug failure in clinical trials and post-market withdrawal. Physiological liver microtissues that better reflect in vivo morphology and function are needed to overcome the limitations of 2D hepatocyte cultures [37] [38].
Key Experimental Protocol: Utilizing a 384-well Liver Microtissue System for Hepatotoxicity Screening
This standardized system uses spheroids comprising primary human parenchymal and non-parenchymal cells for high-throughput safety assessment [37].
- Microtissue Formation: Seed primary human hepatocytes (PHHs) along with non-parenchymal cells in ultra-low attachment 384-well microplates to allow for self-assembly into 3D liver microtissues (spheroids) [37].
- Long-term Culture and Maintenance: Culture the microtissues for extended periods (weeks) in a specially formulated medium to maintain hepatocyte differentiation and functionality, including expression of drug-metabolizing enzymes and transporters [37].
- Compound Dosing: Treat the mature microtissues with a library of small molecule drugs across a range of concentrations. Include drugs with known "Most-DILI-concern" and "No-DILI-concern" classifications for model validation [37].
- Endpoint Measurement and Analysis: After a defined exposure period, measure cell viability as a change in ATP content (e.g., using CellTiter-Glo assay). Calculate the IC50 for ATP depletion for each drug. The key metric for discrimination is the IC50ATP-to-Cmax ratio (where Cmax is the maximum human plasma concentration). A threshold ratio of 176 has been used to classify drugs as safe or hepatotoxic [37].
Table 2: Predictive Performance of a 384-well Liver Microtissue Model for DILI [37]
| Drug Category | Sensitivity of Detection | Specificity of Detection | Key Functional Endpoint |
|---|---|---|---|
| "Most-DILI-Concern" Drugs | 72% | 89% | ATP content (Viability) |
| "Most-DILI-Concern" Drugs (Nervous System) | 92% | 91% | ATP content (Viability) |
Alternative Protocol: Bioengineering a 3D Organotypic Liver Model at Air-Liquid Interface
An alternative model involves seeding PHHs onto cell culture inserts under ALI conditions to form a stratified, polarized 3D tissue [38].
- Tissue Fabrication: Seed PHHs onto a permeable membrane support in a Transwell insert. Culture under ALI conditions, where the cells are fed from the basolateral side while the apical surface is exposed to air. This promotes the formation of a well-differentiated, multi-layered tissue that can be maintained for 23-30 days [38].
- Model Characterization: Validate the model by assessing barrier integrity (TEER), tissue architecture (H&E staining), expression of liver-specific genes (qPCR for CYP enzymes, transporters), and functional metabolism (e.g., conversion of midazolam to 1-hydroxymidazolam) [38].
- Hepatotoxicity Testing: Expose the tissues to compounds like Fialuridine. Monitor barrier function, albumin production (a marker of liver synthetic function), and release of liver injury enzymes ALT and AST over time in a concentration-dependent manner [38].
The Scientist's Toolkit: Essential Research Reagents and Materials
The following table catalogs key reagents and materials used in the featured studies, providing a resource for experimental setup.
Table 3: Research Reagent Solutions for 3D Disease Modeling
| Item | Function/Application | Specific Examples |
|---|---|---|
| Bioinks | Support living cells during 3D bioprinting; provide structural and biochemical cues. | Gelatin methacryloyl (GelMA), Hyaluronic acid (HA), Collagen, Alginate, Fibrin [15] [18] |
| Microdissection Tools | Generate uniform, viable microtissues from fresh tumor specimens while preserving the TME. | µDicer (silicon microblades), µGrater (stainless steel) [35] |
| Culture Systems | Support long-term maintenance and maturation of 3D tissues. | Air-Liquid Interface (ALI) Transwell inserts; Ultra-low attachment 384-well microplates [37] [35] |
| Primary Cells | Provide physiologically relevant, human-derived cells for constructing models. | Primary Human Hepatocytes (PHHs); Tumor-infiltrating lymphocytes (TILs); Human iPSC-derived neural cells [34] [38] |
| Functional Assays | Quantify tissue viability, function, and drug response. | ATP content assay (CellTiter-Glo); ALT/AST release assays; Transepithelial Electrical Resistance (TEER); qPCR for metabolic enzymes [37] [38] |
The strategic application of mini-tissues and microtissues in cancer, neurological, and liver disease modeling marks a significant leap toward more predictive and human-relevant biomedical research. The case studies and detailed protocols presented herein underscore the critical importance of model fidelity—achieved through advanced biofabrication like bioprinting, careful preservation of native microenvironments as in ALI organoids, and the use of primary human cells. As the technology for generating these models continues to advance, particularly with improvements in vascularization, scalability, and multi-tissue integration, their role in de-risking drug development and enabling personalized medicine is poised to expand dramatically. For researchers, adopting these robust, quantitative, and physiologically relevant models is becoming increasingly essential for successful translational science.
In the field of modern pharmaceutical research and development, three-dimensional (3D) bioprinting has emerged as a transformative technology for creating advanced biological models. This technical guide focuses on the application of automated, high-throughput bioprinting for drug development, specifically through the generation and utilization of mini-tissues and microtissues. These constructs, typically ranging from spheroids to more complex organoids, serve as critical building blocks for creating physiologically relevant models that bridge the gap between traditional two-dimensional (2D) cell cultures and in vivo animal models [39] [15].
Mini-tissues and microtissues are 3D cellular aggregates that better mimic the native tissue microenvironment through direct cell-cell signaling and cell-matrix interactions [15]. Unlike traditional 2D cultures where cells grow in a single layer on plastic surfaces, these 3D structures recapitulate essential aspects of tissue physiology, including diffusion kinetics, oxygen and nutrient gradients, and complex cellular crosstalk [39]. The emergence of high-throughput bioprinting technologies has enabled the precise, automated fabrication of these miniature tissue models at scales necessary for pharmaceutical screening applications, allowing researchers to conduct more physiologically relevant compound testing, disease modeling, and therapeutic development [39] [40].
High-Throughput Bioprinting Technologies
Core Bioprinting Modalities for Pharmaceutical Screening
High-throughput screening (HTS) in pharmaceutical development demands technologies capable of producing large numbers of standardized, reproducible 3D tissue models. Several bioprinting modalities have been adapted and developed to meet this need:
Extrusion-Based Bioprinting (EBB): This pressure-driven approach enables the deposition of cell-laden bioinks in continuous strands, allowing the creation of tissue constructs with higher cell densities. However, conventional EBB subjects cells to substantial shear stress, which can compromise viability, and offers limited control over precise spheroid placement [40].
Aspiration-Assisted Bioprinting (AAB): This technique uses controlled aspiration to pick and place individual pre-formed spheroids with high positional precision (approximately 11% with respect to spheroid size) and minimal cellular damage (>90% viability). The primary limitation of traditional AAB is its sequential nature, processing only one spheroid at a time (approximately 20 seconds per spheroid), which constricts throughput for larger tissue constructs [40].
Droplet-Based Bioprinting (DBB): Utilizing thermal, piezoelectric, or acoustic mechanisms to generate bioink droplets, DBB offers relatively high deposition speeds. However, it is constrained by bioink viscosity requirements and limited precision, making it less suitable for applications demanding high spatial resolution or scalability with dense cellular aggregates [40].
Light-Based Bioprinting: This modality uses projected light patterns to crosslink photo-sensitive bioinks layer by layer. While offering high resolution, it typically requires lower cell densities for effective light penetration and curing, and raises concerns about potential phototoxicity to cells [16].
Emerging High-Throughput Systems
Recent technological advances have specifically addressed the throughput limitations of traditional bioprinting systems. The HITS-Bio (High-throughput Integrated Tissue Fabrication System for Bioprinting) platform represents a significant leap forward by employing a digitally-controlled nozzle array (DCNA) for simultaneous positioning of multiple spheroids [40]. This system achieves an unprecedented bioprinting speed—ten times faster than existing techniques—while maintaining high cell viability exceeding 90% [40]. The DCNA platform patterns numerous spheroids simultaneously, increasing fabrication throughput proportionally to the number of nozzles deployed, dramatically reducing production time for scalable tissue constructs [40].
Table 1: Comparison of High-Throughput Bioprinting Technologies
| Technology | Maximum Speed | Cell Viability | Key Advantages | Primary Limitations |
|---|---|---|---|---|
| HITS-Bio | ~2 seconds per spheroid (with multi-nozzle operation) [40] | >90% [40] | Simultaneous multi-spheroid printing; high precision; minimal shear stress | Specialized equipment required |
| Extrusion-Based | Varies with construct complexity | Lower due to shear stress [40] | Higher cell density capability; diverse bioink compatibility | Limited spheroid placement control; shear stress [40] |
| Aspiration-Assisted | ~20 seconds per spheroid [40] | >90% [40] | High placement precision; minimal cellular damage | Low throughput with single-nozzle systems [40] |
| Droplet-Based | Potentially high (kHz range) | Moderate to high | Fast deposition speeds; compatibility with various bioinks | Limited by bioink viscosity; reduced precision [40] |
| Light-Based | Varies with resolution and size | Moderate (phototoxicity concerns) [16] | High resolution; no nozzle clogging issues | Lower cell density requirements; potential DNA damage [16] |
Experimental Protocols for High-Throughput Bioprinting
HITS-Bio Operational Workflow
The HITS-Bio platform enables rapid fabrication of microtissue constructs through a standardized operational sequence:
System Setup and Sterilization: Assemble the DCNA module, high-precision XYZ linear stage, and extrusion head within a biosafety hood. Sterilize all components facing the biological environment using appropriate methods (e.g., UV irradiation, ethanol treatment) [40].
Spheroid Preparation: Culture and aggregate cells into spheroids using appropriate methods (hanging drop, round-bottom plates, or magnetic levitation). Ensure spheroids reach desired size (typically 80-800 μm) and maturation before bioprinting [40].
Bioink Preparation: Formulate support hydrogels with appropriate rheological properties. Natural polymers like alginate, gelatin, chitosan, collagen, or hyaluronic acid are commonly used, either alone or in combination [15].
Substrate Deposition: Using the extrusion head, deposit a foundational layer of bioink onto the printing substrate (e.g., Petri dish or multi-well plate) to serve as the base for spheroid attachment [40].
Multi-Spheroid Bioprinting:
- Position the DCNA over the spheroid reservoir suspended in culture medium.
- Apply controlled aspiration pressure to selectively open nozzles and pick up multiple spheroids simultaneously.
- Transfer the DCNA loaded with spheroids over the prepared substrate.
- Gently bring spheroids into contact with the substrate and release aspiration pressure to deposit them [40].
Construct Consolidation: Deposit an additional layer of bioink over the bioprinted spheroids to envelop them, if required by the design.
Crosslinking: Apply appropriate crosslinking method (e.g., photo-crosslinking using 405 nm LED light source for 1 minute for photo-sensitive bioinks, or ionic crosslinking for alginate-based bioinks) to stabilize the final construct [40].
Programmable 4D Shape-Morphing Bioprinting
Recent advances have introduced 4D bioprinting approaches that replicate the dynamic shape changes occurring during natural organ development. The following protocol enables the creation of functionally enhanced microtissues:
Bioink Formulation for 4D Morphing: Develop bioinks with specific mechanical properties that allow cell-generated forces to drive shape changes. Adjust bioink stiffness by modifying polymer concentration or crosslinking density to control the magnitude of shape transformation [19].
Embedded Bioprinting: Utilize granular support hydrogels as a suspension medium for printing, allowing free-form fabrication of complex geometries that are not possible with traditional layer-by-layer printing on solid surfaces [19].
Geometry Design: Design initial print geometries that predispose the construct to specific morphological changes. Simple tubular structures can be programmed to undergo bending and twisting similar to embryonic heart tube formation [19].
Computational Modeling: Implement a predictive model to simulate tissue shape-morphing behavior based on factors including initial geometry, bioink stiffness, and anticipated cell-generated forces [19].
Maturation and Functional Assessment: Culture the bioprinted constructs under appropriate conditions and monitor morphological changes over time. Assess functional maturation through measures such as contractile strength and synchronization for cardiac tissues [19].
This approach has demonstrated significant improvements in tissue functionality, with shape-morphing bioprinted heart tissues exhibiting stronger and faster beating compared to static controls [19].
Advanced Analytical Methods for Bioprinted Microtissues
Comprehensive Viability and Function Assessment
Robust characterization of bioprinted mini-tissues requires analytical methods adapted for 3D constructs:
Viability Analysis: Employ multi-timepoint live/dead staining (e.g., Calcein AM/EthD-1) to track both short- and long-term cell survival. Differentiate between apoptotic and necrotic cell death using Annexin-V/propidium iodide staining or caspase 3/7 activation assays [16].
Phenotypic Characterization: Use immunofluorescent staining for cell-specific markers to verify cell identity and organization within 3D constructs. Monitor expression of differentiation markers (e.g., osteogenic, chondrogenic) over extended culture periods (up to 21 days) [16].
Metabolic Imaging: Apply fluorescent lifetime imaging (FLIM) to measure the decay time of endogenous fluorophores (e.g., NAD(P)H, FAD) to assess metabolic states within different regions of 3D constructs [16].
Cell Painting: Adapt this high-content screening technique using multiple fluorophores that stain specific organelles to visualize cellular response to perturbations in 3D-bioprinted models [16].
AI-Enhanced Image Analysis
The complexity and scale of data generated from 3D bioprinted tissues necessitates advanced analytical approaches:
Automated Segmentation: Implement convolutional neural networks (CNNs) and other AI tools to process large 3D image datasets, enabling efficient quantification of cell number, viability, and spatial organization [16].
Morphometric Analysis: Utilize machine learning algorithms to extract quantitative descriptors of tissue morphology and cellular arrangement from 3D image stacks [16].
High-Content Screening: Develop automated analysis pipelines that integrate multiple readouts (viability, morphology, differentiation status) to comprehensively evaluate bioprinted tissue quality and functionality [16].
Table 2: Analytical Methods for Bioprinted Microtissue Assessment
| Analysis Type | Key Assays/Techniques | Information Obtained | Considerations for 3D Cultures |
|---|---|---|---|
| Viability | Live/Dead staining (Calcein AM/EthD-1); Annexin-V/PI apoptosis assay [16] | Short- and long-term survival; apoptotic vs. necrotic death | Dye penetration issues; background signal from bioink |
| Phenotype | Immunofluorescence for cell-specific markers; differentiation markers [16] | Cell identity; maturation status; tissue organization | Antibody penetration; imaging depth limitations |
| Metabolic State | Fluorescent Lifetime Imaging (FLIM) [16] | Spatial metabolic heterogeneity; response to compounds | Specialized equipment required; complex data interpretation |
| Proliferation | Ki67 staining; EdU incorporation [16] | Cell cycle activity; growth potential | Penetration of detection reagents; 3D reference standards |
| Morphology | Cell painting; phalloidin staining [16] | Cytoskeletal organization; subcellular structures | Adaptation needed from 2D protocols; matrix interactions |
| AI-Assisted Analysis | Convolutional Neural Networks (CNNs) [16] | High-throughput quantification; pattern recognition | Training data requirements; computational resources |
The Scientist's Toolkit: Essential Research Reagents and Materials
Successful implementation of high-throughput bioprinting for pharmaceutical screening requires carefully selected materials and reagents:
Table 3: Essential Research Reagent Solutions for High-Throughput Bioprinting
| Reagent Category | Specific Examples | Function and Application |
|---|---|---|
| Natural Polymer Bioinks | Alginate, gelatin, chitosan, collagen, hyaluronic acid, fibrinogen, agar [15] | Provide biocompatible 3D microenvironment; mimic native ECM |
| Synthetic Polymer Bioinks | Polyethylene glycol (PEG), Pluronics, polycaprolactone (PCL) [15] | Offer tunable mechanical properties; controlled degradation |
| Support Hydrogels | Granular microgels (for embedded printing) [19] | Enable free-form fabrication; support complex geometries |
| Crosslinking Agents | Calcium chloride (for alginate); photoinitiators (e.g., LAP for light crosslinking) [40] | Stabilize printed constructs; provide structural integrity |
| Viability Stains | Calcein AM (live); Ethidium homodimer-1 (dead); Annexin-V (apoptosis) [16] | Assess cell health and survival post-printing |
| Cell Labeling Dyes | CellTracker dyes; phalloidin (cytoskeleton); DRAQ7 (nuclei) [16] | Visualize cell morphology and organization in 3D |
| Immunostaining Reagents | Antibodies for cell-specific markers; Ki67 (proliferation) [16] | Characterize phenotype and differentiation status |
| Genetically Encoded Reporters | H2B-GFP (nuclear); cytoplasmic fluorescent proteins [16] | Enable long-term lineage tracking without dye interference |
Applications in Pharmaceutical Research and Development
Disease Modeling and Drug Screening
Bioprinted mini-tissues serve as advanced platforms for various pharmaceutical applications:
Cardiotoxicity Screening: Bioprinted human heart tissues that undergo 4D shape-morphing exhibit improved structural and functional maturity, demonstrating stronger and faster contractions that better replicate adult human heart function for accurate compound safety assessment [19].
Precision Medicine: 3D bioprinting enables the creation of patient-specific tissue models using primary cells, allowing for tailored therapeutic testing and drug selection based on individual genomic profiles and disease characteristics [41].
High-Throughput Compound Screening: Automated bioprinting systems like HITS-Bio facilitate the rapid production of standardized tissue constructs (e.g., fabrication of ~600 chondrogenic spheroids in under 40 minutes) compatible with 96-well or greater plate formats for large-scale drug efficacy studies [40].
Tissue Fabrication for Regenerative Medicine
Beyond screening applications, high-throughput bioprinting enables:
Intraoperative Bioprinting (IOB): The HITS-Bio system has been successfully applied for in-situ bone regeneration, achieving near-complete calvarial defect closure (~91% bone coverage area in 3 weeks and ~96% in 6 weeks) in rat models through direct printing of microRNA-transfected human adipose-derived stem cell spheroids [40].
Scalable Tissue Fabrication: The simultaneous multi-spheroid printing capability of systems like HITS-Bio enables the creation of volumetric tissue constructs (e.g., 1 cm³ cartilage tissues) with physiologically relevant cell densities that are essential for effective tissue repair and regeneration [40].
The integration of high-throughput automation with 3D bioprinting technologies represents a paradigm shift in pharmaceutical research and development. The advanced mini-tissue and microtissue models produced through these systems offer unprecedented physiological relevance for drug screening, disease modeling, and therapeutic development. Current systems like HITS-Bio demonstrate that simultaneous multi-spheroid bioprinting can achieve unprecedented speeds while maintaining high cell viability, addressing critical scalability challenges [40].
Future advancements in this field will likely focus on increasing complexity through the integration of vascular networks to support larger tissue constructs, enhancing functional maturation through 4D bioprinting approaches that replicate developmental processes [19], and further improving analytical methods through AI-driven image analysis [16]. Additionally, standardization of bioink formulations and quality control metrics will be essential for broader adoption in regulated pharmaceutical environments. As these technologies continue to evolve, automated high-throughput bioprinting is positioned to become an indispensable tool in the pharmaceutical R&D pipeline, enabling more predictive compound evaluation and accelerating the development of safer, more effective therapeutics.
Overcoming Technical Hurdles: Strategies for Reproducible and Functional Tissues
In the evolving landscape of regenerative medicine and drug development, the creation of mini-tissues and microtissues represents a pivotal shift toward more physiologically relevant human in vitro models. These three-dimensional (3D) constructs are designed to mimic the microarchitecture and functional properties of native human tissues on a miniature scale. Unlike traditional two-dimensional (2D) monolayers, which significantly differ from native tissue conditions, 3D bioprinted mini-tissues replicate a native-like tissue microenvironment that enables direct cell-cell signaling and cell-matrix interactions, leading to improved biological functions [15]. The field aims to replicate the structure and function of real biological tissues for applications in disease modeling, drug discovery, and implantable grafts [7].
The fundamental challenge in bioprinting these microtissues lies in navigating the delicate balance between structural precision and biological fidelity. The ultimate goal is to generate constructs that are not only viable but also functional—capable of exhibiting metabolic activity, molecular expression, and mechanical responses akin to their in vivo counterparts. This technical guide examines the core principles and advanced methodologies for optimizing the bioprinting process to ensure both viability and function, with a specific focus on the unique requirements of mini-tissue engineering.
Core Bioprinting Technologies and Their Impact on Viability
The selection of an appropriate bioprinting technology is foundational to the success of mini-tissue fabrication. Each modality applies distinct physical forces to cells during the deposition process, directly influencing post-printing viability and function. The following table summarizes the primary bioprinting approaches, their operating principles, and their characteristic effects on cellular components.
Table 1: Comparison of Core 3D Bioprinting Technologies
| Technology | Actuation Principle | Resolution | Key Viability Considerations | Ideal Mini-Tissue Applications |
|---|---|---|---|---|
| Extrusion-Based | Pneumatic or mechanical pressure forces bioink through a nozzle [42]. | 100 µm - 1 mm | Shear stress in nozzle can compromise viability; capable of printing high cell density bioinks [42]. | Vascularized tissues, bone, muscle constructs [42]. |
| Droplet-Based (Inkjet) | Thermal or piezoelectric actuators eject controlled bioink droplets [42]. | 10-100 µm | Thermal/mechanical stress may affect sensitive cells; high speed and precision [42]. | High-precision patterning, skin models [42]. |
| Laser-Assisted | Pulsed laser energy vaporizes a ribbon layer, propelling bioink toward a substrate [42]. | <10 µm - 100 µm | Avoids nozzle clogging; can print high-density cells; potential for metallic contamination [42]. | Complex cellular co-cultures, delicate micro-architectures. |
| Light-Assisted (Stereolithography) | Light-induced layer-by-layer polymerization of photosensitive bioink [42]. | 10-100 µm | Phototoxicity from UV light can damage cells; newer visible-light initiators mitigate this [42]. | High-resolution scaffolds, spinal cord injury models [42]. |
Advanced Bioprinting Modalities
Beyond these core technologies, advanced embedded bioprinting techniques have been developed to enhance the structural fidelity and viability of soft mini-tissues.
- FRESH (Freeform Reversible Embedding of Suspended Hydrogels): This approach uses a thermoreversible support bath that acts as a temporary matrix during printing, enabling free nozzle movement and controlled deposition of low-viscosity bioinks without structural collapse. This method achieves high structural fidelity and cell viability up to 99.7% and is ideal for delicate materials like collagen [42].
- SWIFT (Sacrificial Writing Into Functional Tissue): This strategy focuses on creating vascular channels within high-density tissues. A sacrificial gelatin ink is printed into a matrix of stem cell-derived spheroids at 4°C. Upon warming to 37°C, the gelatin liquefies and is removed, leaving behind perfusable vascular networks that are critical for sustaining larger mini-tissues [42].
The Bioink: A Foundational Component for Function
The bioink is not merely a delivery vehicle for cells; it constitutes the initial synthetic extracellular matrix (ECM) that directly influences cell behavior, survival, and maturation. An optimal bioink must fulfill a complex set of biochemical and biomechanical requirements.
Essential Bioink Properties and Material Selection
The table below outlines the critical properties of an ideal bioink and the common natural and synthetic materials used to achieve them.
Table 2: Essential Bioink Properties and Common Material Options
| Property | Functional Significance | Representative Materials |
|---|---|---|
| Biocompatibility | Supports cell adhesion, proliferation, and differentiation without cytotoxic effects [15]. | Collagen, gelatin, alginate, chitosan, hyaluronic acid [15]. |
| Printability | Exhibits sufficient viscosity to form and maintain 3D structures after deposition [15]. | Alginate, GelMA, silicone-modified polymers [15]. |
| Mechanical Stability | Provides structural integrity to the printed construct and withstands physiological loads [42]. | PLA, PCL, reinforced composite hydrogels [15]. |
| Biodegradability | Degrades at a rate matching new tissue formation, with non-toxic byproducts [15]. | Polycaprolactone (PCL), Polylactic acid (PLA) [15]. |
The Scientist's Toolkit: Key Research Reagent Solutions
Table 3: Essential Reagents for Bioprinting Optimization
| Reagent/Category | Function | Specific Examples & Notes |
|---|---|---|
| Natural Polymer Bioinks | Provide innate biocompatibility and bioactivity, mimicking the native ECM. | Collagen: Abundant in native ECM; requires FRESH printing for fidelity. Alginate: Ionic-crosslinking allows gentle gelation [42]. |
| Synthetic Polymer Bioinks | Offer tunable mechanical properties and high printability. | PLGA, PCL: Used for mechanical reinforcement [15]. PEG-based hydrogels: Highly customizable biochemical and mechanical properties. |
| Crosslinking Agents | Stabilize printed structures by forming chemical or physical bonds between polymer chains. | Calcium Chloride (CaCl₂): Used for ionic crosslinking of alginate. Visible-Light Photoinitiators: (e.g., LAP) Reduce UV-induced phototoxicity [42]. |
| Viability Assays | Quantify live/dead cell ratios and metabolic activity post-printing. | Calcein AM/EthD-1: Standard live/dead stain. Annexin V/PI Apoptosis Assay: Differentiates early apoptosis from necrosis [43]. |
| Advanced Functional Probes | Enable deep imaging of 3D mini-tissue structure and function. | H2B-GFP Cells: Genetically engineered for nuclear labeling. PhenoVue Cell Painting Kits: Multiplexed organelle staining [43]. |
Process Optimization: From Printing to Functional Maturation
Optimization extends beyond the printing process itself to include post-printing culture conditions that drive functional maturation.
Computational Modeling and Process Control
Computational models are invaluable for predicting and optimizing bioprinting outcomes without costly and time-consuming experimental trial-and-error. Modeling the bioprinting process can help investigate the impact dynamics of encapsulated cells during deposition [44].
- Shear Stress Modeling: For extrusion-based bioprinting, quantitative models can predict cell viability based on process parameters like dispensing pressure and nozzle size, as shear stress is a primary cause of cell damage [44].
- Droplet Impact Modeling: For inkjet printing, compound droplet impact models (Newtonian or viscoelastic) can simulate the deformation of a cell (modeled as a viscous inner droplet) during impact with a substrate, helping to optimize parameters for preserving viability [44].
A novel monitoring technique developed at MIT integrates a low-cost digital microscope (under $500) for layer-by-layer imaging of tissues during printing. An AI-based image analysis pipeline then rapidly compares the captured images to the intended digital design. This allows for quick identification of print defects, such as over- or under-deposition of bioink, facilitating the identification of optimal print parameters for various materials and improving inter-tissue reproducibility [7].
4D Bioprinting and Functional Maturation
A groundbreaking approach to enhancing function is 4D bioprinting, where the fourth dimension is time-dependent shape morphing. Researchers at the University of Galway have developed a method to bioprint tissues that change shape as a result of cell-generated forces, mimicking the process of natural organ development.
- Protocol Overview: Using embedded bioprinting, tissues are printed within a support hydrogel. The geometry of the printed filament and the stiffness of the bioink are strategically designed. As the cells within the bioink exert traction forces, the entire structure undergoes a predictable and programmable shape change, such as bending or coiling [19].
- Functional Outcome: This shape-morphing process was found to sculpt cell alignment and enhance the contractile properties of bioprinted heart tissues. The study reported that these tissues started to beat stronger and faster, indicating improved structural and functional maturity—a major challenge in the field [19].
The following workflow diagram synthesizes key optimization steps from image acquisition to functional maturation of bioprinted mini-tissues.
Advanced Imaging and Analysis for Quality Control
Moving beyond simple live/dead assays is crucial for qualifying mini-tissues for research applications like drug screening.
- Multiplexed Immunofluorescence (IF): Using antibodies against markers like Ki67 (proliferation) and caspases (apoptosis) provides deeper insight into cell health beyond mere membrane integrity [43].
- Cell Painting: This high-content technique uses fluorescent dyes to label multiple organelles simultaneously (e.g., nucleus, nucleoli, actin, mitochondria, Golgi), providing a rich, multivariate readout of cell state that can reveal subtle stress-induced phenotypes caused by the printing process [43].
- AI-Powered Image Segmentation: Analyzing the large 3D image datasets generated from mini-tissues is computationally intensive. AI segmentation tools can automate the quantification of cell number, morphology, and marker expression across these complex constructs, enabling robust and high-throughput analysis [43].
Optimizing the bioprinting process for viability and function is not a singular task but a holistic endeavor that integrates materials science, engineering, and cell biology. The path to creating clinically relevant and physiologically accurate mini-tissues depends on a synergistic workflow: selecting a bioprinting technology that minimizes cellular stress, formulating a bioink that provides appropriate biochemical and mechanical cues, implementing computational and real-time monitoring for process control, and employing advanced maturation and analysis techniques like 4D bioprinting and AI-based imaging. As these elements continue to converge, the potential of bioprinted mini-tissues to revolutionize disease modeling, drug development, and ultimately, regenerative medicine, draws increasingly closer to realization.
The development of three-dimensional (3D) functional tissues in vitro is fundamentally constrained by one critical, diffusion-limited factor: the absence of a perfusable vascular network. In vivo, most living cells reside within 100-200 μm of a capillary to ensure the efficient delivery of oxygen and nutrients and the removal of metabolic waste [45]. Beyond this limit, cells in engineered tissues experience nutrient gradients, hypoxia, and ultimately, necrotic core formation, which restricts the size, complexity, and physiological relevance of engineered tissues and organoids [46]. Vascularization is therefore not merely an enhancement but a prerequisite for cultivating thick, complex, and clinically relevant tissues.
This challenge is acutely framed within the context of mini-tissues and microtissues in bioprinting research. These terms refer to the smallest structural and functional units of a tissue which can be combined and assembled into a larger, mature "macrotissue" [1]. Utilizing microtissues as building blocks for bioprinting accelerates tissue maturation, increases printing efficiency by reducing printer clogging, and offers a scalable path to automation [1]. A prominent example is the engineering of mature blood vessels from myofibroblast and endothelial cell microtissues, which demonstrated accelerated extracellular matrix (ECM) production and differentiation [1]. Thus, the quest for vascularization is intrinsically linked to the paradigm of building with microtissues, where the creation of perfusable networks enables the survival and integration of these vital building blocks.
Foundational Strategies for Vascularization
Three primary strategic approaches guide the design and fabrication of vascularized tissues: biomimicry, autonomous self-assembly, and the mini-tissue approach. The following table summarizes their core principles, advantages, and disadvantages.
Table 1: Core Strategic Approaches to Vascularization in Tissue Engineering
| Strategy | Description | Advantages | Disadvantages |
|---|---|---|---|
| Biomimicry | Attempts to duplicate the exact environmental and structural cues of the target native tissue. | High degree of control and precision in cellular positioning. | Extremely complex and slow; requires reproduction of numerous dynamic factors [1]. |
| Autonomous Self-Assembly | Replicates the embryonic environment, allowing cells to spontaneously organize and form vascular networks. | Fast, efficient, and generates high cellular density; does not require a scaffold [1]. | Difficult to control or alter the final outcome during the self-organization process [1]. |
| Mini-Tissue/Microtissue | Forms the smallest functional vascular units (mini-tissues) which are then assembled into a larger macrotissue. | Increased speed, efficiency, and scalability; can accelerate tissue maturation [1]. | The initial creation of the microtissues themselves can be challenging [1]. |
These strategies are not mutually exclusive and are often combined. For instance, self-assembly principles are frequently employed within a microtissue-based approach to form the initial vascular networks [46].
Key Experimental Models and Protocols
To overcome the vascularization challenge, researchers have developed sophisticated in vitro models that simulate in vivo conditions. A critical foundation is understanding the two primary biological mechanisms for blood vessel formation:
- Vasculogenesis: The de novo formation of blood vessels from endothelial progenitor cells or angioblasts, which assemble into a vascular plexus [45].
- Angiogenesis: The sprouting of new blood vessels from pre-existing ones [45].
Advanced 3D in vitro models have been developed to study and harness these processes, moving beyond simplistic 2D assays.
Self-Assembled Vascular Networks in PEG Hydrogels
Objective: To generate 3D, self-assembled vascular networks within a synthetic hydrogel for studying network morphology under different flow conditions.
Detailed Methodology:
- Cell Culture: Utilize human embryonic stem cell-derived endothelial cells (ECs) co-cultured with primary human pericytes.
- Hydrogel Encapsulation: Encapsulate the ECs and pericytes within a synthetic poly(ethylene glycol) (PEG)-based hydrogel engineered to mimic the extracellular matrix.
- Bioreactor Application: Culture the cell-laden hydrogels under different dynamic conditions to stimulate network formation:
- Static Condition: Traditional culture without flow.
- Recirculating Flow Bioreactor: Generates recirculating flow in the basal media beneath the developing networks.
- Continuous Flow Bioreactor: Applies unidirectional, constantly refreshed media flow [46].
- Label-Free Imaging and Analysis: At day 6, image the 3D vascular networks using autofluorescence multiphoton microscopy (aMPM). This technique leverages the natural fluorescence of NAD(P)H in cells, allowing for quantitative analysis without fixation, dyes, or labels, which is crucial for samples destined for transplant [46]. An image processing pipeline is then used to segment the networks and quantify key morphological parameters.
Key Quantitative Findings: The aMPM analysis revealed that dynamic flow conditions significantly improve network interconnectivity. The continuous flow bioreactor specifically induced the formation of more branch points compared to static conditions, and both dynamic flow conditions reduced network anisotropy (vessel alignment), promoting a more natural, web-like architecture [46]. These trends were confirmed with standard immunocytochemistry, validating the aMPM method [46].
Table 2: Quantitative Morphology of Self-Assembled Vascular Networks under Different Culture Conditions [46]
| Culture Condition | Vessel Diameter | Vascular Density | Branch Point Density | Network Anisotropy |
|---|---|---|---|---|
| Static | No significant change | No significant change | Baseline | Highest |
| Recirculating Flow | No significant change | No significant change | No significant change vs. Static | Significantly Decreased vs. Static |
| Continuous Flow | No significant change | No significant change | Significantly Increased vs. Static | Significantly Decreased vs. Static & Recirculating |
Sacrificial Bioprinting of a Perfusable Vascularized Tumor Model
Objective: To fabricate a thick, vascularized, and perfusable 3D model of a cancer niche to study early-stage metastatic spread.
Detailed Methodology:
- Bioink Formulation:
- Cell-Laden Matrix: Use Gelatin Methacrylate (GelMA) at 8% (w/v) concentration, synthesized from porcine skin gelatin and functionalized with methacrylic anhydride. It is photoinitiated with Irgacure 2959 (0.5% w/v) for UV cross-linking.
- Sacrificial Ink: Use Pluronic F-127 at 40% (w/v) in cold PBS. This ink is printed as a filament and later liquefied and removed to create hollow, perfusable channels [47].
- Multi-Material Bioprinting: Employ a multi-material bioprinter to fabricate the construct layer-by-layer. The Pluronic F-127 is printed to define the vascular channel architecture, while the cell-laden GelMA is printed as the surrounding tissue matrix (bulk). This approach combines the advantages of Pluronic's excellent sacrificial properties with the speed and precision of multi-material printing [47].
- Post-Printing Processing:
- Cross-linking: Expose the entire construct to UV light to permanently cross-link the GelMA matrix.
- Sacrificial Ink Removal: Lower the temperature to liquefy the Pluronic F-127 filament and gently flush it out, leaving behind a hollow channel within the GelMA construct.
- Endothelialization: Seed the lumen of the newly formed channel with Human Umbilical Vein Endothelial Cells (HUVECs) to form a continuous endothelium.
- Perfused Culture: Transfer the vascularized construct to a customized perfusion system that provides continuous media flow through the vascular channel, maintaining viability and promoting maturation for up to 3 weeks [47].
Outcome: This protocol resulted in the formation of a confluent endothelium lining the vascular channel after 14 days of perfusion. The model successfully recapitulated tumor cell behaviors, including growth, recruitment of endothelial cells, and preliminary evidence of cancer cell migration towards the vascular compartment, mimicking early metastatic dissemination [47].
The Scientist's Toolkit: Essential Research Reagents and Materials
The following table catalogues key materials and reagents critical for implementing the vascularization strategies and protocols described above.
Table 3: Essential Research Reagents and Materials for Vascularization Studies
| Reagent/Material | Function/Application | Example Usage |
|---|---|---|
| PEG-Based Hydrogels | Synthetic, tunable hydrogel that mimics the ECM; supports self-assembly of vascular networks. | Used as the 3D matrix for co-culturing ECs and pericytes in self-assembly models [46]. |
| Gelatin Methacrylate (GelMA) | A photo-cross-linkable, bioactive hydrogel derived from gelatin; serves as a cell-laden matrix. | The primary bioink for encapsulating tumor and stromal cells in the bulk of bioprinted constructs [47]. |
| Pluronic F-127 | A thermoreversible polymer used as a sacrificial ink; solidifies at room temp and liquefies when cooled. | Printed to define vascular channels; removed post-printing to create perfusable lumens [47]. |
| Human Umbilical Vein Endothelial Cells (HUVECs) | A standard primary cell source for modeling the endothelium. | Used to seed the lumen of sacrificial channels and form a biologically active endothelium [47]. |
| Pericytes | Mural cells (e.g., vascular smooth muscle cells) that stabilize nascent blood vessels. | Co-cultured with ECs to promote the maturation and stability of self-assembled vascular networks [46]. |
| Vascular Endothelial Growth Factor (VEGF) | A key angiogenic growth factor that stimulates EC proliferation, migration, and network formation. | Added to culture media to induce and promote the formation of vascular networks [45]. |
Visualizing Workflows and Signaling Pathways
The following diagrams, created using DOT language and compliant with the specified color and contrast rules, illustrate the logical relationships in key processes.
Strategic Pathways to Vascularization
This diagram outlines the three main strategic approaches and their interrelationships.
Sacrificial Bioprinting Workflow
This diagram details the sequential steps in the sacrificial bioprinting protocol for creating perfusable channels.
Emerging Frontiers and Future Perspectives
The field of vascularization is rapidly advancing with the integration of new technologies. Intelligent process control is emerging as a critical frontier. Researchers are developing low-cost, modular monitoring systems that use digital microscopes and AI-based image analysis to capture high-resolution images of tissues during the printing process [48]. This allows for rapid identification of defects, such as over- or under-deposition of bio-ink, and enables real-time adaptive correction. This approach is a foundational step towards fully automated, reproducible bioprinting, which enhances resource efficiency and improves the quality of engineered tissues for disease modeling and therapeutic applications [48].
Furthermore, the combination of self-assembly strategies within defined fabrication techniques like sacrificial bioprinting represents a powerful synthesis of approaches. By creating a perfusable channel (via biomimicry/sacrificial printing) and then allowing endothelial cells to form a natural network within the surrounding matrix (via self-assembly), researchers can create complex, multi-scale vascular systems [47]. As these technologies mature, the ability to routinely fabricate thick, vascularized, and patient-specific tissues will fundamentally accelerate drug discovery, disease modeling, and the development of implantable grafts.
A significant challenge in bioprinting research is the consistent fabrication of mini-tissues—also referred to as microtissues—which are simplified, three-dimensional biological constructs designed to replicate key functional units of native human tissues [49]. These building blocks are essential for creating more complex organs and for applications in disease modeling and drug screening [15] [49]. However, the field has been hampered by variability in the quality and function of these printed constructs. Achieving reproducibility is not merely a technical hurdle; it is a prerequisite for the clinical translation and industrial application of bioprinted tissues. This whitepaper explores how integrating advanced process control and AI-driven monitoring addresses the critical challenge of reproducibility, thereby unlocking the potential of mini-tissue-based research and therapeutics.
The Core Challenge: Variability in Mini-Tissue Fabrication
The biological performance of mini-tissues is intrinsically linked to their structural fidelity during printing. Minor deviations in the printing process can lead to major defects that compromise the entire construct. Traditional bioprinting workflows often lack the capability to detect these flaws in real-time, leading to inter-batch variability and unreliable experimental outcomes [7]. Key sources of variability include:
- Bioink Behavior: Bioinks, which are substances or materials that support living cells, exhibit complex rheological properties. Their printability can be affected by factors like temperature, pressure, and cell density, leading to inconsistencies in filament diameter and placement [50] [19].
- Structural Defects: Common print defects such as over-extrusion (depositing too much material) or under-extrusion (depositing too little) alter the designed pore architecture and mechanical properties of the scaffold. This, in turn, affects cell migration, nutrient diffusion, and ultimately, tissue maturation [50].
- Functional Immaturity: Even structurally sound bioprinted tissues often lack the functional maturity of native tissue. For instance, bioprinted heart tissues may contract, but with a force significantly weaker than a healthy adult heart [19]. This highlights that reproducing form is insufficient; the process must also guide the tissue toward functional maturity.
Table 1: Common Defects in Mini-Tissue Bioprinting and Their Consequences
| Defect Type | Impact on Mini-Tissue Structure | Impact on Biological Function |
|---|---|---|
| Over-extrusion | Increased filament diameter, clogged pores, reduced structural resolution. | Impaired nutrient waste exchange; altered cell alignment and migration. |
| Under-extrusion | Gaps in the structure, poor layer adhesion, reduced mechanical integrity. | Disrupted cell-cell signaling; failure to form continuous tissue networks. |
| Layer Misalignment | Deviation from the intended 3D geometry and internal architecture. | Development of anomalous tissue morphology; compromised physiological relevance. |
| Inconsistent Cross-linking | Variations in local mechanical stiffness and scaffold stability. | Heterogeneous cell differentiation and proliferation; unpredictable tissue maturation. |
AI-Driven In-Process Monitoring: A Paradigm Shift
The limitations of traditional bioprinting are being overcome by the integration of modular, real-time monitoring systems coupled with artificial intelligence (AI) for instantaneous data analysis. This paradigm shift moves the field from open-loop fabrication to intelligent, data-driven manufacturing.
Modular and Low-Cost Sensing Platforms
Researchers have developed modular, printer-agnostic sensing platforms that can be readily integrated into existing bioprinting setups at a low cost (under $500) [50] [7]. These systems typically employ a compact digital microscope to capture high-resolution images of the tissue as it is being printed, layer-by-layer. This provides a rich, in-situ data stream of the printing process as it unfolds.
AI and Vision Transformers for Defect Detection
The captured image data is processed using an AI-based image-analysis pipeline. A key advancement is the use of Vision Transformer models, a type of deep learning architecture, to perform rapid and precise image segmentation [50]. This AI is trained to:
- Identify the boundaries of the printed bioink filaments.
- Compare the live image to the intended digital design.
- Automatically flag discrepancies, such as deviations in filament diameter or placement, classifying them as defects [50] [7].
This automated analysis enables rapid optimization of print parameters by linking specific printer settings (e.g., pressure, velocity) directly to print quality outcomes. For example, the system can identify critical velocity thresholds for printing stability for different bioinks, both acellular and cellular [50].
Diagram 1: AI monitoring workflow for adaptive bioprinting.
Experimental Protocol: Implementing AI-Monitored Bioprinting
The following detailed methodology outlines how to establish and validate an AI-driven monitoring process for the embedded bioprinting of mini-tissues, based on published research [50] [7].
Materials and Setup
- Bioprinter: Any standard 3D bioprinter capable of extrusion-based printing.
- Monitoring Module: A modular imaging system comprising a compact digital microscope (e.g., compatible with USB video class standards) and a mounting apparatus. The system should be positioned to capture a top-down view of the print nozzle and the most recently deposited layer.
- Computing Unit: A computer with adequate processing power for running the AI analysis pipeline in near real-time.
- Bioink: Prepare a suitable bioink, such as a granular support hydrogel or a cell-laden hydrogel like collagen or fibrin. The protocol should be tested with both acellular and cellular bioinks.
Step-by-Step Procedure
System Integration and Calibration:
- Physically mount the digital microscope onto the bioprinter gantry, ensuring a clear, focused view of the printing region.
- Calibrate the imaging system by printing a calibration pattern to establish a pixel-to-millimeter conversion factor.
AI Model Preparation:
- Implement a pre-trained Vision Transformer model for semantic segmentation. The model should be trained on a dataset of bioprinting images annotated with correct filament geometries and common defects.
- Integrate the model's inference engine with the bioprinter's control software to enable data exchange.
Printing with Concurrent Monitoring:
- Initiate the print job according to the predefined digital model (e.g., a .STL file).
- As each layer is deposited, the imaging system automatically captures a high-resolution image.
Real-Time Analysis and Defect Detection:
- The captured image is fed to the AI model, which segments the image to isolate the printed filament.
- The segmented geometry is quantitatively compared to the intended design from the digital model. Key metrics include filament diameter, layer width, and positioning accuracy.
- Any significant deviation is flagged as a defect, and the parameters (e.g., pressure, print velocity, nozzle height) are logged against the defect type.
Post-Print Analysis and Parameter Optimization:
- After the print, analyze the collected data to identify the optimal print parameters that consistently produced defect-free layers.
- These optimized parameters are then hard-coded for future print jobs of the same bioink and design, or fed into a predictive control system for adaptive closed-loop control.
Table 2: Key Research Reagent Solutions for AI-Monitored Bioprinting
| Item | Function/Description | Example Use-Case |
|---|---|---|
| Granular Support Bath | A yield-stress fluid that enables embedded printing, supporting overhanging structures and facilitating 4D shape-morphing. [19] | Used as a temporary suspension medium for printing complex, freeform structures like heart tissue tubes. |
| Cell-Laden Hydrogel Bioink | A biocompatible polymer (e.g., alginate, gelatin-methacryloyl) mixed with living cells to form the primary building material of the mini-tissue. [15] | Serves as the "living ink" for creating parenchymal tissue structures, such as cardiac patches or liver lobules. |
| Vision Transformer AI Model | A deep learning model for image segmentation that identifies and measures printed filaments in situ, comparing them to the design. [50] | The core analytical engine for real-time, automated defect detection during the bioprinting process. |
| Modular Imaging Sensor | A low-cost, high-resolution digital microscope that provides the 2D image data for the AI analysis pipeline. [50] [7] | Acts as the "eye" of the monitoring system, capturing layer-by-layer data for immediate processing. |
Beyond Structure: Guiding Functional Maturation with 4D Bioprinting
True reproducibility extends beyond initial structure to encompass the functional maturation of mini-tissues. A groundbreaking approach inspired by embryonic development, known as 4D bioprinting, is critical here. This technique involves printing tissues in an initial "pre-curated" shape that then undergoes programmed, cell-driven shape-morphing into a more complex final architecture [19].
The Functional Advantage of Shape-Morphing
In native organ development, tissues bend and twist, and these mechanical cues are essential for proper cell maturation. Researchers at University of Galway have applied this principle by bioprinting simple, linear tubes of heart tissue embedded in a support hydrogel. Over several days, the contractile forces generated by the cardiac cells caused the tubes to bend and coil. This shape-morphing process actively sculpted cell alignment and enhanced the tissue's contractile properties, resulting in tissues that beat stronger and faster than those produced by static methods [19]. This demonstrates that controlling the dynamic post-printing process is as vital as controlling the initial printing parameters.
Diagram 2: 4D bioprinting leads to functional maturation.
The path to reliable and clinically relevant bioprinted mini-tissues is through intelligent process control. The integration of modular, AI-driven monitoring provides the necessary eyes and brain to detect and correct defects in real-time, ensuring structural reproducibility from one print to the next. Furthermore, embracing developmentally-inspired 4D bioprinting strategies ensures that these reproducible structures are not the end point, but a starting point for guiding the tissues toward greater functional maturity. Together, these technologies form a powerful framework for overcoming the critical challenge of reproducibility, paving the way for the widespread adoption of bioprinted mini-tissues in drug development, disease modeling, and the future of regenerative medicine.
The development of mini-tissues and microtissues represents a pivotal advancement in bioprinting research, offering more physiologically relevant models for drug screening and disease modeling than conventional two-dimensional cultures. These three-dimensional constructs aim to recapitulate the structural and functional aspects of native tissues at a miniature scale. The cornerstone of fabricating these sophisticated architectures lies in the judicious selection and functionalization of biomaterials that serve as bioinks. Bioinks are substance materials that encapsulate viable cells and are employed in the printing procedure to construct 3D objects through successive layers [51]. The fundamental challenge in this domain is striking a critical balance between printability—the physical capacity of a material to be accurately deposited and maintain structure—and the delivery of appropriate biological cues that direct cell behavior and tissue maturation [52] [53].
An ideal bioink must satisfy dual, often competing, requirements: possessing rheological properties amenable to the printing process while simultaneously providing a bioactive microenvironment that supports cell viability, proliferation, and function [53] [51]. This technical guide examines the principal biomaterial classes used in bioprinting, their functionalization strategies, and methodologies for assessing their performance, with a specific focus on applications in mini-tissue and microtissue engineering.
Core Biomaterial Classes for Bioinks
Natural Polymer-Based Bioinks
Natural polymers are widely utilized in bioink formulation due to their innate biocompatibility, biodegradability, and presence of native cell-binding motifs. The table below summarizes key natural polymers, their characteristics, and applications relevant to mini-tissue fabrication.
Table 1: Natural Polymers for Bioinks in Mini-Tissue Engineering
| Material | Key Characteristics | Printability Considerations | Representative Mini-Tissue Applications |
|---|---|---|---|
| Collagen | Abundant in native ECM; excellent biocompatibility; promotes cell adhesion [54] [51]. | Low viscosity pre-gelation; requires precise thermal or pH-controlled printing [54]. | Skin models [54], nerve guides [51], epithelial tissues [54]. |
| Alginate | Biocompatible; rapid ionic crosslinking; tunable mechanical properties [55]. | Excellent shear-thinning; requires functionalization (e.g., RGD) for cell adhesion [52] [55]. | Cartilage templates [52], vascularized constructs [55], drug screening models. |
| Gelatin Methacrylate (GelMA) | Combines biocompatibility of gelatin with tunable photocrosslinking [52]. | Viscosity and gelation kinetics adjustable via degree of methacrylation and concentration [52]. | Cardiac microtissues [52], neural, and skeletal muscle models [52]. |
| Hyaluronic Acid | Ubiquitous in connective tissues; can be modified (e.g., Methacrylation) for crosslinking [52]. | Often blended with other polymers to enhance mechanical integrity and printability [52]. | Cartilage tissue engineering [52]. |
| Chitosan | inherent antimicrobial properties; biocompatible and biodegradable [56]. | Requires blending or chemical modification to achieve optimal printability [56]. | Infection-resistant wound healing models [56]. |
Synthetic and Composite Bioinks
Synthetic polymers and composite bioinks offer enhanced control over mechanical properties and printability. Synthetic polymers like poly(ethylene glycol) (PEG) and polycaprolactone (PCL) provide a high degree of tunability, excellent mechanical stability, and reproducibility [52] [53]. However, they often lack inherent bioactivity and require modification with adhesive peptides (e.g., RGD) to support cell functions [53].
Composite bioinks have emerged as a powerful strategy to overcome the individual limitations of single-component systems. These hybrids combine materials to create a synergistic effect, balancing printability, mechanical strength, and bioactivity. Common approaches include blending natural polymers for bioactivity with synthetic polymers for structural integrity, or incorporating nanomaterial fillers (e.g., nanocellulose, silicate nanoplatelets) to enhance rheological properties and mechanical strength without compromising biocompatibility [53]. For instance, a collagen-alginate composite bioink can leverage alginate's superior printability and collagen's rich bioactivity [51].
Functionalization Strategies to Enhance Biological Performance
Functionalization is essential for embedding biological cues into bioinks, guiding cell fate, and promoting the formation of functional mini-tissues.
Biochemical Functionalization
- Peptide Conjugation: Incorporating cell-adhesive peptides like RGD (Arginine-Glycine-Aspartic acid) is a widespread method to render otherwise inert materials (e.g., alginate, PEG) bioactive, enhancing cell attachment, spreading, and survival [52] [55].
- Covalent Immobilization of Growth Factors: Growth factors can be tethered to the polymer network to create localized signaling gradients. For example, incorporating Bone Morphogenetic Proteins (BMPs) or Transforming Growth Factor-β (TGF-β) in bone-specific bioinks directs mesenchymal stem cell differentiation toward osteogenic lineages [52].
- Enzymatic Crosslinking: Enzymes like transglutaminase or tyrosinase can create biocompatible covalent bonds between polymer chains. This strategy offers a balance between achieving good structural integrity and maintaining high cell viability, as it occurs under mild physiological conditions [52].
Physical and Mechanical Functionalization
The physical microenvironment, particularly matrix stiffness, profoundly influences cell behavior. Tuning the crosslinking density—via light exposure for photocrosslinkable bioinks like GelMA or via crosslinker concentration for alginate—allows researchers to match the mechanical properties of the target tissue, a concept known as mechanotransduction [52] [53]. Recent innovations, such as 4D bioprinting, leverage cell-generated forces to drive post-printing shape changes in the construct. This process mimics embryonic development and has been shown to enhance the structural and functional maturation of bioprinted tissues, such as heart microtissues, which started to beat stronger and faster after shape-morphing [19].
The following diagram illustrates the logical relationship between bioink properties, functionalization strategies, and their ultimate impact on mini-tissue development.
Quantitative Assessment and Experimental Protocols
Rigorous quantification of bioink properties is essential for successful mini-tissue fabrication. The table below outlines key parameters and their standard measurement techniques.
Table 2: Quantitative Assessment of Bioink Properties
| Parameter Category | Key Metrics | Standard Measurement Techniques | Target Ranges for Mini-Tissues |
|---|---|---|---|
| Rheological Properties | Complex modulus (G′, G″), Yield stress, Viscosity, Shear-thinning exponent [52] [53]. | Oscillatory rheometry, steady-state shear flow measurements [52]. | G′ > G″ for shape fidelity; High yield stress to prevent collapse [53]. |
| Printability & Fidelity | Filament diameter uniformity, Strand collapse, Pore area accuracy, Layer fusion [52]. | Microscopic imaging + image analysis (e.g., comparing designed vs. printed structure) [52]. | >90% fidelity for macro-scale features [7]. |
| Biological Performance | Cell viability, Proliferation rate, Metabolic activity, Differentiation markers [54] [53]. | Live/Dead assay, AlamarBlue/MTT assay, qPCR, Immunocytochemistry [54]. | >90% cell viability post-printing; Cell-specific gene/protein expression [53]. |
| Mechanical Properties of Construct | Young's modulus, Compressive/Tensile strength [52] [51]. | Uniaxial compression/tension testing, Atomic Force Microscopy (AFM) [52]. | Tissue-matched modulus (e.g., ~0.1-1 kPa for brain, ~10-100 kPa for cartilage) [52]. |
Detailed Experimental Protocol: 4D Bioprinting of Shape-Morphing Cardiac Mini-Tissues
This protocol is adapted from a recent breakthrough in bioprinting functional human heart tissue, highlighting a developmentally-inspired approach [19].
- Objective: To fabricate a cardiac mini-tissue that undergoes programmable shape changes (4D) via cell-generated forces, leading to improved structural and functional maturation.
- Materials:
- Bioink: A blend of collagen-based bioink (e.g., Viscoll [52]) or gelatin methacrylate (GelMA [52]) supplemented with cardiac cells (e.g., cardiomyocytes derived from human induced pluripotent stem cells).
- Support Bath: A granular support hydrogel (e.g., a Carbopol microgel) that allows freeform embedding and temporary support during printing [19].
- Methods:
- Bioink Preparation: Mix the polymer solution with the cardiac cell suspension at a high cell density (e.g., 10-50 million cells/mL) to ensure sufficient cell-cell interactions and force generation. Keep the bioink on ice to prevent premature gelation.
- Printing Setup: Load the bioink into a sterile extrusion bioprinter fitted with a nozzle (diameter 200-400 µm). The print bed should contain the support bath.
- Printing Parameters: Utilize a 3D model of a simple structure (e.g., a flat sheet or a linear tube). Print under low pressure and at a temperature that maintains the bioink's viscosity for deposition.
- Crosslinking: After deposition, induce crosslinking. For physical collagen gels, raise the temperature to 37°C and adjust pH. For GelMA, expose the structure to UV light (365 nm) at a controlled intensity.
- Post-Printing Culture & Morphing: Gently remove the crosslinked structure from the support bath and transfer to a cell culture medium. Over 3-7 days, the cell-generated contractile forces will cause the initially simple structure to bend and twist into a more complex 3D form.
- Functional Assessment:
- Imaging: Use time-lapse microscopy to quantify shape-morphing.
- Contractility: Measure the contraction force and frequency using video-based analysis or force transducers.
- Maturation: Analyze tissue alignment and expression of mature cardiac markers (e.g., Troponin T, Connexin 43) via immunostaining.
The workflow for this protocol, from design to functional analysis, is depicted below.
The Scientist's Toolkit: Research Reagent Solutions
Selecting appropriate materials is critical for replicating experiments. The following table details key reagents and their functions in bioink formulation and mini-tissue fabrication.
Table 3: Essential Research Reagents for Bioink Development
| Reagent / Material | Function / Role | Example Commercial Sources (for informational purposes) |
|---|---|---|
| Type I Collagen | Core bioink component; provides native ECM backbone and excellent biocompatibility [54] [51]. | Collagen Lifeink 200 [52], Viscoll [52]. |
| Alginate | Base polymer for bioink; enables rapid ionic crosslinking and provides structural integrity [52] [55]. | CELLINK A, CELLINK A-RGD [52]. |
| Gelatin Methacrylate (GelMA) | Photocrosslinkable bioink; offers tunable mechanical properties and good cell compatibility [52]. | CELLINK GelMA series [52]. |
| RGD Peptide | Bioactive motif; conjugated to polymers (e.g., alginate) to promote integrin-mediated cell adhesion [52]. | CELLINK A-RGD [52]. |
| Methacrylated Hyaluronic Acid (MeHA) | Photocrosslinkable bioink component; mimics native glycosaminoglycans [52]. | PhotoHA [52]. |
| Photoinitiator (e.g., LAP) | Catalyzes polymerization upon light exposure for crosslinking photocurable bioinks (e.g., GelMA, MeHA) [53]. | Various specialty chemical suppliers. |
| Calcium Chloride (CaCl₂) Solution | Ionic crosslinker for alginate-based bioinks; initiates rapid gelation post-printing [55]. | Standard laboratory chemical supplier. |
The journey toward creating robust and physiologically relevant mini-tissues and microtissues hinges on a deep understanding of material selection and functionalization. The optimal strategy often involves a composite approach, synergizing the printability and mechanical strength of synthetic or simple natural polymers with the sophisticated bioactivity of ECM components like collagen [51]. The emergence of 4D bioprinting, which leverages cell-generated forces to drive structural maturation, represents a paradigm shift from static printing to dynamic, developmentally-inspired fabrication, significantly enhancing the functional output of cardiac and other mini-tissues [19].
Future advancements will likely be driven by several key technologies:
- Intelligent Process Control: Integrating AI-based monitoring systems, as demonstrated in recent research, enables real-time defect detection and correction during printing, ensuring high inter-tissue reproducibility and fidelity [7].
- Advanced Vascularization: Co-printing endothelial cells and supportive bioinks to create perfusable vascular networks remains a critical frontier for sustaining larger or more complex mini-tissues [19] [55].
- Multi-Material and High-Resolution Printing: Technologies like digital light processing (DLP) and acoustic bioprinting allow for the precise spatial patterning of multiple cell types and biomaterials, essential for mimicking tissue heterogeneity [53].
By systematically addressing the balance between printability and biological cues through rational material design and advanced fabrication technologies, the field moves closer to the ultimate goal of generating clinically relevant tissues for regenerative medicine, advanced disease modeling, and more predictive drug screening.
Benchmarking Success: Validating and Comparing Microtissue Performance
In the field of bioprinting research, mini-tissues and microtissues refer to three-dimensional (3D) living structures engineered to closely mimic the complex architecture and functionality of human organs on a miniature scale. Unlike traditional two-dimensional (2D) cell cultures, these 3D models recapitulate critical aspects of the native tissue microenvironment, including cell-cell interactions, spatial organization, and the presence of an extracellular matrix (ECM) [15] [57]. The creation of these microtissues is enabled by 3D bioprinting, an additive manufacturing process that precisely layers living cells and biomaterials, known as bioinks, to construct custom tissue-engineered structures [15] [18]. These advanced models serve as powerful tools for studying disease mechanisms and, crucially, for improving the drug development process by providing more human-relevant screening platforms [58] [59].
The central thesis of this whitepaper is that bioprinted human microtissues offer a superior predictive power for drug outcomes, effectively bridging the translational gap between conventional 2D cell cultures, animal models, and human clinical trials. The core problem in drug development is the inability of existing models to accurately replicate human biological processes. Traditional 2D cell cultures, while low-cost and suitable for high-throughput screening, grow cells on rigid, flat surfaces. This artificial environment fails to replicate tissue-specific structures and cell-ECM interactions, leading to incorrect assessments of drug efficacy and toxicity [58] [57]. Conversely, animal models, while providing a whole-organism context, are limited by significant interspecies differences in physiology and drug metabolism, which often prevent findings from being reliably translated to humans [58] [59]. This failure of predictability results in staggering attrition rates during clinical trials, representing massive financial losses and extended drug approval timeframes [58]. Bioprinted microtissues address these shortcomings by incorporating multiple cell types in a physiologically relevant 3D context, thereby creating human-based models that yield more accurate and predictive data for drug testing [58] [18].
The Scientific Basis for Superior Predictive Power
The enhanced predictive power of 3D bioprinted microtissues is rooted in their ability to more accurately emulate the in vivo tumor microenvironment (TME) and key organ structures. Seminal studies have demonstrated that the dialogue between cancer cells and their surrounding microenvironment plays a critical role in tumor progression, metastasis, and the development of treatment resistance [57]. The TME consists of various non-cancerous cell types, including fibroblasts, immune cells, and endothelial cells, which collectively influence the physiology and function of the tumor [57]. Conventional 2D cultures, grown on rigid materials like polystyrene, modify tissue-specific architecture, flatten cell shape, and disrupt native mechanical and biochemical signals. This results in altered cell-to-cell communication and fails to reflect the essential physiology of real tissues [57]. In contrast, 3D models, particularly those formed as spheroids or organoids, preserve natural cell-cell and cell-ECM interactions, creating a native-like tissue microenvironment that is crucial for realistic drug response testing [15] [57].
Key Physiological Mechanisms Faithfully Recapitulated in 3D Microtissues
- Proliferation and Metabolic Gradients: In 3D microtissues, cell proliferation and metabolic activity are not uniform. As spheroids grow in size, they develop internal gradients of nutrients, oxygen, and metabolic waste. This leads to the establishment of a proliferative outer zone, a quiescent intermediate zone, and, in larger spheroids, a necrotic core [57]. This zonation mirrors the phenomenon observed in in vivo tumors and cannot be modeled in 2D cultures where all cells are exposed equally to the culture medium.
- Migration and Metastasis: The process of cancer cell invasion and migration is highly dependent on 3D architecture and ECM remodeling. Studies have shown that the migratory behavior of cells embedded in a 3D matrix is fundamentally different from their movement on a 2D surface [57]. Bioprinted models can incorporate specific ECM components and multiple cell types to create physiological barriers that better mimic the complex journey of metastatic cells.
- Chemoresistance: A critical advantage of 3D models is their innate ability to model drug resistance. The same gradients that create proliferative and quiescent zones also affect drug penetration and activity. Furthermore, cell-ECM interactions in 3D environments activate specific signaling pathways, such as those involving integrins and survival signals, that confer protection against chemotherapeutic agents [57]. This makes 3D microtissues a more robust platform for identifying compounds that can overcome resistance.
The following diagram illustrates the fundamental architectural and functional differences between 2D, 3D, and animal models that underpin the superior predictive power of microtissues.
Quantitative Data Comparison
The theoretical advantages of 3D microtissues are borne out by extensive quantitative data comparing their performance to traditional models across critical parameters in drug development. The tables below summarize key comparative findings.
Table 1: Comparative Analysis of Model Performance in Drug Development
| Performance Metric | 2D Cell Culture | Animal Model | 3D Bioprinted Microtissue |
|---|---|---|---|
| Clinical Trial Predictive Value | Low (Fails to model toxicity & efficacy) [58] | Low (~8% concordance with human trials) [57] | High (Human-relevant biology) [58] [59] |
| Tumor Microenvironment (TME) | Absent (No cell-ECM interactions, forced polarity) [57] | Present but with interspecies differences [57] | Present (Recapitulates native TME architecture) [15] [57] |
| Drug Penetration & Gradient Effects | Not applicable (Uniform drug exposure) [57] | Applicable but difficult to monitor | Applicable (Models physiological barriers & resistance) [57] |
| Cost & Throughput | Low cost / High throughput [58] | High cost / Low throughput [58] | Moderate cost (improving with automation) [58] |
| Species Specificity | Human | Animal (Mouse, Rat, etc.) | Human (can use patient-derived cells) [58] [59] |
Table 2: Functional Maturity of Bioprinted Tissues: The Case of Cardiac Models
| Functional Parameter | Traditional 3D Bioprinted Tissue | 4D Shape-Morphing Bioprinted Tissue [19] | Native Adult Human Heart Tissue |
|---|---|---|---|
| Contractile Force | Weaker | Stronger and faster beating | Benchmark for strong contraction |
| Structural Maturity | Limited | Enhanced (Improved cell alignment and tissue structure) | Fully mature and aligned |
| Fabrication Approach | Static anatomical shape | Developmentally-inspired (mimics embryonic twisting/bending) | Natural organogenesis |
| Potential for Disease Modeling & Drug Screening | Lower fidelity | Higher fidelity (Better replicates adult human heart structure) | N/A |
Detailed Experimental Protocols and Methodologies
This section provides a detailed breakdown of the methodologies used to generate, validate, and employ bioprinted microtissues in drug testing applications.
Core 3D Bioprinting Workflow for Microtissue Fabrication
The fabrication of microtissues follows a multi-stage process centered on 3D bioprinting. The following diagram outlines the key steps from design to functional analysis.
Step 1: Bioink Formulation Bioinks are specialized materials that combine living cells with a biomaterial base to support cell viability and function during and after printing. Key requirements include biocompatibility, printability (adequate viscosity), and the ability to form a 3D structure [15] [18]. Common bioink components include:
- Natural Polymers: Gelatin, hyaluronic acid (HA), collagen, alginate, and chitosan. These are prized for their innate bioactivity and support of cell adhesion [15] [18]. For instance, Gelatin Methacryloyl (GelMA) is widely used in Direct Ink Writing for its biocompatibility and tunable mechanical properties [18].
- Synthetic Polymers: Poly(ε-caprolactone) (PCL), polyethylene glycol (PEG), and Pluronics. These offer greater control over mechanical properties and degradation kinetics [18]. The bioink is typically prepared as a sterile, cell-laden suspension at a concentration of millions of cells per milliliter.
Step 2: 3D Model Design The architectural blueprint of the microtissue is designed using computer-aided design (CAD) software. This model is often derived from medical imaging data (e.g., CT, MRI) to create patient-specific geometries. The design phase also determines the printing path and layering pattern [15].
Step 3: Bioprinting Process Several bioprinting technologies are employed, each with specific advantages:
- Extrusion-Based Bioprinting: The most common technique. It uses pneumatic or mechanical pressure to force the bioink through a microscale nozzle, depositing it as a continuous filament layer-by-layer [18]. It is suitable for a wide range of materials and allows for high cell densities.
- Inkjet Bioprinting: Operates like a standard office printer, using thermal or piezoelectric actuators to dispense precise droplets of bioink in a non-contact process. It is faster and offers good resolution but can be limited by bioink viscosity and cell clogging [18].
- Laser-Assisted Bioprinting (LAB): Uses a pulsed laser to vaporize a small area of a ribbon coated with bioink, transferring droplets onto a substrate. It is excellent for high-resolution printing and is gentle on cells, but can be more complex and expensive [18].
Step 4: Post-Printing Maturation After printing, the construct is often crosslinked (e.g., using UV light for GelMA) to stabilize its structure. It is then transferred to a bioreactor, which provides dynamic culture conditions (e.g., nutrient perfusion, mechanical stimulation) that promote tissue maturation, enhance cell alignment, and improve functional properties, as demonstrated in the 4D shape-morphing heart tissues [19]. This maturation phase can last from days to weeks.
Step 5: Drug Testing & Assay The matured microtissue is exposed to drug candidates. Key assays include:
- Viability/Cytotoxicity: Using stains like Calcein-AM (for live cells) and Propidium Iodide (for dead cells).
- Functional Metrics: For cardiac tissues, contractility and beating strength are measured [19]. For liver models, albumin production, urea synthesis, and cytochrome P450 (CYP) enzyme activity are assessed (see Table 1 for CYP substrates) [59].
- High-Throughput Screening (HTS): Automated bioprinting platforms, such as Inventia's RASTRUM, can produce standardized microtissues in multi-well plates, making them compatible with pharmaceutical HTS pipelines [58].
The Scientist's Toolkit: Essential Research Reagents and Materials
Table 3: Research Reagent Solutions for Bioprinting Microtissues
| Category | Item | Function & Application |
|---|---|---|
| Bioink Polymers | Gelatin Methacryloyl (GelMA) | A photocrosslinkable hydrogel derived from gelatin; supports cell adhesion and allows tunable stiffness. Used for a wide range of soft tissues [18]. |
| Hyaluronic Acid (HA) | A natural ECM component; provides biocompatibility and flexibility. Often modified (e.g., methacrylated) and used in cartilage tissue engineering [18]. | |
| Fibrinogen | A natural protein involved in clotting; forms a fibrin hydrogel that is highly conducive to cell migration and vascularization. | |
| Support Materials | Granular Support Hydrogels | A suspension of microgels used in embedded 3D printing to support the bioink during printing, enabling the creation of complex, shape-morphing structures [19]. |
| Crosslinkers | Calcium Chloride (CaCl₂) | Used to ionically crosslink alginate-based bioinks, providing immediate structural integrity. |
| Photoinitiators (e.g., LAP) | Used in conjunction with UV light to crosslink photocurable bioinks like GelMA, providing spatiotemporal control over gelation. | |
| Cell Sources | Patient-Derived Stem Cells | Enable the creation of personalized microtissues for tailored drug response profiling and disease modeling [58] [59]. |
| Immortalized Cell Lines | Provide a consistent and readily available cell source for high-throughput screening and foundational research. |
The field of bioprinting for drug testing is rapidly evolving, with several emerging trends poised to further enhance the predictive power of microtissues. Volumetric bioprinting allows for the rapid creation of viable tissues with embedded vascular-like channels, enabling more realistic drug response testing [58]. The integration of microfluidics creates "organ-on-a-chip" systems that simulate dynamic physiological forces like fluid flow and mechanical stretch, further enhancing the physiological relevance of these models [15] [58]. Furthermore, the use of AI-guided optimization and automated high-throughput systems is addressing challenges of scalability, reproducibility, and data comparability across laboratories [58].
In conclusion, the evidence compellingly demonstrates that 3D bioprinted human microtissues possess a superior predictive power for drug outcomes compared to traditional 2D cultures and animal models. By faithfully replicating critical aspects of human tissue biology—such as 3D architecture, cell-ECM interactions, and metabolic gradients—these advanced models address a fundamental bottleneck in the drug development pipeline. They offer a more accurate, human-relevant platform for assessing efficacy, toxicity, and underlying mechanisms of action early in the discovery process. As technologies for vascularization, automation, and design continue to mature, bioprinted microtissues are set to become an indispensable tool for researchers and pharmaceutical companies, ultimately accelerating the delivery of safer and more effective therapeutics to patients.
Mini-tissues and microtissues represent advanced three-dimensional in vitro models engineered through bioprinting technologies to closely mimic the structural and functional characteristics of human organs. These constructs serve as indispensable platforms for drug screening and disease modeling, addressing critical limitations of traditional two-dimensional cell cultures and animal models. The primary advantage of these 3D models lies in their ability to recapitulate the complex tissue microenvironment, including cell-cell and cell-extracellular matrix interactions, which are crucial for generating physiologically relevant data on drug efficacy and toxicity [60]. Within the broader context of bioprinting research, these tissues range from simpler spheroids and organoids to more complex biofabricated structures incorporating multiple cell types and vascular networks, bridging the gap between conventional in vitro models and in vivo physiology.
The validation of these engineered tissues requires a multifaceted approach, assessing their structure, function, and pharmacological responses. As the field progresses toward clinical translation, establishing standardized, quantitative metrics for these parameters becomes paramount for ensuring reliability and reproducibility across studies and laboratories [8]. This guide details the essential metrics and methodologies for comprehensively validating bioprinted mini-tissues and microtissues, providing researchers with a framework for rigorous quality assessment.
Structural Validation Metrics
Structural validation confirms that the bioprinted construct possesses the intended architectural and morphological characteristics that support biological function. Key metrics and techniques for structural assessment are summarized in Table 1.
Table 1: Structural Validation Metrics for Bioprinted Tissues
| Validation Category | Specific Metric | Analytical Technique | Target Outcome |
|---|---|---|---|
| Architectural Fidelity | Print Resolution & Dimensional Accuracy | Micro-CT, SEM | <5% deviation from CAD model |
| Pore Size & Porosity | Micro-CT, SEM | 50-200 μm pore size, >80% interconnectivity | |
| Cell-Matrix Organization | Cell Viability & Distribution | Live/Dead Assay, Histology (H&E) | >90% initial viability, uniform distribution |
| ECM Deposition & Composition | Immunohistochemistry (Collagen I, IV, Laminin) | Physiological ECM protein levels | |
| Cell-Cell Interactions | Confocal Microscopy (ZO-1, E-cadherin) | Formation of functional junctions | |
| Tissue-Specific Morphology | Tissue Layer Organization | Histology (Masson's Trichrome) | Distinct, continuous tissue layers |
| Vasculature Formation | Immunofluorescence (CD31) | Network of tubular structures |
Experimental Protocols for Structural Assessment
Protocol 1: Assessment of Cell Viability via Live/Dead Staining
- Materials: Calcein AM, ethidium homodimer-1, phosphate-buffered saline (PBS).
- Procedure:
- Rinse bioprinted constructs with PBS to remove residual media.
- Prepare staining solution: 2 μM Calcein AM and 4 μM ethidium homodimer-1 in PBS.
- Incubate constructs with staining solution for 30-45 minutes at 37°C protected from light.
- Image using confocal microscopy at multiple depths.
- Quantify viable (green) and dead (red) cells using image analysis software (e.g., ImageJ).
- Interpretation: Calculate percentage viability as (live cells / total cells) × 100. High viability (>90%) indicates optimal printing parameters and bioink compatibility [49].
Protocol 2: Histological Analysis for Tissue Organization
- Materials: Formalin, paraffin, microtome, hematoxylin, eosin.
- Procedure:
- Fix constructs in 10% neutral buffered formalin for 24 hours at 4°C.
- Dehydrate through graded ethanol series, clear in xylene, and embed in paraffin.
- Section at 5-10 μm thickness using a microtome.
- Deparaffinize and rehydrate sections through xylene and graded ethanols.
- Stain with hematoxylin (5-10 minutes) and eosin (30 seconds-2 minutes).
- Dehydrate, clear, and mount for imaging.
- Interpretation: H&E staining reveals overall tissue architecture, cell distribution, and nuclear/cytoplasmic details. Special stains (Masson's Trichrome, Alcian Blue) can highlight specific ECM components [60].
Functional Validation Metrics
Functional validation assesses the physiological behaviors and capabilities of the bioprinted tissues, confirming they replicate key activities of native tissues. Table 2 summarizes critical functional metrics.
Table 2: Functional Validation Metrics for Bioprinted Tissues
| Functional Domain | Specific Metric | Analytical Technique | Target Outcome |
|---|---|---|---|
| Metabolic Activity | Metabolic Rate | PrestoBlue, MTT Assay | Sustained metabolic activity over culture period |
| ATP Production | Luminescence-based ATP assay | Physiological ATP levels | |
| Tissue-Specific Functions | Albumin Production (Liver) | ELISA | >5 μg/10^6 cells/day |
| Contraction (Cardiac) | Video microscopy | Synchronous, rhythmic contractions | |
| Neural Activity | Multi-electrode array, Calcium imaging | Spontaneous synaptic currents, network synchronization | |
| Barrier Function | Transepithelial Electrical Resistance | Epithelial Voltohmmeter | TEER >500 Ω·cm² |
| Permeability | FITC-dextran flux assay | Size-selective molecular transport | |
| Network Formation | Neural Circuitry | Patch-clamp electrophysiology | Functional connections between neural subtypes |
| Vascular Perfusion | Fluorescent bead infusion, dextran leakage | Patency and interconnectivity |
Experimental Protocols for Functional Assessment
Protocol 3: Measurement of Transepithelial Electrical Resistance
- Materials: Epithelial voltohmmeter, cell culture inserts.
- Procedure:
- Equilibrate bioprinted tissue constructs in culture medium at 37°C for 30 minutes.
- Calibrate voltohmmeter according to manufacturer instructions.
- Position electrodes on apical and basolateral sides of the tissue barrier.
- Record resistance values at multiple locations across the tissue surface.
- Subtract background resistance from empty insert controls.
- Calculate TEER by multiplying raw resistance by membrane surface area.
- Interpretation: Increasing TEER values over time indicate formation of tight junctions and functional barrier integrity, essential for absorption and toxicity studies [60].
Protocol 4: Assessment of Neural Network Function
- Materials: Multi-electrode array system, recording medium, analysis software.
- Procedure:
- Transfer bioprinted neural tissues to MEA recording chamber.
- Maintain at 37°C with 5% CO2 during recording.
- Replace culture medium with recording medium.
- Record spontaneous electrical activity for 10-30 minutes.
- Analyze spike rates, burst patterns, and network synchronization.
- Apply pharmacological agents (e.g., glutamate receptor antagonists) to confirm specific neural activity.
- Interpretation: Functional human neural tissues should demonstrate spontaneous synaptic currents, synchronized network activity, and appropriate pharmacological responses, indicating functional neural circuit formation [61].
Drug Response Assessment
Validating the pharmacological responses of bioprinted tissues is crucial for establishing their utility in drug discovery and toxicity testing. Key assessment parameters are detailed in Table 3.
Table 3: Drug Response Assessment Metrics for Bioprinted Tissues
| Response Category | Specific Metric | Analytical Technique | Application Context |
|---|---|---|---|
| Efficacy Assessment | IC50/EC50 Determination | Dose-response curves | Compound potency evaluation |
| Target Engagement | Phospho-specific antibodies, FRET assays | Mechanism of action confirmation | |
| Toxicity Evaluation | Cytotoxicity | LDH release, caspase activation | General safety profiling |
| Organ-Specific Toxicity | Albumin production (liver), beating rate (cardiac) | Hepatotoxicity, cardiotoxicity assessment | |
| Metabolic Capacity | CYP450 Activity | Luminescent or fluorescent substrates | Drug metabolism evaluation |
| Metabolite Profiling | LC-MS/MS | Metabolic pathway identification | |
| Predictive Accuracy | In Vitro-In Vivo Correlation | Comparative pharmacokinetic analysis | Clinical translatability assessment |
Experimental Protocols for Drug Response Assessment
Protocol 5: Compound Screening in Medium-Throughput Format
- Materials: Multi-well plates, automated liquid handler, test compounds.
- Procedure:
- Bioprint mini-tissues directly into 96- or 384-well plates or transfer pre-formed tissues.
- Allow tissues to mature for 3-7 days with regular medium changes.
- Prepare compound dilutions in DMSO followed by culture medium (final DMSO <0.1%).
- Treat tissues with compound series (typically 8-10 concentrations) for specified duration.
- Assess viability using CellTiter-Glo 3D or similar 3D-optimized assay.
- Measure tissue-specific functions (e.g., albumin secretion, electrical activity).
- Fit dose-response data using four-parameter logistic curve to determine IC50/EC50 values.
- Interpretation: High-quality models show appropriate Z-factors (>0.5), reproducible dose-response relationships, and tissue-specific effects at clinically relevant concentrations [60].
Protocol 6: Assessment of Metabolic Competence
- Materials: CYP450 substrates (e.g., luciferin-IPA), reaction stop solution, luminometer.
- Procedure:
- Pre-incubate bioprinted hepatic tissues with CYP450 inducer (e.g., rifampicin for CYP3A4) for 48 hours.
- Wash tissues with PBS and add isoform-specific substrate in serum-free medium.
- Incubate for 2-4 hours at 37°C.
- Collect supernatant and mix with luciferin detection reagent.
- Measure luminescence according to manufacturer protocol.
- Normalize activity to total protein content or cell number.
- Interpretation: CYP450 activities should approach physiological levels (e.g., CYP3A4 >50 pmol/min/mg protein) and respond appropriately to inducers and inhibitors, demonstrating metabolic competence for drug evaluation [60].
Visualization of Validation Workflows
The following diagrams illustrate key experimental workflows and relationships in the validation of bioprinted mini-tissues and microtissues.
Structural and Functional Validation Pipeline
Visual Workflow for Tissue Validation
Drug Testing Protocol
Drug Testing Protocol Workflow
Research Reagent Solutions
Essential materials and reagents for validating bioprinted mini-tissues and microtissues are cataloged in Table 4.
Table 4: Essential Research Reagents for Tissue Validation
| Reagent Category | Specific Product | Function/Application |
|---|---|---|
| Bioink Components | Gelatin Methacryloyl (GelMA) | Photocrosslinkable hydrogel providing cell-adhesive motifs |
| Poly(ethylene glycol) Diacrylate (PEGDA) | Synthetic hydrogel with tunable mechanical properties | |
| Hyaluronic Acid Methacrylate (HAMA) | Glycosaminoglycan-based bioink mimicking native ECM | |
| Viability Assays | Calcein AM/Ethidium Homodimer | Live/dead staining for viability assessment |
| CellTiter-Glo 3D | Luminescent ATP detection for 3D viability | |
| Histology Reagents | Formalin, Paraffin | Tissue fixation and embedding for sectioning |
| Hematoxylin and Eosin | Nuclear and cytoplasmic staining | |
| Masson's Trichrome Kit | Collagen visualization in ECM | |
| Functional Assays | PrestoBlue/MTT | Metabolic activity indicators |
| TEER Measurement System | Epithelial/endothelial barrier integrity | |
| Multi-Electrode Array | Neural network activity recording | |
| Drug Testing Tools CYP450-Glo Assay System | Cytochrome P450 activity profiling | |
| Lactate Dehydrogenase (LDH) Kit | Cytotoxicity quantification |
Comprehensive validation of bioprinted mini-tissues and microtissues across structural, functional, and drug response parameters is essential for establishing their reliability in pharmaceutical research. The metrics and methodologies detailed in this guide provide a framework for rigorous quality assessment, enabling researchers to generate physiologically relevant data predictive of human responses. As bioprinting technologies advance, standardized validation protocols will be crucial for accelerating the adoption of these models in drug discovery and development pipelines, potentially reducing the high attrition rates in clinical trials [60]. Through implementation of these comprehensive validation strategies, researchers can confidently utilize bioprinted tissues to bridge the critical gap between traditional preclinical models and human clinical outcomes.
In the field of bioprinting research, mini-tissues and microtissues represent three-dimensional, physiologically relevant cellular models engineered to mimic key aspects of human tissue microarchitecture and function. Unlike simpler 2D cultures, these constructs recapitulate critical cell-cell interactions and cell-matrix interactions within a native-like tissue microenvironment, enabling more predictive assessment of drug efficacy and toxicity [62] [15]. The primary focus of the 3-D Tissue Bioprinting Program at the National Center for Advancing Translational Sciences (NCATS) is specifically on developing such "disease-relevant tissue models" to bridge the predictability gap between conventional 2D cell-based assays and human clinical outcomes [63].
The drive toward adopting these advanced models is underpinned by significant pressures in pharmaceutical development. Traditional testing methods, including 2D cell cultures and animal models, often fail to replicate dynamic human biological processes, leading to high attrition rates in clinical trials [62]. Bioprinted human microtissues address this bottleneck by providing a platform for early detection and more informative screening, thereby supporting the development of safer and more effective therapeutics [62].
Regulatory Framework and Product Classification
Navigating the regulatory landscape is a critical step for the clinical translation of bioprinted mini-tissues. In the United States, the U.S. Food and Drug Administration (FDA) oversees 3D bioprinting through a multi-center structure [64].
- The Center for Devices and Radiological Health (CDRH) regulates medical devices.
- The Center for Biologics Evaluation and Research (CBER) handles biological applications.
- The Center for Drug Evaluation and Research (CDER) oversees drug-related aspects [64].
These products are often classified as Tissue Engineered Medical Products (TEMPs), a category of Advanced Therapy Medicinal Products (ATMPs) [65]. TEMPs are defined as biomaterial-cell products or cell-drug combinations that are injected, implanted, or topically applied in a therapeutic or diagnostic procedure [65]. The FDA classifies medical devices based on risk, which directly impacts the required regulatory pathway [64].
Table 1: FDA Medical Device Classification and Pathways
| Device Class | Risk Level | Regulatory Pathway | Key Requirements |
|---|---|---|---|
| Class I | Minimal Risk | Generally exempt from Premarket Notification [64] | General controls [64] |
| Class II | Moderate Risk | Premarket Notification via the 510(k) pathway [64] | Demonstration of substantial equivalence to a predicate device [64] |
| Class III | High Risk | Stringent Premarket Approval (PMA) [64] | Requires clinical trial evidence to support safety and effectiveness [64] |
In the European Union, different directives apply. 3D printers themselves are considered harmonized products and require adherence to the Machinery Directive 2006/42/EC for equipment safety and the Electromagnetic Compatibility Directive 2014/30/EC for electrical components [64]. Furthermore, ISO and ASTM International have established an Additive Manufacturing Standards Development Structure to provide global guidelines for process validation, material specifications, and quality control [64].
Technical and Quality Control Requirements
Successful regulatory acceptance hinges on demonstrating rigorous control over the entire biomanufacturing process, from raw materials to the final product.
Essential Infrastructure and Material Control
A 3D bioprinting facility requires a specialized infrastructure with distinct operational zones to ensure product quality and safety. These include material storage areas, patient sample governance systems, sterile buffer preparation zones, cell culture spaces, aseptic printing chambers, and construct maturation units [64]. The printing environment itself must maintain strict parameters, with printbed temperature control between 4-65°C and printheads capable of operating from 4-250°C [64]. The facility must also be equipped with HEPA-filtered airflow systems and UV-C sterilization capabilities operating at a wavelength of 275nm with a 20mW output [64].
Material selection is a cornerstone of product quality. Bioinks are typically composed of natural polymers (e.g., silk fibronin, chitosan, alginate) or synthetic polymers (e.g., poly l-lactic acid (PLLA), poly-caprolactone (PCL), poly glycolic acid (PGA)) [64]. These materials require stringent storage protocols, typically at 4-8°C, and must be protected from temperature fluctuations to maintain their biochemical and rheological properties [64].
Comprehensive Quality Control and Testing
A robust Quality Management System (QMS) is mandatory. Process validation must be conducted at multiple stages: pre-process optimization, in-process monitoring, and post-process assessment [64]. The integration of machine learning algorithms is increasingly used to enhance quality assessment and reduce inter-batch variability [64].
Table 2: Key Testing Protocols for Bioprinted Constructs
| Testing Category | Specific Assessments | Target Specifications |
|---|---|---|
| Mechanical Testing | Tensile strength, Compressive strength, Elasticity [64] | Ensures structural integrity and mimics native tissue mechanics [64] |
| Biological Assessment | Cell viability, Proliferation, Structure functionality [64] | Confirms biological performance and tissue formation [64] |
| Physicochemical Analysis | pH levels, Osmolality, Viscosity, Endotoxin testing [64] | pH must be maintained between 6.5 and 7.4 to prevent cell damage; products must be free of viable contaminative microorganisms [64] |
Non-destructive testing techniques are under active development to characterize individual products without compromising their integrity, which is particularly important for patient-specific implants [64].
Experimental Protocols for Validation
Validating bioprinted mini-tissues for regulatory submissions requires a methodical approach to demonstrate reliability and predictive value. The following protocol outlines a standardized workflow for creating and validating a bioprinted liver microtissue for drug toxicity screening, incorporating recent technological advancements.
Workflow for a Bioprinted Liver Microtissue
The experimental workflow for creating and validating a bioprinted liver microtissue for drug toxicity screening can be visualized as follows:
Detailed Methodological Steps
Step 1: Bioink Formulation and Cell Sourcing
- Primary Human Hepatocytes are the gold standard for liver toxicity models. Patient-derived induced Pluripotent Stem Cells (iPSCs) can be differentiated into hepatocyte-like cells for personalized medicine applications [62].
- Prepare a bioink combining liver-derived decellularized extracellular matrix (dECM) to provide a tissue-specific niche [15] and a synthetic polymer like polyethylene glycol (PEG) for structural reinforcement.
- Mix cells with the bioink at a high cell density (e.g., 5-10 million cells/mL) to promote robust cell-cell interactions [62].
Step 2: 3D Bioprinting Process
- Utilize microextrusion bioprinting, the dominant technology with a 68% market share, for its versatility in printing tissue-like structures [11].
- Employ a core-shell printing strategy to create perfusable microchannels within the construct. This involves co-printing a cell-laden bioink (shell) alongside a sacrificial bioink (e.g., Pluronic F-127) that forms the channel (core), which is later removed to simulate vascularization [62].
Step 3: Construct Maturation
- Transfer the bioprinted structure to a perfusion bioreactor. The dynamic flow of culture media provides nutrient supply, waste removal, and application of physiological shear stresses, which are critical for enhancing tissue maturity and function over 14-21 days [62].
Step 4: Quality Control and Pre-validation
- Confirm cell viability post-printing and after maturation using a live/dead assay (e.g., Calcein-AM/Propidium Iodide). Target viability should be >90% after maturation.
- Validate the phenotype and functionality of the hepatocytes by measuring the secretion of key proteins like Albumin and the activity of cytochrome P450 (CYP) enzymes, such as CYP3A4, using standardized kits [62].
Step 5: Drug Treatment and Functional Assessment
- Expose the matured liver microtissues to a range of drug candidate concentrations for 72 hours.
- Analyze functional endpoints:
- Acute Toxicity: Measure the release of lactate dehydrogenase (LDH) into the culture medium.
- Metabolic Competence: Quantify the depletion of the drug from the medium using Liquid Chromatography-Mass Spectrometry (LC-MS).
- Mechanistic Toxicity: Assess ATP content and Caspase 3/7 activity as markers for cytotoxic and apoptotic responses, respectively [62].
Step 6: Data Correlation and Reporting
- Correlate the in vitro results (e.g., IC50 values for cytotoxicity) with known in vivo human toxicity data to validate the predictive power of the model.
- Compile all data, including detailed records of process parameters, material certificates, and QC results, into a comprehensive report for regulatory submission [64].
The Scientist's Toolkit: Essential Research Reagent Solutions
Table 3: Key Reagents and Materials for Bioprinting Microtissues
| Item | Function/Description | Example Application |
|---|---|---|
| Natural Polymer Bioinks | Provide biological cues and support cell adhesion [64]. | Alginate, gelatin, chitosan, hyaluronic acid for creating the base hydrogel [64] [15]. |
| Synthetic Polymer Bioinks | Offer tunable mechanical properties and printability [64]. | Poly-caprolactone (PCL) for structural support; PEG for modular bioink design [64]. |
| dECM Bioinks | Offer a tissue-specific microenvironment for enhanced cell differentiation and function [15]. | Liver-derived dECM for creating highly functional hepatocyte models [15]. |
| Cell Viability Stains | Assess the health and survival of cells within the bioprinted construct [64]. | Calcein-AM (live cells) and Propidium Iodide (dead cells) for post-printing QC. |
| Perfusion Bioreactor | Provides dynamic culture conditions to enhance tissue maturity and function [62]. | Essential for long-term culture and vascularization of thick tissue constructs. |
Risk Management and Path to Market
A proactive risk management strategy is essential for successful regulatory review and market entry.
Risk Management Strategies
Risk management should follow a systematic process involving risk analysis, evaluation, control implementation, residual risk assessment, and production monitoring [64]. Key areas of focus include:
- Material Contamination Prevention: Implement strict aseptic techniques and material handling protocols. Bacterial populations can recover hours after disinfection, requiring robust and repeated cleaning protocols in the printing environment [64].
- Process Control: Utilize process mapping to identify relationships between printing variables (e.g., pressure, speed, temperature) and printing outcomes to achieve better resolution and accuracy [64].
- Error Detection and Correction: Deploy advanced monitoring systems. For instance, neural networks trained on millions of images can detect and correct diverse printing errors in real-time across different geometries and materials, enabling rapid correction without human intervention [64].
Market Entry Planning
Entering the market requires careful financial and strategic planning. The initial investment for 3D bioprinting operations is substantial, with low-cost bioprinters ranging from USD 13,000 to USD 300,000 and annual operational costs of approximately USD 150,000 [64]. Bioinks represent a significant recurring cost, ranging from USD 3.85 to USD 100 per gram [64].
A major financial challenge is insurance reimbursement. Currently, most insurance carriers, including Medicare and Medicaid, do not cover 3D bioprinting procedures. Changing this will require concerted efforts by professional medical societies to collect data demonstrating improved patient outcomes [64]. The global 3D bioprinting market is projected to grow from USD 2.0 billion in 2022 to USD 23.1 billion by 2035, demonstrating significant commercial potential for those who can successfully navigate the regulatory pathway [11].
Gaining regulatory acceptance for bioprinted mini-tissues with the FDA and EMA is a multifaceted process that demands scientific rigor, robust quality systems, and strategic planning. As the technology evolves toward more complex models, including 4D bioprinting where structures change shape over time in response to stimuli, the regulatory framework will similarly need to adapt [66]. By adhering to current guidelines, engaging early with regulatory bodies, and building comprehensive validation data packages, researchers and drug developers can successfully translate these promising technologies from the laboratory to the clinic, ultimately enabling more predictive drug development and personalized medicine.
The field of bioprinting has undergone a paradigm shift from traditional scaffold-based approaches toward the innovative use of mini-tissues and microtissues as fundamental building blocks for engineering biological constructs. These microtissues represent the smallest structural and functional units capable of self-organizing into complex macrotissues, offering accelerated maturation, high cellular density, and improved cell-cell interactions compared to conventional methods [1]. Within the context of drug discovery and development, the economic imperative for adopting these advanced bioprinted models stems from the staggering costs associated with traditional drug development, where approximately 90% of medications that pass animal trials subsequently fail in human clinical phases [17]. This review provides a comprehensive cost-benefit analysis of integrating bioprinted mini-tissue platforms, detailing technical protocols, economic impacts, and future directions for researchers and drug development professionals.
Table 1: Strategic Approaches to Bioprinting with Mini-Tissues
| Strategy | Description | Advantages | Disadvantages |
|---|---|---|---|
| Biomimicry | Attempts to duplicate environment and growth cues for a target tissue; relies heavily on bioreactors [1]. | Control at each step of tissue development; High degree of precision in cellular positioning [1]. | Complex given all factors that must be reproduced; Slow and often inefficient [1]. |
| Autonomous Self-Assembly | Replicates embryonic environment allowing for autoregulation and self-production of raw elements [1]. | Fast and efficient; Scalable for automation; High cellular density [1]. | Difficult to change outcome during self-assembly process [1]. |
| Microtissue-Based Approach | Forms smallest possible structural and functional units that can later be combined to form mature tissue [1]. | Fast and efficient; Scalable for automation; Potential to solve limitations in engineering vascular tissue [1]. | Microtissues are difficult to create [1]. |
Technical Foundation of Mini-Tissues and Microtissues
Definition and Physiological Basis
Mini-tissues and microtissues are engineered, spatially organized, cell-laden constructs that serve as fundamental building blocks for bottom-up tissue engineering. These micro-constructs typically range from 100-500 micrometers in diameter and are designed to mimic the repetitive functional units found in native organs, such as liver lobules, osteons in bone, or muscle fibers [67]. The physiological relevance of these constructs lies in their ability to recapitulate the microarchitecture and cell-cell interactions critical for organ function, which cannot be achieved through conventional two-dimensional culture systems [67].
The strategic advantage of utilizing microtissues in bioprinting research stems from their capacity for self-organization and functional maturation. When properly engineered, these building blocks can spontaneously assemble into complex structures through cell-mediated processes that mimic embryonic development [1]. This bottom-up approach stands in contrast to traditional top-down strategies where cells are seeded onto prefabricated scaffolds, often resulting in uneven cell distribution and limited physiological relevance [67].
Manufacturing Methodologies for Building Blocks
Multiple techniques have been developed for fabricating mini-tissues and microtissues, each offering distinct advantages for specific applications:
3D Culture and Organoids: Utilizing human adult stem cells or pluripotent stem cells growing in extracellular matrices to form miniature systems that resemble living tissue in both function and structure. These systems respond to environmental cues including substrate stiffness, surface patterning, and growth factors [67]. While offering high biological fidelity, organoids face challenges in limited productivity and poor mechanical properties that complicate assembly processes [67].
Emulsification: An accessible method involving the stirring of aqueous phase liquid (e.g., gelatin, collagen, chitosan) with an organic phase (e.g., paraffin oil) to create cell-laden droplets. These droplets are subsequently crosslinked in calcium/magnesium ion solutions (for alginate) or via ultraviolet light (for photocurable hydrogels) [67]. This technique is moderately easy but limited to producing spherical microgels with uncontrolled size distributions [67].
Microfluidics: This technique enables precise manipulation of fluid flows in channels smaller than 1 mm to generate uniformly sized particles. The size of resulting microtissues can be controlled by adjusting injection angles, channel geometry, fluid viscosity, and flow velocity [67]. Photocurable hydrogels like PEG diacrylate (PEGDA) and gelatin methacryloyl (GelMA) are particularly suitable for microfluidics due to their rapid crosslinking properties [67].
Bioprinting: Extrusion-based, inkjet, and light-based bioprinting technologies offer the highest degree of control over microtissue size, shape, and composition. These automated approaches enable precise deposition of cell-laden bioinks to create spatially organized constructs with complex architecture [67]. The versatility of bioprinting makes it particularly valuable for creating vascularized units essential for engineering larger tissues [67].
Economic Analysis of Bioprinted Models
Cost Structure of Bioprinting Technology
The implementation of bioprinted mini-tissue models requires significant capital investment and ongoing operational expenses. Commercially available bioprinters range from approximately $5,000 for basic models to over $200,000 for advanced systems with multiple extrusion nozzles and advanced capabilities [68]. This substantial variation in equipment costs reflects the diverse technological approaches available, including micro-extrusion, inkjet, laser-assisted, and stereolithography-based systems, each with distinct resolution and cell viability profiles [68].
Beyond equipment acquisition, consumable costs represent an ongoing financial consideration. Bioinks can range from $100 to $500 per milliliter, with specific costs dependent on their composition, cellular content, and proprietary factors [17]. Specialized bioinks containing living cells, hydrogels, extracellular matrices, and growth factors constitute essential recurring expenses that must be factored into economic models [17]. Additionally, operational costs include maintenance contracts, technician training, and facility requirements that collectively contribute to the total cost of ownership.
Table 2: Cost Analysis of Bioprinting Technologies and Materials
| Category | Specific Item | Cost Range | Notes |
|---|---|---|---|
| Bioprinting Equipment | Low-cost systems (e.g., open-source prototypes) | ~$260 or less [68] | Built from recycled materials and off-the-shelf electronics [68] |
| Basic commercial bioprinters (e.g., Biobot Basic) | ~$5,000 [68] | Single injection nozzle systems [68] | |
| Mid-range systems (e.g., CELLINK Inkredible) | $5,420–$9,591 [68] | Syringe-based extrusion [68] | |
| High-end systems (e.g., Advanced Solutions' BioAssemblyBot) | ~$160,000 [68] | Six-axes syringe based extrusion [68] | |
| Premium systems (e.g., RegenHU's 3D Discovery + Biofactory) | ~$200,000 [68] | Multi-technology platforms [68] | |
| Consumables | Bioinks | $100–$500 per milliliter [17] | Price varies based on composition and cellular content [17] |
| Biomaterials (historical context) | $3.85–$100,000 per gram [68] | Wide range depending on material type and purity [68] |
Comparative Cost-Benefit Analysis
When evaluated against traditional drug development approaches, bioprinted mini-tissue models demonstrate compelling economic advantages despite substantial upfront investments:
Reduced Preclinical Costs: Bioprinted organ and tissue models can reduce the cost of preclinical trials by up to 50% by potentially eliminating the need for animal testing, which fails for approximately 90% of medicines that appear effective in animal models [17]. The implementation of 3D-bioprinted tissues for high-throughput screening enables more physiologically relevant toxicity and efficacy assessment earlier in the development pipeline, potentially identifying failure candidates before substantial resources are invested.
Enhanced Predictive Capacity: The improved physiological relevance of bioprinted mini-tissues containing multiple cell types in spatially appropriate organizations provides superior predictive capability for human responses. This enhanced predictability potentially reduces costly late-stage clinical failures, which represent the most significant financial burden in pharmaceutical development [69]. The integration of patient-specific cells further enables personalized medicine approaches, potentially improving clinical success rates for targeted therapies.
Market Growth and Adoption Trends: The significant market expansion of 3D bioprinting, projected to grow from $1.3 billion in 2024 to $2.8 billion by 2030 at a compound annual growth rate of 13.6%, reflects increasing recognition of the technology's value proposition across pharmaceutical and biotechnology sectors [17]. North America currently dominates the market with approximately 40% share, driven by advanced healthcare infrastructure, significant R&D investments, and established industry players [17] [70].
Experimental Protocols for Mini-Tissue Evaluation
Protocol 1: Microtissue Fabrication via Microfluidics
Objective: To generate uniform, cell-laden microtissues for high-throughput drug screening applications using microfluidic technology.
Materials:
- Microfluidic device with flow-focusing geometry
- Aqueous phase: Cell-laden hydrogel (e.g., 3-5% GelMA, 1-2% alginate)
- Organic phase: Sterile paraffin oil with 2-5% surfactant (e.g., Span 80)
- Crosslinking solution: 100mM CaCl₂ for alginate or UV light source (365 nm, 5-10 mW/cm²) for GelMA
- Cell suspension: Hepatocytes, fibroblasts, or iPSCs at 5-20 million cells/mL
Procedure:
- Prime microfluidic channels with organic phase to establish stable flow conditions.
- Prepare cell-laden hydrogel solution maintaining temperature control to prevent premature gelation.
- Infuse aqueous and organic phases at precisely controlled flow rates (typically 0.5-5 mL/hr) to form monodisperse droplets.
- Collect droplets in crosslinking solution reservoir for ionic crosslinking or expose to UV light for photopolymerization.
- Transfer crosslinked microtissues to culture media, washing to remove residual oil and crosslinking agents.
- Culture in bioreactor systems with appropriate physiological stimulation for 7-21 days to promote functional maturation.
Quality Control Parameters:
- Microtissue diameter consistency (coefficient of variation <5%)
- Cell viability assessment via live/dead staining (>85% viability)
- Functional characterization (e.g., albumin secretion for hepatic models, contractility for cardiac tissues)
Protocol 2: Drug Response Assessment in Bioprinted Mini-Tissues
Objective: To evaluate compound efficacy and toxicity using bioprinted mini-tissue models.
Materials:
- Mature bioprinted mini-tissues (hepatic, cardiac, or tumor models)
- Test compounds at clinically relevant concentrations
- Multiplexed assay reagents (ATP quantification, caspase activity, functional biomarkers)
- Histological supplies (fixation, embedding, sectioning)
- Advanced imaging systems (confocal microscopy, high-content screening platforms)
Procedure:
- Transfer mini-tissues to 96- or 384-well screening platforms using compatible liquid handling systems.
- Treat with test compounds across appropriate concentration ranges (typically 0.1 nM-100 µM) including vehicle controls.
- Incubate for predetermined exposure periods (24-168 hours) based on therapeutic application.
- Assess viability endpoints using ATP-based luminescence or resazurin reduction assays.
- Quantify functional biomarkers specific to tissue model (e.g., urea production for liver models, beat frequency for cardiac tissues).
- Fix subsets of tissues for histopathological evaluation (H&E staining, immunohistochemistry).
- Analyze using high-content imaging systems to assess morphological changes and specific biomarker expression.
Analytical Methods:
- Dose-response modeling (EC50/IC50 calculation)
- Statistical comparison to positive and negative controls
- Benchmarking against established preclinical models and clinical outcomes
Figure 1: Experimental workflow for drug response assessment in bioprinted mini-tissues
The Scientist's Toolkit: Essential Research Reagents
Successful implementation of bioprinted mini-tissue models requires specialized materials and reagents optimized for maintaining cell viability and functionality throughout the fabrication and assessment processes.
Table 3: Essential Research Reagents for Mini-Tissue Bioprinting
| Reagent Category | Specific Examples | Function | Technical Considerations |
|---|---|---|---|
| Bioinks | Natural polymers (alginate, collagen, gelatin, fibrin) [71] | Provide structural support and biochemical cues; enhance cell viability and function [71]. | Viscosity optimization for printability; tunable mechanical properties; degradation kinetics matching tissue formation [71]. |
| Hybrid bioinks (GelMA, collagen-methacrylate) [17] | Combine natural polymers with synthetic modifications for improved mechanical properties and photocrosslinking capability [17]. | UV exposure duration must be balanced between crosslinking efficiency and cell damage; photoinitiator concentration critical for cytocompatibility [67]. | |
| Synthetic polymers (PEGDA, Pluronics) [17] | Offer precise control over mechanical properties and degradation rates; highly reproducible [17]. | Often require functionalization with adhesion peptides (RGD) to support cell attachment; may lack native biological cues [67]. | |
| Living Cells | Primary cells (hepatocytes, keratinocytes, fibroblasts) [71] | Provide physiologically relevant functions for specific tissue models [71]. | Limited expansion capacity; donor-to-donor variability; maintenance of phenotype in culture [71]. |
| Stem cells (iPSCs, MSCs) [17] [67] | Offer self-renewal capacity and differentiation potential; enable patient-specific models [17] [67]. | Require precise differentiation protocols; potential for uncontrolled proliferation; batch-to-batch variability in differentiation efficiency [67]. | |
| Cell lines (Caco-2, HepG2, HUVECs) [69] | Provide unlimited expansion capacity; highly reproducible [69]. | May exhibit altered phenotypes compared to primary cells; careful characterization required for specific applications [69]. | |
| Support Materials | Extracellular matrix components (collagen, fibronectin, laminin) [71] | Enhance cell attachment, proliferation, and organization; critical for basement membrane formation [71]. | Concentration-dependent effects on mechanical properties; batch variability in natural isolates; potential immunogenicity [71]. |
| Growth factors and cytokines (VEGF, TGF-β, FGF) [71] | Direct cell differentiation and tissue maturation; support vascularization [71]. | Short half-lives require stabilization strategies; concentration gradients critical for patterning; cost considerations for large-scale use [71]. | |
| Crosslinking agents (CaCl₂ for alginate, UV for photopolymers) [67] | Stabilize printed structures; provide mechanical integrity during tissue maturation [67]. | Cytocompatibility concerns; residual crosslinker removal required; diffusion limitations in larger constructs [67]. |
Implementation Framework and Future Perspectives
Strategic Integration Pathway
The successful implementation of bioprinted mini-tissue models requires a phased approach that aligns with organizational capabilities and research objectives:
Phase 1: Technology Evaluation and Pilot Studies - Begin with accessible bioprinting technologies such as open-source systems or service bureau partnerships to validate specific applications. Focus on establishing robust protocols for mini-tissue fabrication and functional assessment using well-characterized cell sources. Initial investments typically range from $50,000-$100,000 including equipment, training, and initial consumables [68] [72].
Phase 2: Targeted Application Development - Implement bioprinted models for specific screening applications where conventional models show poor clinical correlation, such as hepatotoxicity, cardiotoxicity, or complex disease modeling. Develop standardized operating procedures and validation frameworks to ensure data quality and reproducibility. At this stage, organizations typically invest in dedicated personnel and more advanced bioprinting capabilities [69].
Phase 3: Integrated Discovery Platforms - Fully incorporate bioprinted mini-tissue models throughout the drug discovery pipeline, from target validation to lead optimization. Implement high-throughput screening approaches using miniaturized formats and advanced analytical methods. Organizations at this stage often develop proprietary bioink formulations and custom instrumentation tailored to specific research needs [69].
Emerging Trends and Future Outlook
The field of bioprinting continues to evolve rapidly, with several emerging trends likely to enhance the economic value proposition of mini-tissue models:
Stem Cell and Organoid Integration: The incorporation of induced pluripotent stem cells (iPSCs) and organoids into bioprinting workflows is transforming biomedical research, with approximately 70% of global research projects utilizing stem cells to produce functional tissues [17]. These approaches enable patient-specific disease modeling and personalized therapeutic screening, potentially increasing clinical success rates while reducing development costs [67].
Advanced Manufacturing Platforms: The development of manufacturing-as-a-service models for bioprinting offers potential pathways to reduce capital barriers for smaller organizations [73]. These cloud-based platforms connect researchers with local manufacturing facilities, potentially democratizing access to advanced tissue models while optimizing equipment utilization rates [73].
Multi-Material and Multi-Cell Printing: Advances in bioprinting resolution and multi-material capabilities are enabling the creation of increasingly complex tissue models with vascular networks and multiple cell types in spatially defined arrangements [74]. These enhancements improve physiological relevance and predictive capacity, potentially further reducing clinical attrition rates [74] [67].
Figure 2: Evolution of bioprinting capabilities for mini-tissue engineering
The economic argument for integrating bioprinted models based on mini-tissues and microtissues presents a compelling case despite substantial initial investment requirements. The enhanced physiological relevance of these advanced in vitro systems addresses fundamental limitations of conventional preclinical models, potentially reducing costly late-stage clinical failures that represent the primary financial burden in pharmaceutical development. As bioprinting technologies continue to mature and costs decrease through open-source initiatives and service-based models, these platforms are positioned to become standard tools in the drug development pipeline. The strategic implementation of bioprinted mini-tissue models offers researchers and drug development professionals an opportunity to enhance predictive accuracy while potentially reducing development costs and timelines, ultimately contributing to more efficient therapeutic development and improved clinical success rates.
Conclusion
Bioprinted mini-tissues and microtissues represent a paradigm shift in biomedical research, offering human-relevant platforms that significantly enhance the predictability of drug efficacy and toxicity. By faithfully replicating the 3D architecture and cellular complexity of native tissues, these models are poised to reduce the high failure rates and exorbitant costs associated with clinical trials. Future advancements hinge on overcoming challenges in long-term vascularization, functional maturation, and full automation. The integration of emerging technologies like AI for process optimization, 4D bioprinting for dynamic structures, and the use of patient-derived cells for personalized medicine will further solidify the role of these constructs as indispensable tools. Their continued development and validation are critical for accelerating the discovery of safer, more effective therapeutics and advancing the frontiers of regenerative medicine.
References
- 1. 3-D bioprinting technologies in tissue engineering and ... [https://pmc.ncbi.nlm.nih.gov/articles/PMC6003668/]
- 2. Miniature Models Made to Aid Drug Development [https://nihrecord.nih.gov/2022/10/14/miniature-models-made-aid-drug-development]
- 3. 3D Bioprinting- Definition, Principle, Process, Types, ... [https://microbenotes.com/3d-bioprinting/]
- 4. 3D bioprinting [https://en.wikipedia.org/wiki/3D_bioprinting]
- 5. High-throughput scaffold-free microtissues through 3D ... [https://pmc.ncbi.nlm.nih.gov/articles/PMC6197341/]
- 6. Bioprinting 101: Glossary [https://nextbiginnovationlabs.com/bioprinting-101-glossary/]
- 7. New 3D bioprinting technique may improve production of ... [https://news.mit.edu/2025/new-3d-bioprinting-technique-may-improve-production-engineered-tissue-0917]
- 8. Tissue Bioprinting: Promise and Challenges - PMC [https://pmc.ncbi.nlm.nih.gov/articles/PMC10740401/]
- 9. A Review of Bioprinting Techniques, Scaffolds, and Bioinks [https://pmc.ncbi.nlm.nih.gov/articles/PMC11447703/]
- 10. Cellular Interaction of Human Skin Cells towards Natural ... [https://www.mdpi.com/1422-0067/23/1/476]
- 11. 3D Bioprintin Market | Growth Projections and Trends (2025 ... [https://www.pharmiweb.com/press-release/2025-02-13/3d-bioprintin-market-growth-projections-and-trends-2025-2035]
- 12. 3D Bioprinting Statistics and Facts (2025) [https://media.market.us/3d-bioprinting-statistics/]
- 13. Beyond Animals: Revolutionizing Drug Discovery with Human ... [https://wyss.harvard.edu/news/beyond-animals-revolutionizing-drug-discovery-with-human-relevant-models/]
- 14. FDA Announces Plan to Phase Out Animal Testing ... [https://www.fda.gov/news-events/press-announcements/fda-announces-plan-phase-out-animal-testing-requirement-monoclonal-antibodies-and-other-drugs]
- 15. Current Standing and Future Potential of 3D Bioprinting ... [https://scifiniti.com/3105-0387/2/2025.0015]
- 16. advances in imaging and analysis for 3D-bioprinted tissues [https://pmc.ncbi.nlm.nih.gov/articles/PMC12187805/]
- 17. Global 3D Bioprinting Market Research Report [https://www.marknteladvisors.com/research-library/3d-bioprinting-market.html]
- 18. Bioprinting revolution: Innovative design of 3D bioactive ... [https://pmc.ncbi.nlm.nih.gov/articles/PMC12617564/]
- 19. Researchers make breakthrough in bioprinting functional ... [https://www.sciencedaily.com/releases/2025/01/250122130024.htm]
- 20. An Overview of Extracellular Matrix-Based Bioinks for 3D ... [https://pmc.ncbi.nlm.nih.gov/articles/PMC9130719/]
- 21. What is Microtissue ? Uses, How It Works & Top Companies ( 2025 ) [https://www.linkedin.com/pulse/what-microtissue-uses-how-works-top-companies-2025-marketing-mavenn-jx0sf]
- 22. 3D- Bioprinting for Precision Microtissue Engineering: Advances... [https://pubmed.ncbi.nlm.nih.gov/39648541/]
- 23. 3D Bioprinting : Definition , History, How it Works, and Types | Xometry [https://www.xometry.com/resources/3d-printing/3d-printing-in-bioprinting/]
- 24. Advances in In Situ Bioprinting: A Focus on Extrusion and ... [https://link.springer.com/article/10.1007/s40883-025-00420-1]
- 25. Advancements in high-resolution 3D bioprinting [https://www.sciencedirect.com/science/article/pii/S2405886624000484]
- 26. Advances in Microfluidic Bioprinting for Multi-Material ... [https://scifiniti.com/3105-3866/1/2025.0002]
- 27. Extrusion bioprinting: meeting the promise of human tissue ... [https://pmc.ncbi.nlm.nih.gov/articles/PMC11894458/]
- 28. Inkjet-based 3D Bioprinting 2025-2033 Trends [https://www.archivemarketresearch.com/reports/inkjet-based-3d-bioprinting-329173]
- 29. research and application progress of sacrificial inks [https://pmc.ncbi.nlm.nih.gov/articles/PMC12237911/]
- 30. Three-Dimensional Printing and Bioprinting Strategies for ... [https://www.mdpi.com/2073-4360/17/17/2337]
- 31. Microspheres for 3D bioprinting: a review of fabrication ... [https://pmc.ncbi.nlm.nih.gov/articles/PMC12146379/]
- 32. Uniform biodegradable microparticle systems for controlled ... [https://pmc.ncbi.nlm.nih.gov/articles/PMC4140625/]
- 33. High drug-loaded microspheres enabled by controlled in ... [https://www.nature.com/articles/s41467-022-28787-7]
- 34. Johns Hopkins scientists grow a mini human brain that ... [https://www.sciencedaily.com/releases/2025/08/250803233113.htm]
- 35. Microdissection tools to generate organoids for modeling ... [https://www.nature.com/articles/s41378-024-00756-8]
- 36. Brain tissues, assemble! Inside the push to build better ... [https://www.nature.com/articles/d41586-025-01468-3]
- 37. Physiological liver microtissue 384-well microplate system ... [https://pubmed.ncbi.nlm.nih.gov/39397666]
- 38. Bioengineering of novel organotypic 3D human liver tissue ... [https://www.frontiersin.org/journals/toxicology/articles/10.3389/ftox.2025.1574387/full]
- 39. 3D bioprinting for high-throughput screening: Drug ... [https://pmc.ncbi.nlm.nih.gov/articles/PMC7968875/]
- 40. High-throughput bioprinting of spheroids for scalable tissue ... [https://www.nature.com/articles/s41467-024-54504-7]
- 41. 3D bioprinting for drug development and screening [https://www.sciencedirect.com/science/article/pii/S2773207X24001817]
- 42. From Medical Imaging to Bioprinted Tissues [https://pmc.ncbi.nlm.nih.gov/articles/PMC12558632/]
- 43. advances in imaging and analysis for 3D-bioprinted tissues [https://www.frontiersin.org/journals/bioengineering-and-biotechnology/articles/10.3389/fbioe.2025.1600077/full]
- 44. Past, present, and future of 3D bioprinting theory [https://www.sciencedirect.com/science/article/abs/pii/S2405886618300204]
- 45. Bioprinting in Vascularization Strategies - PMC [https://pmc.ncbi.nlm.nih.gov/articles/PMC6305822/]
- 46. Quantitative Label-Free Imaging of 3D Vascular Networks ... [https://pmc.ncbi.nlm.nih.gov/articles/PMC6601624/]
- 47. 3D bioprinting for the production of a perfusable ... [https://www.frontiersin.org/journals/bioengineering-and-biotechnology/articles/10.3389/fbioe.2025.1484738/full]
- 48. New 3D bioprinting technique may improve production ... [https://meche.mit.edu/news-media/new-3d-bioprinting-technique-may-improve-production-engineered-tissue]
- 49. 3D bioprinting and its innovative approach for biomedical ... [https://pmc.ncbi.nlm.nih.gov/articles/PMC9790048/]
- 50. Modular and AI-driven in situ monitoring platform for real- ... [https://www.sciencedirect.com/science/article/abs/pii/S2666998625002406]
- 51. Collagen as a bio-ink for 3D printing: a critical review [https://pubs.rsc.org/en/content/articlehtml/2025/tb/d4tb01060d]
- 52. Bioprintability: Physiomechanical and Biological ... [https://pmc.ncbi.nlm.nih.gov/articles/PMC7599870/]
- 53. Hydrogels for 3D bioprinting in tissue engineering and ... [https://pmc.ncbi.nlm.nih.gov/articles/PMC10339415/]
- 54. Collagen Bioinks for Bioprinting: A Systematic Review of ... [https://pmc.ncbi.nlm.nih.gov/articles/PMC8468019/]
- 55. Alginate-based 3D bioprinting strategies for structure–function ... [https://pubs.rsc.org/en/content/articlehtml/2025/tb/d5tb01489a?page=search]
- 56. Polysaccharides as functional biomaterials in 3D bioprinting [https://www.sciencedirect.com/science/article/pii/S2949822825007737]
- 57. Halfway between 2D and Animal Models: Are 3D Cultures ... [https://pmc.ncbi.nlm.nih.gov/articles/PMC5796130/]
- 58. Bioprinting of Human Microtissue for Drug Testing [https://www.bccresearch.com/industry-trends/bioprinting-of-human-microtissue-for-drug-testing-industry?srsltid=AfmBOoruWA9URfPytTDTVoPt2Wbf5BvO6PKNUNNl3I5FAYj1drci38eA]
- 59. Toward better drug development: Three-dimensional ... [https://pmc.ncbi.nlm.nih.gov/articles/PMC10090537/]
- 60. 3D bioprinting for the construction of drug testing models- ... [https://www.frontiersin.org/journals/bioengineering-and-biotechnology/articles/10.3389/fbioe.2025.1457872/full]
- 61. 3D bioprinting of human neural tissues with functional ... [https://www.sciencedirect.com/science/article/pii/S1934590923004393]
- 62. Bioprinting of Human Microtissue for Drug Testing [https://www.bccresearch.com/industry-trends/bioprinting-of-human-microtissue-for-drug-testing-industry?srsltid=AfmBOooSJT6XJ5OEO4tyN39gdDe-xlLY2KWu42Czo0gQX8mJz4dXT-ce]
- 63. 3-D Tissue Bioprinting Program Goals [http://ncats.nih.gov/research/research-activities/bioprinting/program-goals]
- 64. 3D Bioprinting in 2025: What Medical Device Makers Need to ... [https://diasurgemed.com/ng/3d-bioprinting-in-2025-what-medical-device-makers-need-to-know-now/]
- 65. Current standards and ethical landscape of engineered ... [https://pmc.ncbi.nlm.nih.gov/articles/PMC8330463/]
- 66. 4D Bioprinting: Materials, Mechanisms, and Mathematical ... [https://www.sciencedirect.com/science/article/abs/pii/S2405886625000442]
- 67. Utilizing bioprinting to engineer spatially organized tissues ... [https://stemcellres.biomedcentral.com/articles/10.1186/s13287-024-03712-5]
- 68. Development and implementation of a significantly low- ... [https://pmc.ncbi.nlm.nih.gov/articles/PMC10119389/]
- 69. Recent applications of three-dimensional bioprinting in ... [https://www.sciencedirect.com/science/article/pii/S0169409X24002783]
- 70. 3D Bioprinting Market Analysis, Size, and Forecast 2025- ... [https://www.technavio.com/report/3d-bioprinting-market-industry-analysis]
- 71. 3D bioprinting for skin tissue engineering: Current status ... [https://pmc.ncbi.nlm.nih.gov/articles/PMC8283073/]
- 72. A Cost/Benefit and Flexibility Evaluation Framework for ... [https://www.mdpi.com/2227-9717/11/7/1968]
- 73. A Cost-Benefit Analysis of Additive Manufacturing as ... [https://arxiv.org/abs/2502.05586]
- 74. Advancements in tissue and organ 3D bioprinting [https://www.sciencedirect.com/science/article/pii/S0264127524002260]